manual calculo para doblar tubos

Manual Calculo Para Doblado de Tubos

This manual provides essential concepts and practical applications for tube bending calculations․ It covers formulas for radius, length, and material properties, ensuring precise bends while maintaining structural integrity․ Tools, safety, and techniques are also detailed for optimal results․

Tube bending calculations are fundamental for achieving precise and durable bends in various applications, from plumbing to industrial manufacturing․ This section introduces the core principles and objectives of tube bending, emphasizing the importance of accuracy and safety․ Understanding the physics behind bending, such as stress distribution and material deformation, is crucial for successful outcomes․ Key concepts like bend radius, springback, and material properties are explored to provide a solid foundation for subsequent calculations․ Whether working with metal, PVC, or other materials, mastering these principles ensures reliable results․ The manual guides readers through the essential formulas and tools needed to perform calculations effectively, addressing both theoretical and practical aspects of tube bending․ By following these guidelines, professionals and DIY enthusiasts alike can achieve professional-grade bends with minimal effort and maximum precision․ This introduction sets the stage for a comprehensive exploration of tube bending techniques and calculations․

Essential Concepts and Formulas

Mastering the essential concepts and formulas is critical for accurate tube bending calculations․ The bend radius (R) and tube diameter (D) are fundamental, with the relationship R = D/2 commonly used for standard bends․ The arc length (L) is calculated using the formula L = πRθ/180, where θ is the bend angle in degrees․ Springback, the material’s elastic recovery after bending, is quantified by the springback factor (K), which varies by material type․ The neutral axis theory helps determine stress distribution, ensuring minimal deformation․ Formulas like the bend force (F = (σ × D³)/6R) and torque (T = F × R) are vital for machine setup․ Material properties such as yield strength (σ) and modulus of elasticity (E) influence bending behavior․ These formulas and concepts form the backbone of tube bending, enabling precise calculations for various materials and applications․ Proper application ensures safety, efficiency, and high-quality results in industrial and DIY projects alike․

Tools and Equipment Necessary for Tube Bending

Proper tools and equipment are essential for precise and safe tube bending․ A tube bender is the primary machine, available in manual, hydraulic, or CNC models, depending on the scale and complexity of the job․ Dies and mandrels are crucial for shaping the tube without causing deformation․ The mandrel supports the tube internally, while the die guides the bending process․ A measuring tape or caliper ensures accurate marking of bend locations․ For manual bending, a hand bender or lever-type bender is often used, especially for smaller tubes․ Springback wrenches help compensate for material elasticity, and marking tools, like a sharpie or marker, are used to indicate bend points․ Additional accessories, such as guide rolls and alignment tools, enhance precision․ Safety gear, including gloves and safety glasses, is indispensable to protect against sharp edges and machine operation hazards; Klein Tools and similar brands offer high-quality bending equipment tailored for various materials and tube sizes․ Proper tool selection and maintenance are key to achieving consistent, professional results in tube bending projects․

Understanding Tube Material Properties

Understanding the material properties of tubes is critical for successful bending․ Different materials have unique characteristics that influence how they behave during the bending process․ Stainless steel, copper, and aluminum tubes, for instance, exhibit varying degrees of flexibility and strength․ The yield strength and ultimate tensile strength of the material determine its resistance to deformation․ Hardness levels also play a role, with harder materials requiring more force to bend․ Ductility is another key factor, as it measures how much the tube can stretch without breaking․ For example, copper is highly ductile, making it ideal for tight bends, while steel may require specific techniques to avoid cracking․ The wall thickness and outer diameter of the tube also affect its bendability․ Understanding these properties ensures that the appropriate bending techniques and tools are selected․ Material-specific formulas, such as the Bend Radius Formula, help calculate the minimum radius and necessary forces․ Proper material selection and understanding are essential for achieving precise, durable bends without compromising the tube’s integrity․

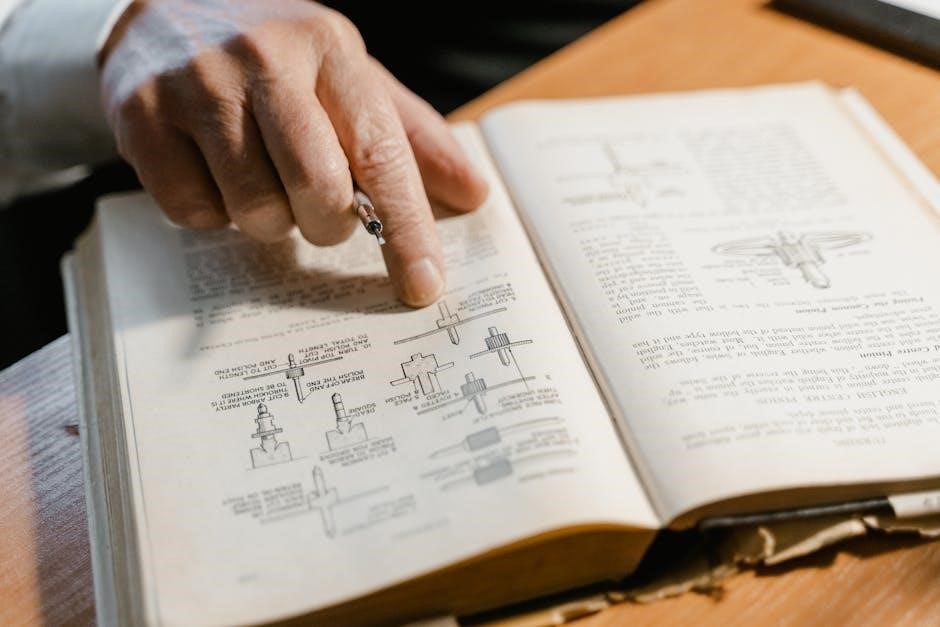
Measuring and Marking Techniques

Accurate measuring and marking are essential for achieving precise tube bends․ Start by measuring the tube’s outer diameter and wall thickness to determine its flexibility․ Use a caliper or micrometer for precise measurements․ Next, mark the bending point using a sharpie or specialized marking tool․ For complex bends, divide the tube into segments and mark each bend location carefully․ Alignment tools, such as laser markers, ensure the marks are straight and evenly spaced․ Measure twice to confirm accuracy before bending․ Common mistakes include incorrect alignment or miscalculating the bend offset․ To avoid errors, use a bending template or reference guide specific to your material․ Double-check all measurements against your calculations to ensure the bend radius and angle meet specifications․ Proper marking ensures the bend is executed correctly, maintaining the tube’s structural integrity and desired shape․

Calculating Bend Radius and Diameter

Calculating the bend radius and diameter is critical for successful tube bending․ The bend radius (R) is measured from the tube’s center to the bend’s inner edge․ Use the formula: R = (D/2) + T, where D is the outer diameter and T is the wall thickness․ For precise bends, ensure the radius meets the material’s minimum requirement to avoid kinking․ The bend diameter (D_bend) is calculated as D_bend = 2R + D․ This accounts for the tube’s expansion during bending․ For accurate results, consider the material’s deformation limits and the bending method (cold or hot)․ Use a bending chart or calculator to verify dimensions․ Common errors include using the wrong radius or neglecting material stretch․ Always cross-reference calculations with the tube’s specifications to ensure the bend is feasible and within safety limits․ Proper calculation prevents material damage and ensures the desired shape is achieved․

Determining the Length of Tubing Needed

To determine the length of tubing needed for bending, start by identifying the straight segments and the bent portions․ Use the formula: Total Length = Straight Length + (Number of Bends × Bend Length)․ The bend length is calculated using the bend radius and angle: Bend Length = π × Bend Radius × (Bend Angle / 180)․ For a 90-degree bend, this becomes (π × Bend Radius) / 2․ Multiply by the number of bends and add to the straight segments․ Consider the tube’s minimum bend radius to prevent damage; Add extra length for connections if necessary․ This method ensures accurate tubing length calculation, essential for successful bending projects․

Springback Calculation and Compensation

Springback in tube bending occurs when the tube returns to its original shape after bending, affecting accuracy․ To calculate springback, use the formula: Springback Factor (K) = ΔR / Δθ, where ΔR is the change in radius and Δθ is the change in angle․ The modulus of elasticity (E), outer diameter (D), bend radius (R), and wall thickness (t) are also crucial, with the formula S = (E * D) / (2 * R * t)․ To compensate, over-bend by the calculated springback amount․ For example, if K = 1․2, bend 1․2 times the desired angle․ Measure springback by bending a sample tube and observing its return․ Material properties like yield strength affect springback, with softer materials springing back more․ Accurate measurement or reference charts are essential for precise bends, especially in critical applications․ Proper compensation ensures the final bend meets specifications after springback․

Bend Angle and Offset Calculations

Bend angle and offset calculations are critical for achieving precise tube bends․ The bend angle is determined by the desired geometry of the tube, while the offset ensures proper alignment․ Use the formula: Bend Angle (θ) = 2 * arctan(L / (2 * R)), where L is the arc length and R is the bend radius․ For offsets, calculate the distance between the start and end of the bend using Offset (O) = 2 * R * sin(θ / 2)․ Ensure accuracy by measuring the tube’s outer diameter (D) and wall thickness (t) to account for material deformation․ For example, a 90-degree bend with a 2-inch radius requires an offset of O = 2 * 2 * sin(45°) = 2;828 inches․ Always double-check measurements and use a protractor or angle calculator for precision․ Proper calculation prevents errors and ensures the tube fits the required configuration․ Material properties, such as flexibility, also influence the final bend angle and offset, so consult material charts for specific adjustments․

Torque and Force Requirements

Torque and force calculations are essential for determining the energy required to bend a tube accurately․ The formula Torque (T) = Force (F) × Radius (R) helps estimate the rotational force needed․ The force required depends on the tube’s material, diameter, and wall thickness․ For example, thicker-walled tubes require more force due to higher rigidity․ Use the formula F = (D × t × S_y) / 2, where D is the tube diameter, t is the wall thickness, and S_y is the material’s yield strength; Springback compensation is also crucial, as materials like stainless steel or aluminum experience higher elastic recovery․ To account for this, increase the bend angle by 1-2% to achieve the desired shape․ Always consider the bending machine’s torque capacity to avoid overloading․ For precise calculations, use a scientific calculator and consult material property charts․ Proper torque and force management ensure smooth, accurate bends without damaging the tube or machinery․

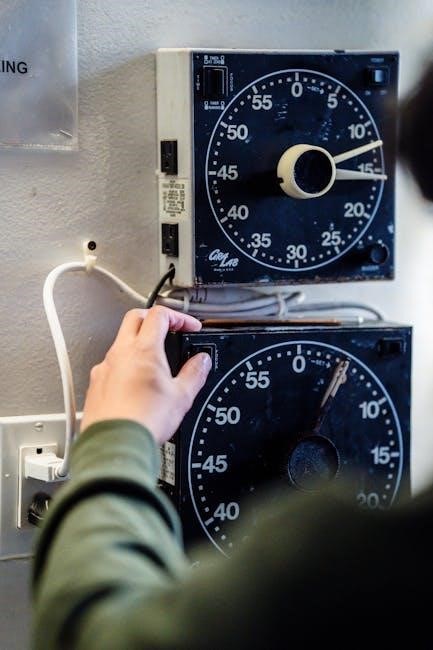
Step-by-Step Bending Process

Bending tubes requires a systematic approach to ensure accuracy and safety; Start by marking the tube at the desired bend point using a measuring tape and sharpie․ Next, position the tube in the bending machine, aligning the mark with the bending die․ Tighten the machine’s clamp to secure the tube firmly․ Apply the calculated torque and force gradually, monitoring the bend angle using a protractor or digital angle sensor․ Once the desired angle is achieved, release the pressure and remove the tube from the machine․ For multiple bends, repeat the process, ensuring each mark is precise․ Always use protective gear, such as gloves and safety glasses, to prevent injuries․ Regularly inspect the bending die and machine for wear to maintain performance․ By following these steps and using the correct calculations, you can achieve precise and consistent bends in your tubing․

Common Mistakes and Troubleshooting

Common mistakes in tube bending often stem from incorrect measurements, improper tool selection, and insufficient compensation for springback․ One frequent error is marking the tube incorrectly, leading to misaligned bends․ Using the wrong bending die or applying excessive force can result in tube deformation or kinking․ Additionally, failing to pre-measure the tube’s material properties, such as elasticity and thickness, can lead to inaccurate bends․ Troubleshooting involves rechecking calculations and ensuring the bending die matches the tube’s diameter and material․ If the bend is too sharp or uneven, adjusting the bending angle or using a different die may be necessary․ Insufficient support during bending can cause the tube to collapse, so ensuring proper clamping is crucial; Finally, always inspect the tube after bending to identify and correct any defects before final installation․ Addressing these issues ensures high-quality, precise bends every time․

Safety Precautions and Best Practices

Ensuring safety is paramount when performing tube bending operations․ Always wear appropriate personal protective equipment, including safety glasses, gloves, and steel-toe boots, to protect against flying debris and heavy machinery․ Clear the workspace of obstructions and flammable materials to minimize hazards․ Before bending, inspect the tube for cracks or damage that could lead to failure during the process․ Ensure all tools and bending machines are properly calibrated and maintained to prevent malfunctions․ Never exceed the recommended bending limits for the material or machine, as this can result in equipment damage or injury․ Keep loose clothing and long hair tied back to avoid entanglement with machinery․ Always follow the manufacturer’s guidelines for tool usage and maintain a secure grip on hand tools․ After bending, allow the tube to cool if heated and inspect it for any signs of stress or deformation․ Properly dispose of scrap materials and adhere to local safety regulations․ Regular training and supervision are essential to maintain a safe working environment․

Advanced Bending Techniques

Advanced bending techniques involve specialized methods to achieve complex geometries and precise bends․ One common technique is the use of adjustable guide rollers to maintain consistent alignment during the bending process․ For intricate shapes, multiple bending operations may be required, with careful planning to avoid material deformation․ Rotary bending is a popular method for creating smooth, consistent curves, especially in thin-walled tubes․ Additionally, using the right die set is crucial; for example, a 3-roll bender can produce precise bends with minimal effort․ Laser-guided tools and scientific calculators are often employed to ensure accuracy․ Another advanced technique is the use of heat induction for bending thick-walled or high-strength tubes, which requires careful temperature control to avoid material damage․ Software simulations can also be used to predict bend outcomes and optimize the process․ Proper training and experience are essential for mastering these techniques, as they require a deep understanding of material properties and bending mechanics․ Regular maintenance of equipment and adherence to safety protocols further enhance the precision and reliability of advanced bending operations․

Using Bender Machines Effectively

Using bender machines effectively requires a thorough understanding of their capabilities and proper setup․ Start by selecting the correct die for the tube size and material, ensuring it matches the desired bend radius․ Always refer to the machine’s capacity chart to avoid overloading․ Pre-bending preparation is crucial; measure and mark the tube accurately, and ensure it is clean and free of debris․ For precise bends, use a scientific calculator to determine the exact bending angle and offset․ Guiding the tube through the machine steadily is essential to maintain consistency, especially for complex geometries․ Regular maintenance, such as lubricating moving parts and checking die alignment, ensures optimal performance․ For manual machines, apply consistent force, while CNC machines should be programmed with precise parameters․ Safety is paramount; always wear protective gear and follow the manufacturer’s guidelines․ By mastering these techniques, operators can achieve high-quality bends efficiently and extend the machine’s lifespan․ Proper training and experience further enhance the effectiveness of bender machine operations․

Calculating Minimum Bend Radius

Calculating the minimum bend radius is critical to ensure the tube does not deform excessively or fracture during bending․ The minimum bend radius depends on the tube’s material properties, wall thickness, and the bending method․ For cold bending, the formula often used is ( R = 46 imes t ), where ( R ) is the radius and ( t ) is the tube’s wall thickness․ For hot bending, the radius typically follows ( R = 4D ), where ( D ) is the tube’s outer diameter․ This ensures the tube retains its structural integrity while achieving the desired curvature․ The Fiber Neutral Axis (FNA) formula, ( R = rac{D}{2} + t ), is also applied to calculate the optimal bending radius accurately․ Using scientific calculators and measurement tools is essential for precise calculations․ Always consider the tube’s material elasticity and ductility to avoid over-bending․ Proper die selection and machine setup are also vital to achieve the calculated radius effectively․ Ignoring these calculations can lead to material failure or improper bends, making it a crucial step in the bending process․ Practical examples and material charts can further guide accurate calculations for specific applications․

Understanding Tube Deformation Limits

Understanding tube deformation limits is essential to prevent material failure during bending․ The deformation limit refers to the maximum degree a tube can bend without exceeding its elastic or plastic limits․ Exceeding these limits can lead to irreversible damage, such as cracking, kinking, or excessive ovalization․ The deformation limit is influenced by the tube’s material, wall thickness, and bending method․ For example, materials like copper and aluminum have higher ductility, allowing greater deformation, while steel tubes may have stricter limits․ The formula (ε = t / R), where (ε) is strain, (t) is wall thickness, and (R) is bend radius, helps calculate deformation․ Strain limits typically range between 2% to 5% for most materials․ Measuring tools like calipers and scientific calculators are crucial for precise calculations․ Excessive deformation can compromise the tube’s structural integrity, making it unsafe for its intended application․ Always refer to material specifications and manufacturer guidelines to determine safe deformation limits․ Proper die selection and controlled bending techniques also play a key role in staying within these limits․ Accurate understanding ensures reliable and durable bends in tubing․

Selecting the Right Bender Die

Selecting the right bender die is critical for achieving precise and consistent tube bends․ The die size must match the tube’s outer diameter and the desired bend radius to ensure proper alignment and prevent deformation․ Different materials, such as steel, aluminum, or copper, require specific die types to avoid damage or wear․ Using a die that is too small or too large can lead to inaccurate bends or tube damage․ The die’s hardness and surface finish also play a role in maintaining the tube’s integrity during the bending process․ For manual or machine-based bending, the die must be compatible with the bending tool or machine․ Proper die selection ensures minimal springback and maintains the tube’s structural integrity․ Regularly inspecting and maintaining the die is essential to prevent wear and tear․ Using the correct die size and type guarantees optimal bending results and extends the lifespan of both the die and the tubing․ Always refer to the manufacturer’s guidelines for die compatibility and material specifications to ensure precise and reliable bends․ Proper die selection is a cornerstone of successful tube bending operations․

Post-Bending Inspections and Adjustments

Post-bending inspections are crucial to ensure the tube meets desired specifications and quality standards․ Begin by visually inspecting the bend for any signs of deformation, such as buckling or cracking․ Use precision tools like calipers or gauges to measure the bend radius and compare it with the calculated value․ Check for ovalization, which occurs when the tube’s circular shape becomes elliptical due to bending stress․ Inspect the tube’s surface for scratches, dents, or other imperfections that may have occurred during the process․ If the bend does not meet the required dimensions, adjustments can be made by fine-tuning the bending die or re-bending the tube slightly․ Document the inspection results for quality control and future reference․ Regular post-bending checks help maintain consistency and prevent defects, ensuring the tubing is fit for its intended application; Proper adjustments and inspections are essential for achieving professional-grade results in tube bending projects․ This step ensures reliability and longevity of the bent tubing in various industrial and structural applications․

Mastering tube bending calculations is essential for achieving precise and durable results․ This manual has provided a comprehensive guide, covering essential formulas, tools, and techniques to ensure successful bending operations․ Key concepts such as bend radius, material properties, and springback compensation have been emphasized to help users avoid common errors․ Always prioritize precise measurements and inspections to maintain quality․ For optimal results, use the right bending dies and follow safety protocols․ Regularly maintain equipment to ensure accuracy and longevity․ Practice makes perfect—start with simple bends and gradually tackle complex projects․ Stay updated with industry advancements and best practices․ By adhering to these guidelines, you’ll achieve professional-grade tube bending outcomes․ Remember, safety and efficiency go hand in hand in every bending task․ Happy bending!

bmw z4 buyers guide

This guide provides essential insights for potential BMW Z4 buyers, covering history, key features, models, maintenance tips, and expert advice to make informed purchasing decisions.

Overview of the BMW Z4

The BMW Z4 is a sleek and dynamic roadster known for its agility, style, and driving thrill. It combines classic roadster design elements with modern engineering, offering a unique blend of performance and luxury. Available in various generations, the Z4 has evolved to cater to diverse driving preferences, from casual cruising to spirited performance. Its lightweight construction, precise handling, and powerful engine options make it a standout in the sports car segment. Whether you’re seeking a refined daily driver or an exhilarating weekend companion, the Z4 delivers an engaging driving experience. This guide helps you navigate its features, models, and maintenance needs to make an informed purchase decision.

Why the BMW Z4 is a Popular Choice

The BMW Z4 remains a favored choice among car enthusiasts due to its harmonious blend of style, performance, and driving pleasure. Its sleek, aerodynamic design captures the essence of a classic roadster, while its advanced engineering ensures a responsive and exhilarating ride. The Z4 appeals to a wide range of drivers, from those who value luxury and comfort to thrill-seekers who crave powerful engine options and precise handling. Additionally, its reputation for reliability and strong resale value makes it a practical investment. Whether for everyday driving or weekend adventures, the Z4 delivers a unique combination of sophistication and excitement, solidifying its status as a popular choice in the sports car market.

History of the BMW Z4

The BMW Z4 has evolved through three generations, each offering unique design and performance advancements while maintaining the brand’s commitment to driving excellence and innovation.

First-Generation (E85/E86)

The first-generation BMW Z4, produced from 2002 to 2008, marked a departure from the Z3 with its bold, flame-surfaced design by Chris Bangle; Available as a roadster (E85) and a coupé (E86), it featured a range of engines, including inline-4 and inline-6 options. The Z4 M variant offered a higher performance with its 3.2L S54 engine. Known for its agile handling and rear-wheel-drive layout, the E85/E86 models remain popular among enthusiasts for their driving dynamics and classic styling, making them a sought-after choice in the used market today.

Second-Generation (E89)

The second-generation BMW Z4 (E89), produced from 2009 to 2016, introduced a more muscular and refined design. Available as a roadster and coupé, it featured a retractable hardtop for improved practicality. The E89 offered a range of engines, including inline-4 and inline-6 options, with the Z4 sDrive35i standing out for its potent N54/N55 turbocharged engine. Known for its balanced chassis and precise handling, the E89 catered to both enthusiasts and casual drivers. Optional features like adaptive damping and BMW’s advanced electronic systems enhanced the driving experience. This generation remains popular for its blend of performance, comfort, and modern styling, making it a desirable option in the used luxury roadster market.

Third-Generation (G29)

The third-generation BMW Z4 (G29), produced from 2018 to 2022, marked a return to the roadster’s roots with a more aggressive and modern design. Developed in collaboration with Toyota, it featured a lower center of gravity and a wider stance for improved handling. The G29 offered a range of turbocharged engines, including a 2.0L inline-4 and a 3.0L inline-6 in the M40i variant, delivering exceptional performance. Inside, the Z4 boasted BMW’s latest iDrive 7.0 infotainment system, a digital instrument cluster, and premium materials. Optional features like adaptive suspension and a head-up display enhanced the driving experience. The G29 balanced sporty dynamics with everyday comfort, appealing to both enthusiasts and casual drivers alike.

Key Features to Look for in a BMW Z4

Look for design quality, engine options, and modern tech features. Ensure the vehicle has proper maintenance history and verify all systems function as expected.

Design and Build Quality

The BMW Z4 is renowned for its sleek, aerodynamic design and robust build quality. Its lightweight body combines aluminum and steel for optimal strength and agility. The convertible roof mechanism is smooth and durable, ensuring long-term reliability. Inside, premium materials like leather and aluminum trim create a luxurious feel. Attention to detail is evident in the fit and finish, reflecting BMW’s commitment to craftsmanship. The Z4’s design emphasizes both style and functionality, making it a standout in its class. Prospective buyers should inspect for any signs of wear or damage, particularly on the soft top and folding mechanism, to ensure the vehicle retains its aesthetic and structural integrity over time;

Engine Options and Performance

The BMW Z4 offers a range of powerful and efficient engine options, catering to various driving preferences. Early models feature inline-6 engines, known for their smooth power delivery and rich exhaust notes. Later generations include turbocharged inline-4 and inline-6 options, providing enhanced performance and fuel efficiency. The sDrive and xDrive variants offer rear-wheel and all-wheel-drive configurations, respectively, ensuring optimal traction and handling. Buyers should prioritize checking engine maintenance records, especially for high-mileage vehicles, to avoid costly repairs. Performance upgrades, such as tuning or exhaust systems, can further enhance the driving experience, but it’s crucial to ensure they are compatible and installed correctly to maintain reliability and warranty validity.

Interior and Technology Features

The BMW Z4 boasts a premium interior designed for comfort and driver engagement. Modern models feature high-quality materials, ergonomic controls, and intuitive infotainment systems like iDrive, ensuring seamless connectivity and navigation. The convertible design emphasizes open-air driving pleasure, with optional features like a retractable hardtop for year-round usability. Advanced technology includes adaptive cruise control, parking sensors, and a heads-up display, enhancing safety and convenience. Buyers should verify the functionality of all electronic systems and check for any software updates. Customization options, such as interior trim and upholstery choices, allow owners to personalize their Z4, making it a blend of luxury and performance.

BMW Z4 Models and Variants

The BMW Z4 is available in various models, including the E85/E86, E89, and G29 generations, offering a range of engine options, design styles, and performance levels to suit different preferences;

E85/E86 Models

The first-generation BMW Z4, codenamed E85/E86, was introduced in 2002 and produced until 2008. Known for its sleek, wedge-shaped design, it offered a sporty and agile driving experience. The E85/E86 models featured a range of engine options, including inline-4 and inline-6 configurations, catering to both performance enthusiasts and casual drivers. The Z4 was available as a roadster (E85) and a coupé (E86), providing choices for different preferences. These models were praised for their handling and build quality, making them a popular choice among BMW enthusiasts. When purchasing an E85/E86, it’s important to check for common maintenance issues like oil leaks and VANOS system wear, ensuring longevity and reliability.

E89 Models

The second-generation BMW Z4, designated E89, was unveiled in 2009 and produced until 2016. This generation marked a shift towards a more luxurious and refined driving experience while retaining the Z4’s sporty DNA. The E89 featured a retractable hardtop, offering the versatility of a convertible and the security of a coupé. Engine options ranged from efficient turbocharged inline-4s to powerful inline-6s, catering to a broad audience. The interior was modernized with advanced technology and premium materials. When considering an E89, buyers should look into potential issues such as cooling system maintenance and transmission performance. Proper care can ensure the E89 remains a reliable and enjoyable vehicle for years to come.

G29 Models

The third-generation BMW Z4, codenamed G29, was introduced in 2018, marking a return to the Z4’s roadster roots with a soft-top design. Developed in collaboration with Toyota, the G29 shares its platform with the Toyota Supra. It features sleek, aggressive styling and a focus on driving dynamics. Engine options include a 2.0L turbocharged inline-4 and a 3.0L inline-6 in the M40i variant, delivering impressive performance. The interior boasts modern technology, including BMW’s iDrive infotainment system. Buyers should pay attention to the suspension setup, as the G29 offers adaptive dampers and multiple driving modes. While reliable, potential issues like oil leaks and cooling system maintenance should be checked. The G29 Z4 appeals to enthusiasts seeking a blend of style, performance, and modern convenience.

Common Maintenance and Repair Issues

BMW Z4 owners often report issues with engine maintenance, cooling systems, and oil leaks. Regular checks and addressing transmission concerns early can prevent costly repairs.

Engine Maintenance and Common Problems

Regular servicing is crucial for the BMW Z4’s engine longevity. Oil leaks, particularly around the valve cover gasket, are common issues. The VANOS system, responsible for variable valve timing, often requires attention, especially in earlier models like the E85 and E89. High-mileage Z4s may experience excessive oil consumption, necessitating frequent checks. Coolant leaks and overheating can occur due to worn hoses or faulty radiators. It’s advisable to use a scan tool, such as the Foxwell NT Elite, to diagnose potential issues early. Buyers should also look for updates or major works performed, like differential oil changes, to ensure the vehicle is well-maintained. A thorough inspection and service history review are essential to avoid costly repairs.

Cooling System and Oil Leaks

The BMW Z4’s cooling system and engine are prone to oil leaks and overheating issues, particularly in older models. Radiators, hoses, and water pumps often fail over time, requiring replacement; Oil leaks frequently occur around the valve cover gasket, oil pan gasket, and timing cover. It’s essential to inspect these areas during pre-purchase checks. Buyers should also monitor coolant levels and look for signs of leakage, such as green stains or drops. Regular servicing and inspections can prevent costly repairs. Consider using a scan tool to identify any hidden issues. Addressing these problems early ensures reliability and prevents further damage to the engine and cooling system.

Transmission and Drivetrain Concerns

The BMW Z4’s transmission and drivetrain can experience issues, particularly in older models. Automatic transmissions may exhibit slipping or hesitation, especially in early generations. Manual transmissions often suffer from clutch wear, leading to high replacement costs. Drivetrain components, such as the differential and propshaft, can develop wear, causing vibration or noise during acceleration. Buyers should inspect these areas thoroughly during pre-purchase checks. Regular servicing and monitoring for unusual noises or performance changes are crucial. Addressing these issues early can prevent costly repairs and ensure smooth driving dynamics. Always consider a professional inspection to identify any hidden problems.

Buying Tips and Checklist

Conduct a pre-purchase inspection, verify maintenance records, and test drive thoroughly. Use a scan tool to check for hidden issues and ensure a smooth transaction.

Research and Budgeting

Research is crucial when considering a BMW Z4 purchase. Start by determining your budget, including purchase price, insurance, maintenance, and fuel costs. Compare different models and their market values to ensure you’re getting a fair deal. Check reviews, forums, and reliability reports to understand common issues and satisfaction levels among owners. Consider financing options or leasing if necessary, and evaluate the total cost of ownership, including depreciation and potential repair costs. Identify must-have features to avoid overspending on unnecessary upgrades. By carefully planning and budgeting, you’ll make an informed decision and find the right Z4 for your needs and preferences.

Test Drive Checklist

A thorough test drive is essential to assess the BMW Z4’s condition and performance. Start by checking for any warning lights on the dashboard and ensuring all systems function properly. Test the engine’s responsiveness, smoothness, and noise levels under acceleration. Evaluate the transmission’s shifting quality, whether manual or automatic, and check for any hesitation or jerking. Inspect the handling and steering precision, noting any unusual vibrations or play. Test the brakes for firmness and even stopping power. Additionally, inspect the exterior and interior for damage or wear, and ensure all features, such as the convertible top, operate smoothly. Finally, take note of any unusual noises or behaviors during the drive.

Inspecting the Vehicle’s History

Inspecting the vehicle’s history is crucial when purchasing a used BMW Z4. Start by obtaining a detailed maintenance record from the seller or service center. Use tools like a scan tool (e.g., Foxwell NT Elite 510) to check for any stored fault codes or issues. Research the car’s VIN to uncover its accident history, previous ownership, and any outstanding recalls. Look for signs of regular servicing, such as oil change records and timing chain or VANOS updates, which are common maintenance points for the Z4. Additionally, review forums or communities for known issues specific to the model year and generation. A pre-purchase inspection by a BMW specialist can also reveal hidden problems and provide peace of mind. Always verify the vehicle’s history report to ensure transparency and avoid potential pitfalls.

Aftermarket Modifications and Upgrades

The BMW Z4 offers ample opportunities for customization, including performance upgrades, interior styling, and suspension tweaks to enhance both aesthetics and driving dynamics for enthusiasts.

Performance Upgrades

Enhancing the BMW Z4’s performance can be achieved through various upgrades, such as engine tuning, lightweight components, and high-performance exhaust systems. These modifications can significantly boost power and handling. For E85, E89, and G29 models, popular upgrades include aerodynamic kits and suspension enhancements. Drivers seeking more agility and speed often opt for aftermarket wheels and braking systems. Additionally, tuning boxes and ECU remaps can unlock additional horsepower and torque. It’s crucial to research reputable providers and ensure modifications comply with local regulations. Consulting with specialists guarantees optimal results without compromising the vehicle’s reliability or warranty. These upgrades not only improve performance but also personalize the driving experience, making the Z4 even more thrilling to own and drive.

Interior and Exterior Customization

Customizing the BMW Z4’s interior and exterior allows owners to tailor the vehicle to their personal style. Interior upgrades can include sport seats, premium upholstery materials, and carbon fiber trim for a refined look. Exterior modifications might involve aerodynamic body kits, unique wheel designs, or bespoke paint finishes. Owners can also add distinctive accents, such as LED lighting or aftermarket grilles, to enhance the car’s visual appeal. Additionally, interior technology upgrades, like advanced infotainment systems or customizable dash trim, can elevate the driving experience. When customizing, it’s important to choose high-quality components and consult with specialists to ensure modifications align with the car’s original design intent and maintain its performance integrity.

Wheels and Suspension Modifications

Upgrading the BMW Z4’s wheels and suspension can significantly enhance its performance and aesthetics. Lightweight alloy wheels, such as forged options, reduce unsprung weight, improving handling and acceleration. Suspension modifications, like coilovers or adjustable sway bars, allow drivers to fine-tune ride height and stiffness for better cornering stability. These upgrades are particularly popular among enthusiasts seeking a sportier driving experience. However, it’s crucial to ensure compatibility and balance with the car’s original setup to maintain ride quality and avoid compromising safety. Consulting with experts or reputable aftermarket suppliers is recommended to select the right modifications for your driving needs and preferences.

nikon d60 instruction manual

Welcome to the Nikon D60 Instruction Manual, your comprehensive guide to mastering this 10.2-megapixel DSLR camera. Designed for both beginners and enthusiasts, it covers setup, shooting modes, autofocus, and customization options to help you unlock the camera’s full potential.

1.1 Overview of the Nikon D60 Camera

The Nikon D60 is a compact, lightweight DSLR camera designed for enthusiasts and beginners alike. It features a 10.2-megapixel DX-format CCD sensor, delivering high-resolution images with rich detail and vibrant colors. Equipped with Nikon’s EXPEED image processing, it ensures superior image quality and efficient operation. The camera’s intuitive design and user-friendly interface make it an excellent choice for those looking to explore advanced photography techniques.

1.2 Importance of Reading the Manual

Reading the Nikon D60 manual is essential for understanding its features and maximizing your photography experience. It provides detailed explanations of camera settings, shooting modes, and customization options. By familiarizing yourself with the manual, you can unlock the camera’s full potential, troubleshoot common issues, and enhance your creative control. This guide ensures you make the most of your Nikon D60, whether you’re a novice or an advanced user.

Contents of the Nikon D60 Manual

The Nikon D60 manual provides a detailed guide, covering camera setup, shooting modes, customization options, troubleshooting, and maintenance tips. It ensures comprehensive understanding and optimal use of the camera’s features.

2.1 Structure and Organization

The Nikon D60 manual is structured logically, starting with basic setup and progressing to advanced features. It is divided into clear sections, including camera overview, shooting modes, customization options, and troubleshooting. The manual ensures easy navigation, with detailed explanations and visual aids to help users understand and utilize the camera’s capabilities effectively. This organization makes it accessible for both novice and experienced photographers to find the information they need quickly and efficiently.

2.2 Key Sections and Topics Covered

The Nikon D60 manual covers essential topics, including camera setup, shooting modes, autofocus, and metering. It also explores ISO settings, white balance, and playback options. Detailed instructions for customizing settings and troubleshooting common issues are provided. The manual ensures users understand all features, from basic operations to advanced functions, making it an invaluable resource for photographers of all skill levels to enhance their photography experience.

Nikon D60 Camera Specifications

The Nikon D60 features a 10.2-megapixel DX-format CCD sensor, delivering images up to 3872 x 2592 pixels. It includes the EXPEED image processing engine, ensuring vivid colors and sharp details, while supporting various resolution and compression settings for versatility in photography.

3.1 Technical Details and Features

The Nikon D60 boasts a 10.2-megapixel DX-format CCD sensor, capturing images at 3872 x 2592 pixels, while the EXPEED image processing engine enhances color accuracy and noise reduction. The camera supports ISO sensitivity from 100 to 3200, with image stabilization and 3D Color Matrix Metering II for precise exposures. Its lightweight design and intuitive controls make it ideal for both casual and advanced photographers.

3.2 Sensor and Image Resolution

The Nikon D60 features a 10.2-megapixel DX-format CCD sensor, delivering a maximum image resolution of 3872 x 2592 pixels. This sensor ensures sharp, detailed images with vibrant colors. The camera’s compact sensor size allows for lightweight portability while maintaining high-quality output, making it ideal for capturing a wide range of photographic subjects with precision and clarity.

3.3 ISO Range and Performance

The Nikon D60 offers an ISO range of 100 to 3200, enabling versatility in various lighting conditions. With expanded settings, it handles low-light scenarios effectively. The camera delivers minimal noise at higher sensitivities, ensuring sharp and clean images. This feature is particularly useful for capturing indoor events or outdoor shots without compromising image quality, making it a reliable choice for photographers seeking flexibility and performance.

3.4 Lens Compatibility

The Nikon D60 is compatible with a wide range of Nikon lenses, including AF-S and AF-I models, ensuring versatile shooting options. It supports DX-format lenses, which are optimized for its 10.2-megapixel sensor. Additionally, the camera can use FX-format lenses with a 1.5x crop factor, offering enhanced flexibility for photographers. This compatibility allows users to explore various focal lengths and specialized lenses, catering to diverse photography needs and styles.

Setting Up the Nikon D60

Unpack and inspect the camera, charge the battery, insert a memory card, and mount a compatible lens to prepare for your first shoot.

4.1 Unpacking and Initial Inspection

When unpacking your Nikon D60, carefully inspect the camera for any visible damage. Verify that all included accessories, such as the battery, charger, and lens, are present and in good condition. Ensure the camera body, LCD screen, and viewfinder are free from scratches or defects. This initial check helps ensure your device is ready for use and prevents potential issues during setup.

4.2 Charging the Battery

Insert the EN-EL9 battery into the charger, ensuring the contacts align properly. Plug the charger into a power outlet and allow the battery to charge fully. The charger’s LED will turn red during charging and green when complete. Avoid overcharging, as it may reduce battery life. Charge the battery before first use, though it may come partially charged. Store unused batteries in a cool, dry place to maintain performance.

4.3 Inserting the Memory Card

Locate the memory card slot on the right side of the camera. Open the compartment door and ensure the card is oriented correctly (label facing up). Gently push the card into the slot until it clicks securely into place. Verify compatibility with the Nikon D60, as it supports SD and SDHC cards. Close the compartment door firmly. Always format the memory card in the camera for optimal performance.

4.4 Mounting the Lens

To mount the lens, align the mounting index on the lens with the white dot on the camera body. Gently rotate the lens clockwise until it clicks securely into place. Ensure compatibility with the Nikon D60, which supports F-mount lenses. Avoid touching the lens surface to prevent smudging. Always handle the lens by the edges or lens hood for stability. Securely attach the lens cap when not in use for protection.

Operating the Nikon D60

Power on the camera, select your desired shooting mode, and navigate the menu system to adjust settings like autofocus, ISO, and exposure. Shoot and review photos effortlessly with intuitive controls.

5.1 Understanding the Camera Controls

The Nikon D60 features intuitive controls designed for easy operation. The mode dial allows quick access to shooting modes, while the shutter-release button and multi-selector enable precise focus and menu navigation. External buttons for ISO, white balance, and exposure compensation provide instant adjustments. Familiarize yourself with these controls to streamline your shooting experience and make creative decisions efficiently. Proper use enhances both speed and accuracy in capturing stunning images.

5.2 Navigating the Menu System

The Nikon D60 menu system is user-friendly, offering quick access to settings. The main menu is divided into sections like Shooting, Setup, and Playback. Use the multi-selector to scroll through options and the OK button to select. Customize settings such as image quality, white balance, and autofocus modes. The menu also allows adjustment of text size and color for better readability. Navigate effortlessly to optimize your camera settings for stunning results.

5.3 Shooting Modes

The Nikon D60 offers a variety of shooting modes to suit different photography needs. Choose from Auto, Portrait, Landscape, Sports, and Night Portrait modes. These modes automatically optimize camera settings for specific scenarios. For more control, use Program Mode (P), which allows manual adjustments while maintaining aperture and shutter speed balance. Experiment with these modes to capture stunning images in diverse lighting conditions and subjects.

5.4 Focus Modes

The Nikon D60 offers three focus modes: AF-A (Auto-Servo AF), AF-C (Continuous-Servo AF), and AF-S (Single-Servo AF). AF-A automatically selects between AF-S and AF-C based on subject movement. AF-C is ideal for moving subjects, continuously adjusting focus. AF-S is best for stationary subjects, focusing once and locking. Manual focus (MF) is also available for precise control, allowing you to adjust focus using the lens ring.

5.5 Exposure Compensation

Exposure compensation allows you to adjust the brightness of your images by +5 to -5 EV in 1/3 EV increments. Access this feature by pressing the exposure compensation button and rotating the command dial. You can also adjust it via the shooting menu. This function is useful for correcting backlighting or achieving creative effects. Use it wisely to ensure properly balanced exposures in challenging lighting conditions.

Advanced Features of the Nikon D60

Explore advanced features like built-in flash, white balance settings, autofocus modes, and metering options to enhance your photography experience and capture stunning images with precision.

6.1 Using the Built-in Flash

The Nikon D60 features a built-in flash for capturing well-lit images in low-light conditions. To activate it, press the flash button on the camera’s top. The flash offers modes like Auto Flash and Forced Flash. Use Auto Flash for automatic lighting adjustments or Forced Flash to ensure the flash fires regardless of lighting conditions. Avoid using the flash in bright sunlight to prevent overexposure. Experiment with flash settings to enhance your photos and reduce red-eye effects effectively.

6.2 White Balance Settings

The Nikon D60 allows you to adjust White Balance to ensure accurate color representation in various lighting conditions. Choose from modes like Auto, Daylight, Shade, and Fluorescent to match your environment. Use the WB button and rotate the command dial to select a setting. Custom White Balance can also be set for precise control. This feature helps capture natural colors and reduces unwanted hues in your photos, enhancing overall image quality and consistency.

6.3 Autofocus Modes

The Nikon D60 offers two primary autofocus modes: Single AF and Continuous AF. Single AF locks focus when the shutter is pressed halfway, ideal for stationary subjects. Continuous AF adjusts focus dynamically, perfect for moving subjects. Use the AF-mode button and command dial to switch modes. Customizing these settings enhances your ability to capture sharp images in various shooting scenarios, ensuring precise focus control for any situation.

6.4 Metering Modes

The Nikon D60 features three metering modes: 3D Color Matrix Metering II, Center-Weighted Metering, and Spot Metering. The 3D Color Matrix Metering II provides balanced exposure by analyzing brightness and color. Center-Weighted Metering prioritizes the central area, ideal for portraits. Spot Metering measures a small area for precise control in challenging lighting conditions. Use these modes to achieve accurate exposures tailored to your scene.

Viewing and Managing Photos

Learn how to playback, delete, and organize photos on your Nikon D60. Discover options for transferring images to a computer and managing files efficiently for better workflow.

7.1 Playback Options

The Nikon D60 offers convenient playback options for reviewing your photos. Use the Playback button to view images, and utilize zoom in/out to inspect details. You can also display thumbnails, check histograms, and access shooting information. Additionally, the camera allows you to delete unwanted images or protect favorites from accidental deletion, ensuring efficient photo management directly on the device;

7.2 Deleting Images

To delete images on the Nikon D60, press the Delete button during playback. Select the desired image, confirm deletion, or choose multiple images to remove. Use the Delete All option to erase all photos, but be cautious as this cannot be undone. Formatting the memory card also deletes all data and resets settings, so ensure backups are made before proceeding.

7.3 Transferring Photos to a Computer

Connect the Nikon D60 to your computer using the provided USB cable. Launch Nikon Transfer software for easy photo transfer. Set the camera to PTP mode for proper detection. The software will automatically detect the camera and allow you to select images for transfer. Ensure all connections are secure to prevent errors. This method ensures your photos are efficiently transferred to your computer.

Customizing Your Nikon D60

Customize your Nikon D60 to suit your photography style by adjusting settings like autofocus, white balance, and more, enhancing your shooting experience and creativity.

8.1 Customizing Camera Settings

The Nikon D60 allows users to personalize their shooting experience by customizing camera settings. Access the menu system to adjust autofocus modes, white balance, and ISO sensitivity.

These settings can be tailored to suit various lighting conditions and photography styles, ensuring optimal results. Customization options enhance flexibility and creativity, making the D60 adaptable to different shooting scenarios.

8.2 Adjusting White Balance

Adjusting the white balance on your Nikon D60 ensures accurate color reproduction in various lighting conditions. The camera offers presets like Auto, Daylight, and Tungsten, as well as fluorescent and custom settings.

Use the menu system to fine-tune white balance for precise control, enhancing image quality by matching the color temperature of the scene, resulting in natural and vibrant colors in your photos.

8.3 Setting Up Autofocus

Customizing the autofocus on your Nikon D60 enhances focus accuracy and speed. Choose from Single AF and Continuous AF modes to suit your subject movement. Adjust the AF-area mode to Single, Dynamic, or Closest Subject, ensuring precise focus control. Fine-tune AF settings via the menu system for optimal performance, making your photography more efficient and effective in capturing sharp images.

8.4 Other Customization Options

Beyond autofocus and white balance, the Nikon D60 offers additional customization options to tailor your shooting experience. Adjust ISO sensitivity to optimize low-light performance, fine-tune metering modes for precise exposure control, and personalize playback options for image review. These settings allow you to adapt the camera to your preferences, ensuring a more intuitive and efficient photography workflow tailored to your creative needs and shooting style.

Troubleshooting and Maintenance

Identify common issues, understand error messages, and learn to clean the sensor and lenses. Proper maintenance ensures optimal performance and longevity of your Nikon D60 camera.

9.1 Common Issues and Solutions

Address issues like camera freezing by resetting it using the two-button reset method. Error messages such as “CARD” indicate formatting or damage issues. Lens problems may prevent autofocus; ensure proper mounting. Clean the sensor regularly to avoid dust spots. If the battery drains quickly, recalibrate it. For persistent issues, refer to the manual or contact Nikon support for assistance.

9.2 Error Messages and Solutions

The Nikon D60 may display error messages like “ERR” or “CARD.” These indicate issues such as memory card errors or improper formatting. Solutions include checking card compatibility, formatting the card in-camera, or replacing it. For “ERR,” restart the camera or clean the sensor. If issues persist, reset the camera or contact Nikon support for further assistance.

9.3 Cleaning the Camera Sensor

Clean the Nikon D60 sensor regularly to remove dust and debris. Turn off the camera, set it to “Clean Sensor” mode, and use a soft, dry brush or blower. For stubborn spots, use a sensor-cleaning swab with a cleaning solution. Avoid touching the sensor surface. Use Nikon-approved cleaning tools to prevent damage. Clean in a dust-free environment for best results. Always handle the camera with care during the cleaning process.

9.4 Cleaning the Lenses

Clean the Nikon D60 lenses regularly to maintain image clarity. Use a soft, microfiber cloth to wipe away smudges and fingerprints. For stubborn spots, apply a small amount of lens cleaning solution to the cloth, not directly to the glass. Avoid harsh chemicals or abrasive materials. Use a blower to remove loose debris before wiping. Clean in a dust-free environment and handle lenses with care to prevent scratches or damage.

Additional Resources

Explore additional resources for your Nikon D60, including online support, firmware updates, customer service, and compatible accessories, available through Nikon’s official website for enhanced functionality and troubleshooting.

10.1 Online Support and Updates

Nikon offers extensive online support for the D60, including firmware updates, user manuals, and troubleshooting guides. Visit the official Nikon website for the latest downloads and resources. The Manual Viewer 2 app allows you to access manuals offline on your smartphone or tablet. Additionally, Nikon provides customer support through their website, ensuring assistance with any camera-related queries or issues you may encounter.

10;2 Nikon Customer Support

Nikon provides comprehensive customer support for the D60 through their official website, including troubleshooting guides, FAQs, and direct contact options. Users can register their product to receive updates, service information, and personalized assistance. Nikon’s customer support team is available to address any queries or issues, ensuring a smooth and enjoyable experience with the D60 camera.

10.3 Firmware Updates

Nikon periodically releases firmware updates for the D60 to enhance performance, fix issues, and add new features. These updates can be downloaded from Nikon’s official website or through the Nikon Manual Viewer 2 app. Ensure to verify the authenticity of the update source to avoid unauthorized software. Updating firmware is essential for maintaining optimal camera functionality and compatibility with lenses and accessories. Always follow Nikon’s official guidelines for a smooth update process.

10.4 Compatible Accessories

The Nikon D60 supports a wide range of accessories to enhance your photography experience. These include high-quality Nikkor lenses, Speedlight flash units, and remote controls. Visit Nikon’s official website or authorized dealers to explore compatible accessories. Using genuine Nikon products ensures optimal performance and compatibility with your D60 camera. Always verify compatibility before purchasing to maintain the camera’s functionality and longevity. Genuine accessories are designed to maximize your creative potential with the D60.

Mastering the Nikon D60’s features takes practice. Use this manual as your guide to explore its capabilities and enhance your photography skills. Happy shooting!

11.1 Final Tips for Using the Nikon D60

Experiment with different shooting modes to find your style. Practice using autofocus for sharp images and explore customization options to tailor the camera to your needs. Regularly clean the sensor and lenses for optimal performance. Stay updated with firmware and utilize compatible accessories for enhanced functionality. Keep the manual handy for quick reference and enjoy capturing stunning moments with your Nikon D60.

11.2 Encouragement to Explore and Practice

Take your photography to the next level by exploring the Nikon D60’s features and practicing regularly. Experiment with shooting modes, autofocus, and customization options to enhance your skills. Familiarize yourself with the manual to discover hidden capabilities. The more you practice, the more comfortable you’ll become with the camera, leading to stunning images and a deeper understanding of photography.

distech controls thermostat user manual

The Distech Controls Thermostat is a cutting-edge HVAC control solution, offering advanced features like touchscreen interfaces, multiple connectivity options, and Bluetooth for seamless mobile integration. Designed for efficiency, it provides precise temperature control, fan management, and smart scheduling. With comprehensive user manuals and guides available, users can easily navigate setup, operation, and troubleshooting, ensuring optimal performance and comfort.

1.1 Overview of Distech Controls

Distech Controls is a leading provider of innovative building automation solutions, specializing in HVAC, lighting, and energy management systems. With a strong focus on sustainability and efficiency, Distech Controls offers a wide range of products, including advanced thermostats, controllers, and sensors. Their ECLYPSE series, for instance, is a modular and scalable platform designed for diverse HVAC applications. Known for their user-friendly interfaces and cutting-edge technology, Distech Controls enables seamless integration with smart home and building systems. Their solutions cater to commercial, industrial, and institutional spaces, ensuring optimal comfort and energy efficiency. By leveraging open protocols like BACnet IP, Distech Controls promotes interoperability and flexibility in system design. Their commitment to innovation and customer satisfaction makes them a trusted name in the building automation industry.

1.2 Importance of a User Manual

A user manual is essential for understanding and maximizing the functionality of the Distech Controls Thermostat. It provides detailed instructions for installation, operation, and troubleshooting, ensuring users can navigate the system confidently. The manual includes information on advanced features like scheduling, smart sensors, and connectivity options. By referring to the manual, users can optimize energy efficiency, customize settings, and resolve common issues quickly. Additionally, it serves as a reference for maintaining and updating the thermostat, ensuring peak performance. With clear guidelines on network security and system integration, the manual empowers users to utilize the thermostat’s full potential while adhering to best practices. Accessing the manual online or via PDF ensures convenience and up-to-date information.

Key Features of Distech Controls Thermostat

The Distech Controls Thermostat features a touchscreen interface, Bluetooth Low Energy (BLE) for mobile connectivity, and compatibility with BACnet IP and Wi-Fi networks. It supports smart sensors, advanced scheduling, and seamless integration with smart home systems, ensuring efficient temperature control and energy management. The thermostat also offers voice assistant integration, multiple fan speed settings, and occupancy-based controls, enhancing user convenience and system performance. These features make it an ideal solution for modern HVAC applications, providing precise control and flexibility for diverse environments.

2.1 Touchscreen Interface

The Distech Controls Thermostat features an intuitive touchscreen interface designed for effortless navigation and control. The high-resolution display provides clear access to temperature settings, fan control, and advanced features like scheduling and smart sensor integration. Users can easily adjust settings with a tap, while the interface also supports swipe gestures for seamless menu navigation. The touchscreen is responsive and user-friendly, ensuring quick access to essential functions. Additionally, the interface offers customizable options, allowing users to tailor the layout and display to their preferences. This feature-rich design enhances user experience, making it simple to manage HVAC systems efficiently; The touchscreen interface is a key element in the thermostat’s modern and sleek design, providing both convenience and precision for optimal comfort control.

2.2 Multiple Connectivity Options

The Distech Controls Thermostat offers a wide array of connectivity options, ensuring compatibility with various systems and networks. It supports both wired IP and Wi-Fi connections, enabling seamless integration into existing HVAC systems. Additionally, Bluetooth Low Energy (BLE) technology allows for mobile connectivity, providing users with the convenience of controlling the thermostat through their smartphones or tablets. This versatility ensures that the thermostat can adapt to different installation requirements, whether in new constructions or retrofits. The multiple connectivity options enhance the thermostat’s functionality, allowing for remote monitoring, scheduling, and energy management. This feature is particularly beneficial for smart home systems, enabling users to maintain consistent comfort levels while optimizing energy efficiency. The connectivity options make the Distech Controls Thermostat a flexible and future-ready solution for modern HVAC needs.

2.3 Bluetooth Low Energy (BLE) for Mobile Connectivity

The Distech Controls Thermostat incorporates Bluetooth Low Energy (BLE) technology, enabling seamless mobile connectivity. This feature allows users to control the thermostat remotely using their smartphones or tablets, enhancing convenience and accessibility. With BLE, users can adjust temperature settings, monitor system performance, and receive notifications directly through a dedicated mobile app. This connectivity option is energy-efficient, ensuring minimal battery consumption while maintaining a stable connection. BLE also facilitates easy integration with smart home systems, allowing for voice assistant control and advanced automation. The mobile connectivity feature is particularly useful for managing HVAC systems in large or complex environments, ensuring optimal comfort and energy efficiency. This innovation makes the Distech Controls Thermostat a modern and user-friendly solution for smart temperature management.

Installation and Setup

Installation requires mounting the thermostat and connecting wiring, following network and power supply guidelines. Initial setup involves configuring settings and connecting to the network for optimal performance.

3.1 Physical Installation Requirements

The physical installation of the Distech Controls Thermostat requires proper wall mounting using the provided screws and wall anchors. Ensure the location is accessible and away from direct sunlight or drafts. The thermostat must be wired correctly, following the detailed wiring diagram in the manual. For network connectivity, use a category 5e cable or refer to the ECLYPSE User Guide for cable specifications. The ECY-STAT model is compatible with fan coil units, heat pumps, and rooftop units, requiring precise mounting to ensure accurate temperature sensing. Always comply with the Network Guide for power supply and wiring to avoid damage. Proper installation ensures reliable performance and accurate temperature control.

3.2 Initial Setup and Configuration

After installation, the initial setup involves configuring the thermostat’s basic settings. Power on the device and follow the on-screen prompts to set the language, unit of measurement, and time zone. Use the touchscreen interface to navigate through menus. Connect to the network using the provided network cable or Wi-Fi settings. Configure the HVAC system type and fan coil settings as per the user manual. For advanced features, enable Bluetooth for mobile connectivity or integrate with smart home systems. Set up user permissions and access control to secure the device. Refer to the ECY-STAT User Guide for detailed configuration steps. Proper setup ensures seamless operation, optimal performance, and integration with other systems. Always follow the recommended guidelines to avoid configuration errors.

3.3 Network and Power Supply Guidelines

Ensure a stable power supply by connecting the thermostat to a 24V AC or 12V DC power source, as specified in the manual. For network connectivity, use a Category 5e cable for wired installations or connect via Wi-Fi for wireless communication. Configure network settings to match your system’s requirements, ensuring compatibility with BACnet IP or other protocols. Enable Bluetooth for mobile connectivity during setup. Follow network security practices, such as changing default passwords and enabling encryption. Power cycling the device may be necessary after configuration changes. Refer to the ECLYPSE User Guide for detailed network setup instructions. Proper power and network configuration ensure reliable performance and integration with smart home systems. Always use Distech Controls-approved cables and adapters for optimal functionality.

Operating the Thermostat

This section covers essential functions for operating the Distech Controls Thermostat, including basic temperature and fan control, as well as advanced scheduling for energy management.

4.1 Basic Operations: Temperature Adjustment and Fan Control

The Distech Controls Thermostat simplifies temperature adjustment and fan control through an intuitive interface. Users can easily set desired temperatures using the touchscreen or remote sensors, ensuring consistent comfort. The thermostat supports up to three fan speeds, allowing for precise airflow management. Additionally, it offers occupancy modes, automatically adjusting settings based on whether the space is occupied or vacant. These features ensure energy efficiency without compromising comfort. The system also provides real-time feedback, enabling users to monitor and adjust settings effortlessly. With these basic operations, users can maintain optimal indoor conditions with minimal effort.

4.2 Advanced Features: Scheduling and Smart Sensors

The Distech Controls Thermostat offers advanced scheduling capabilities, allowing users to create customized temperature profiles for different times of the day or week. This feature ensures energy efficiency by automatically adjusting settings during periods of low occupancy or when specific conditions are met. Smart sensors further enhance functionality by providing real-time data on temperature, humidity, and occupancy, enabling the thermostat to make adaptive adjustments. These sensors can detect changes in room conditions and adjust the system accordingly, optimizing comfort and energy usage. The integration of scheduling and smart sensors creates a seamless, intelligent system that learns and adapts to user preferences, delivering unparalleled control over indoor environments.

Maintenance and Troubleshooting

Regular calibration and firmware updates ensure optimal performance. Troubleshooting common issues like connectivity problems or sensor inaccuracies is streamlined with detailed diagnostic tools and guides available online.

5.1 Calibration and Accuracy

Calibration is crucial for maintaining the thermostat’s performance and accuracy. The Distech Controls Thermostat typically offers an accuracy of ±0.9°F (±0.5°C) at 70°F (21°C), ensuring precise temperature control. Users are advised to calibrate the device during installation and periodically thereafter to account for environmental changes. The process involves syncing the thermostat’s internal sensor with actual room conditions, which can be done manually or through automated calibration tools provided in the user manual. Regular checks and adjustments help prevent drift and ensure reliable operation. Additionally, the thermostat supports advanced features like remote sensor integration, which enhances accuracy by averaging readings from multiple sources. Proper calibration not only improves comfort but also optimizes energy efficiency, making it a key maintenance step for long-term functionality.

5.2 Firmware Updates and Software Management

Regular firmware updates are essential to ensure the Distech Controls Thermostat operates at peak performance. These updates often include bug fixes, feature enhancements, and security improvements. Users can update the firmware via USB or over-the-air, depending on the model and connectivity options. The process is detailed in the user manual, with step-by-step instructions to minimize downtime. It’s crucial to follow these guidelines to avoid firmware corruption, which could require a factory reset. Additionally, the thermostat supports software management tools like the Smart-Vue User Interface, which simplifies monitoring and updating. Always verify compatibility before installing new software to maintain system stability. By keeping the firmware and software up-to-date, users can enjoy the latest features and optimal functionality.

5.3 Common Issues and Solutions

Common issues with the Distech Controls Thermostat include connectivity problems, touchscreen responsiveness, and temperature accuracy. For connectivity issues, ensure the thermostat is properly connected to the network and restart the device if necessary. Touchscreen responsiveness can be resolved by recalibrating the screen or restarting the thermostat. If temperature readings are inaccurate, check the sensor placement and ensure it is free from obstructions. Firmware corruption can occur during updates; in such cases, perform a factory reset and reinstall the latest firmware. For advanced troubleshooting, refer to the user manual or contact technical support. Regular maintenance and updates help prevent these issues, ensuring smooth operation and reliable performance.

Integration with Smart Home Systems

Distech Controls Thermostat seamlessly integrates with smart home systems via Wi-Fi and Bluetooth, enabling voice control and compatibility with popular platforms like BACnet IP for enhanced automation.

6.1 Compatibility with BACnet IP Network

The Distech Controls Thermostat is fully compatible with the BACnet IP network, ensuring seamless integration into building automation systems. This compatibility allows for efficient communication between devices, enabling centralized control and monitoring of HVAC systems. BACnet IP’s standardized protocol supports interoperability with various third-party systems, making it easier to manage and optimize building environments. The thermostat’s ability to operate within this framework ensures enhanced performance, flexibility, and scalability for commercial and industrial applications. By leveraging BACnet IP, users can streamline operations, reduce costs, and maintain consistent comfort levels across facilities. This integration is a key feature that sets the Distech Controls Thermostat apart in modern smart building solutions.

6.2 Wi-Fi and Bluetooth Connectivity Options

The Distech Controls Thermostat offers robust Wi-Fi and Bluetooth connectivity options, ensuring versatile and reliable communication. Wi-Fi enables seamless integration with smart home systems and remote access, while Bluetooth Low Energy (BLE) provides convenient mobile device connectivity for setup and control. These features allow users to adjust settings, monitor conditions, and receive notifications from anywhere. Dual connectivity options enhance flexibility, catering to different network environments and ensuring uninterrupted performance. BLE is particularly useful for initial configuration, simplifying the pairing process with smartphones or tablets. Together, Wi-Fi and Bluetooth capabilities make the thermostat a highly adaptable solution for modern building automation, offering both convenience and reliability in managing HVAC systems efficiently.

6.3 Voice Assistant Integration

The Distech Controls Thermostat seamlessly integrates with popular voice assistants like Amazon Alexa and Google Assistant, enabling voice command control for temperature adjustments, scheduling, and system modes. This feature enhances convenience, allowing users to manage their HVAC system hands-free. By linking the thermostat to a compatible voice assistant, users can effortlessly adjust settings without physical interaction, ensuring comfort and efficiency. The integration is straightforward, typically requiring a one-time setup through the respective smart home platform. Voice commands can be used to change temperatures, switch modes, or even query the current conditions, making it a user-friendly addition to smart home ecosystems. This advanced capability aligns with modern smart home trends, offering a seamless and intuitive control experience.

Security Considerations

Ensure secure authentication, encryption, and regular firmware updates to protect the thermostat from unauthorized access. Always follow network security guidelines to safeguard sensitive data and system integrity.

7.1 Network Security Practices

Implement robust network security practices to protect your Distech Controls Thermostat from unauthorized access. Ensure secure authentication methods, such as strong passwords or multi-factor authentication, are enabled. Use encryption for data transmission, such as HTTPS or TLS 1.2, to safeguard communication between the thermostat and connected devices. Regularly update firmware to patch vulnerabilities and maintain system integrity. Disable unnecessary ports and services to minimize exposure to potential threats. Use firewalls to restrict access to the thermostat’s network interface. Conduct periodic security audits to identify and address weaknesses. Follow industry best practices for network segmentation to isolate IoT devices like thermostats from critical systems. By adhering to these practices, you can ensure a secure and reliable operation of your Distech Controls Thermostat.

7.2 Access Control and User Permissions

Implementing proper access control and user permissions is essential for securing your Distech Controls Thermostat. Assign role-based access to ensure only authorized personnel can modify settings or view sensitive data. Use unique, strong passwords for each user account and avoid shared credentials. Enable multi-factor authentication (MFA) for an additional layer of security. Regularly review and update user permissions to reflect current roles and responsibilities. Remove access for users who no longer require it. Use the thermostat’s built-in tools to audit user activity and detect unauthorized changes. By managing access effectively, you can prevent unauthorized modifications and maintain system integrity. Always refer to the official user manual for detailed guidance on configuring access control and permissions.

7.3 Data Privacy and Protection

Ensuring data privacy and protection is critical when using the Distech Controls Thermostat. Always use encrypted communication protocols for data transmission between the thermostat and connected devices. Regularly update firmware to protect against vulnerabilities and ensure compliance with data protection regulations. Users should review and customize privacy settings to control what data is collected and shared. Avoid using default passwords and ensure all connected devices have strong, unique credentials. Enable data encryption for both local and cloud-based storage to safeguard sensitive information. Refer to the official user manual for detailed guidance on configuring privacy settings and securing your system. By adhering to these practices, you can maintain the confidentiality and integrity of your data while using the Distech Controls Thermostat.

Resources and Support

Distech Controls offers extensive resources, including official manuals, online support forums, and dedicated customer service. Visit their website for documentation, troubleshooting guides, and technical assistance to ensure optimal thermostat performance.

8.1 Official Documentation and Manuals

Distech Controls provides comprehensive official documentation and manuals to ensure seamless installation, operation, and maintenance of their thermostats. These resources are available on their website and documentation portal, offering detailed guides for various models, including ECY-STAT and LC-3. Users can access user manuals, installation guides, and technical specifications in PDF format. The manuals cover topics such as touchscreen interface navigation, connectivity options, and advanced features like scheduling and smart sensors. Additionally, specific guides like the ECY-STAT configuration interface and psychrometric controls setup are available. These documents are regularly updated to reflect the latest features and ensure compliance with industry standards. By referencing these official materials, users can maximize the functionality and efficiency of their Distech Controls Thermostat.

8.2 Online Support and Forums

Distech Controls offers robust online support and active forums to assist users with their thermostat-related queries. These platforms provide a wealth of knowledge, including troubleshooting tips, installation advice, and best practices for optimizing thermostat performance. Users can engage with experts and peers, sharing experiences and solutions. The forums are particularly useful for addressing common issues, such as connectivity problems or software updates. Additionally, the online support portal hosts a variety of resources, including FAQs, video tutorials, and community discussions. This collective knowledge base empowers users to resolve issues independently and stay informed about the latest features and updates, ensuring a smooth and efficient experience with their Distech Controls Thermostat.

8.3 Customer Service and Technical Assistance

Distech Controls provides exceptional customer service and technical assistance to ensure seamless operation of their thermostats. Their dedicated support team is available to address queries via phone, email, or live chat, offering expert guidance for installation, configuration, and troubleshooting. For technical issues, users can access a comprehensive suite of resources, including detailed FAQs, troubleshooting guides, and step-by-step repair instructions. Additionally, Distech Controls offers on-site technical support for complex problems, ensuring minimal downtime. The company prioritizes user satisfaction, delivering timely and effective solutions to maintain optimal system performance. With a focus on customer-centric service, Distech Controls equips users with the tools and support needed to maximize their thermostat’s functionality and efficiency.

mary kay foundation conversion chart 2023 pdf

The Mary Kay Foundation Conversion Chart 2023 is a comprehensive guide designed to help users match their skin tone with the perfect foundation shade․ It simplifies the process of finding your ideal match, offering customization options for a flawless look․ Updated for 2023, this chart is essential for both new and experienced users seeking to enhance their beauty routine with precise foundation choices․

1․1 What Is the Mary Kay Foundation Conversion Chart?

The Mary Kay Foundation Conversion Chart 2023 is a detailed guide created to assist users in selecting the most suitable foundation shade and product for their skin tone and preferences․ It provides a structured comparison of various foundation options, including Mineral Powder Foundation, TimeWise Foundation, and CC Cream, among others․ The chart is designed to simplify the process of finding a perfect match by categorizing shades based on undertones, skin type, and desired finish․ Available as a downloadable PDF, it consolidates information from Mary Kay InTouch and expert sources, offering a user-friendly tool for both newcomers and experienced users․ This resource ensures that individuals can effortlessly navigate the expansive range of Mary Kay foundation products, making it easier to achieve a customized and flawless look tailored to their unique needs․

1․2 Importance of Using the Conversion Chart

Using the Mary Kay Foundation Conversion Chart 2023 is essential for achieving a flawless foundation match tailored to your skin tone and preferences․ It saves time by eliminating guesswork, ensuring you select the most suitable shade and product for your needs․ The chart helps users understand their undertones, skin type, and desired finish, guiding them to the perfect foundation․ This tool is particularly valuable for those exploring Mary Kay’s extensive product range, as it simplifies the selection process․ By providing a clear and organized comparison of shades and formulas, the chart enhances your makeup routine, guaranteeing a smooth and natural base․ Its availability as a downloadable PDF makes it easily accessible, allowing you to reference it anytime for consistent and personalized results․ This resource is a must-have for anyone seeking precision and confidence in their beauty choices․

1․3 How to Use the Conversion Chart Effectively

To effectively use the Mary Kay Foundation Conversion Chart 2023, start by identifying your skin tone and undertones—cool, warm, or neutral․ This can be done by observing vein color or jewelry reactions․ Next, download the PDF chart and familiarize yourself with its layout, which may include text or images to guide shade selection․ Consider your skin type and desired finish, such as oil-control for oily skin or sheer coverage for a natural look․ Explore the chart’s sections for different product lines like Mineral Powder, TimeWise, and CC Cream, comparing them to find the best match for your needs․ The chart may also offer guidance on layering products or combining them for optimal results․ Check for new formulations or shades introduced in 2023 and use the chart to transition between products seamlessly․ If needed, refer to troubleshooting tips for shade adjustments, such as mixing or application techniques․ Utilize digital features like zooming or hyperlinks for detailed information․ Additionally, look for video tutorials or official guides from Mary Kay to enhance your understanding․ By following these steps, you can consistently find your perfect foundation match and enjoy personalized recommendations from consultants, ensuring an effortless and confident beauty routine․

Benefits of the Mary Kay Foundation Conversion Chart 2023

The chart offers personalized foundation matching, catering to diverse skin tones and preferences․ It simplifies shade selection, ensuring a seamless match for a natural, flawless look tailored to individual needs and trends․

2․1 Customized Foundation Matching

Customized foundation matching is at the heart of the Mary Kay Foundation Conversion Chart 2023․ This feature ensures that every individual can find a shade that perfectly complements their unique skin tone and undertones․ By providing a detailed guide, the chart helps users identify their ideal match, whether they prefer a light, medium, or full-coverage finish․ The chart also considers factors like skin type, ensuring that the foundation not only matches in color but also suits the user’s skin texture and needs․ This personalized approach eliminates guesswork, making it easier to achieve a natural, flawless look․ With options catering to various preferences, the chart is a valuable tool for anyone seeking a tailored foundation experience․

2․2 Skin Tone and Undertone Considerations

The Mary Kay Foundation Conversion Chart 2023 places a strong emphasis on skin tone and undertone considerations, ensuring that users can accurately determine their perfect foundation match․ The chart categorizes shades based on cool, neutral, and warm undertones, helping individuals identify their natural skin undertones․ This detailed approach allows for a more precise foundation selection, as it accounts for the subtle differences in skin pigmentation․ By addressing both skin tone and undertone, the chart eliminates the guesswork often associated with foundation matching․ Additionally, it provides visual guides to help users understand how their undertones influence their foundation choice․ This focus on undertones ensures that the foundation blends seamlessly with the skin, creating a natural and radiant appearance․ The chart’s attention to these details makes it an invaluable resource for achieving a flawless, personalized look․

2․3 Expanded Product Range and Options

The Mary Kay Foundation Conversion Chart 2023 highlights an expanded product range, offering a diverse selection of foundation options to cater to various skin types and preferences․ This includes popular lines like Mineral Powder Foundation, TimeWise Foundation, and CC Creams, each providing unique benefits and finishes․ The chart allows users to explore these products side by side, making it easier to transition between formulations or find the best match for their needs․ With an emphasis on inclusivity, the range now includes more shades and finishes, ensuring that individuals with different skin tones and undertones can find a product that suits them perfectly․ This expansion underscores Mary Kay’s commitment to providing versatile and high-quality foundation options for every user, making the chart an essential tool for discovering the ideal foundation․ The detailed product comparisons within the chart further enhance the user experience, offering clarity and convenience for all beauty enthusiasts․

Types of Mary Kay Foundation Conversion Charts

The Mary Kay Foundation Conversion Chart 2023 includes Mineral Powder Foundation, TimeWise Foundation, and CC Cream and Tinted Moisturizer charts, each catering to different skin types and preferences for a personalized match․

3․1 Mineral Powder Foundation Conversion Chart

The Mineral Powder Foundation Conversion Chart is a detailed guide within the 2023 collection, designed to help users find their perfect match among Mary Kay’s mineral powder foundations․ It offers a wide range of shades, catering to various skin tones and undertones․ This chart is particularly useful for those who prefer a lightweight, natural finish and buildable coverage․ By cross-referencing skin tone, undertone, and finish preferences, users can easily identify their ideal shade․ The chart also provides guidance for transitioning between different mineral powder products or finishes, ensuring a seamless switch․ Its user-friendly format makes it accessible for both beginners and experienced makeup enthusiasts․ This resource is especially popular among makeup artists and consultants for its precision and versatility in achieving a natural, flawless look․

3․2 TimeWise Foundation Conversion Chart

The TimeWise Foundation Conversion Chart is a specialized tool within the 2023 Mary Kay collection, tailored for users of the TimeWise foundation line․ This chart is designed to help individuals find their ideal shade match while benefiting from the anti-aging and skin-smoothing properties of TimeWise products․ It provides a seamless transition between different TimeWise formulas, ensuring consistent coverage and finish․ Whether switching from liquid to crème-to-powder or exploring different undertones, the chart offers precise guidance․ Its detailed shade mapping is particularly useful for those seeking long-lasting, youthful-looking results․ Consultants and customers alike appreciate its clarity and effectiveness in achieving a flawless, age-defying complexion․ This chart is a must-have resource for anyone dedicated to maintaining a radiant and youthful appearance with TimeWise foundations․

3․3 CC Cream and Tinted Moisturizer Conversion Chart

The CC Cream and Tinted Moisturizer Conversion Chart is a unique feature of the 2023 Mary Kay Foundation Conversion Chart, catering to those who prefer lighter coverage․ This chart helps users transition seamlessly from foundation to CC creams or tinted moisturizers, ensuring a natural, effortless look․ It highlights how different shades translate across products, providing options for varying skin tones and undertones․ Perfect for everyday use, it allows individuals to maintain their preferred level of coverage while enjoying the benefits of multi-functional skincare-infused products․ The chart is particularly useful for achieving a “no-makeup” makeup look, offering versatility and convenience for users who value both simplicity and radiance․

Customization and Skin Tone Matching

This section guides users through personalized foundation selection by analyzing skin tones and undertones, ensuring optimal coverage and a natural finish tailored to individual preferences․

4․1 Understanding Your Undertones

Understanding your skin’s undertones is crucial for selecting the right foundation․ Undertones can be cool, neutral, or warm, and they influence how foundation shades appear on your skin․ Cool undertones tend to have a pink or rosy hue, while warm undertones lean toward golden or yellow․ Neutral undertones are a balanced mix of both․ Identifying your undertones helps in choosing a foundation that complements your natural skin color, ensuring a seamless and natural-looking finish․ To determine your undertones, observe the color of the veins on the inside of your wrist in natural light․ If they appear blue or purple, you likely have cool undertones․ Green veins suggest neutral undertones, while warm undertones are indicated by yellow or golden veins․ This insight is essential for achieving a perfect foundation match using the Mary Kay Foundation Conversion Chart 2023․

4․2 Skin Type and Finish Preferences

Your skin type and desired finish play a significant role in selecting the perfect foundation․ The Mary Kay Foundation Conversion Chart 2023 caters to various skin types, including oily, dry, combination, and sensitive․ For oily skin, look for matte or oil-control finishes to minimize shine․ Dry skin benefits from hydrating or dewy finishes for a radiant appearance․ Combination skin may require a balanced formula that controls shine in certain areas while moisturizing others․ Sensitive skin often needs hypoallergenic or fragrance-free options to avoid irritation․ Understanding your skin type and finish preferences helps narrow down the options, ensuring the foundation not only matches your tone but also addresses your skin’s specific needs․ This tailored approach enhances comfort and longevity, providing a natural and polished look tailored to your unique skin profile․

4․3 Achieving the Perfect Match

Achieving the perfect match with the Mary Kay Foundation Conversion Chart 2023 involves a combination of understanding your undertones, skin type, and personal preferences․ Start by testing foundation shades on your jawline in natural light to ensure seamless blending․ Consider your undertones—cool, neutral, or warm—to narrow down options․ If you’re still unsure, the chart offers cross-references between different product lines, helping you find a shade that aligns with your skin tone and desired finish․ Blending is key; apply the foundation evenly and set it with powder for longevity․ The chart also accounts for seasonal changes, allowing you to adjust your shade as your skin tone shifts․ By following these steps, you can achieve a flawless, customized look that enhances your natural beauty without appearing cakey or mismatched․

Digital Tools and Resources for the Conversion Chart

The 2023 Mary Kay Foundation Conversion Chart is available as a downloadable PDF, offering easy access to shade matching․ Online editors and mobile apps further enhance the digital experience, ensuring precise foundation matches and personalized recommendations for a flawless look․

5․1 Downloading the 2023 PDF Chart

The Mary Kay Foundation Conversion Chart 2023 is readily available as a downloadable PDF, ensuring easy access to foundation shade matching․ Users can download the chart directly from the official Mary Kay website or through authorized distributors․ The PDF format allows for seamless printing, making it a practical tool for offline use․ Additionally, the chart can be shared digitally with friends or consultants for second opinions․ Once downloaded, the chart provides a detailed guide to comparing foundation shades, including notes on undertones and finish preferences․ This resource is particularly useful for those who prefer a hands-on approach to finding their perfect match․ By downloading the 2023 PDF chart, users can streamline their foundation selection process and achieve a personalized beauty routine with ease․

5․2 Using Online Editors for the Chart

For enhanced convenience, the Mary Kay Foundation Conversion Chart 2023 can be edited using online tools, allowing users to fill out and modify the chart digitally․ Platforms like pdfFiller offer robust editing features, enabling users to input their preferences, mark favorite shades, and even share the chart with consultants or friends for feedback․ These editors support digital signatures, ensuring that any annotations or selections are securely saved․ Additionally, many online editors integrate with cloud storage services, making it easy to access and manage the chart from any device․ This digital approach streamlines the process of finding the perfect foundation match, offering a modern and efficient alternative to traditional printed charts․ By utilizing online editors, users can save time and maintain their beauty routine effortlessly, all while enjoying the flexibility of digital tools․

5․3 Mobile Apps for Foundation Matching

Mobile apps have revolutionized the way users interact with the Mary Kay Foundation Conversion Chart 2023, offering convenient tools for foundation matching․ These apps provide virtual try-on features, allowing users to see how different shades look on their skin tone without physical testing․ Advanced shade-matching technologies within the apps analyze skin undertones and recommend the most suitable foundation options․ Additionally, apps enable users to save their preferences, track their beauty routine, and even share results with consultants or friends for feedback․ This digital innovation makes finding the perfect match effortless and accessible on-the-go, ensuring a personalized beauty experience tailored to individual needs․ By leveraging mobile technology, Mary Kay enhances the foundation selection process, making it user-friendly and modern for today’s beauty enthusiasts․

Comparing Mary Kay Foundation to Other Brands

Mary Kay Foundation stands out for its wide shade range and customizable options, offering precise matches for diverse skin tones․ Unlike some brands, it emphasizes undertone accuracy and finish variety, catering to individual preferences․ The conversion chart helps users transition seamlessly from other brands, ensuring consistency and satisfaction․ With a focus on quality and inclusivity, Mary Kay remains a top choice for those seeking flawless coverage and long-lasting wear․

6․1 Cross-Brand Shade Comparisons

The Mary Kay Foundation Conversion Chart 2023 simplifies cross-brand shade comparisons, enabling users to find equivalent shades across different brands like MAC, Estee Lauder, and more․ This tool is particularly useful for those transitioning from other brands, as it ensures a seamless switch without compromising on color accuracy․ By aligning shades based on undertones and finish, the chart helps users maintain their desired look while exploring Mary Kay’s product range․ For instance, if a user typically wears a specific MAC Pro Longwear foundation shade, the chart provides a corresponding Mary Kay shade, ensuring consistency in coverage and tone․ This feature makes the chart a valuable resource for beauty enthusiasts and professionals alike, fostering confidence in their foundation choices․

6․2 Formula and Finish Differences

Mary Kay foundations are known for their unique formulas and finishes, which set them apart from other brands․ The chart highlights how these differences cater to various skin types and preferences․ For instance, Mary Kay’s TimeWise foundation offers a lightweight, age-fighting formula, while their Mineral Powder Foundation provides a natural, buildable coverage․ Unlike some brands, Mary Kay emphasizes skin benefits, such as hydration and UV protection, making their products versatile for everyday use․ The finish options range from matte to radiant, ensuring users can achieve their desired look․ These distinctions help consumers make informed decisions based on their skin concerns and aesthetic goals, showcasing Mary Kay’s commitment to quality and customization․ By comparing formulas and finishes, users can better understand what sets Mary Kay apart in the competitive beauty market․

6․3 Cost and Value Analysis

Mary Kay foundations are competitively priced, offering exceptional value for their quality and performance․ The 2023 conversion chart helps users compare costs across different product lines, such as TimeWise and Mineral Powder Foundation․ While prices may vary slightly by region, Mary Kay generally offers mid-range to premium options, ensuring affordability without compromising on formula or finish․ Compared to other luxury brands, Mary Kay often provides larger product sizes or additional skin benefits, making it a cost-effective choice․ The chart emphasizes the value of investing in a foundation that not only enhances appearance but also cares for the skin․ This focus on quality and longevity makes Mary Kay a preferred option for many, balancing budget-friendliness with high-end results․ Users can use the chart to evaluate their spending and ensure they’re getting the best value for their needs․

Troubleshooting Common Issues

This section helps resolve issues like inconsistent application, finish mismatch, and product texture problems, ensuring a seamless experience with the Mary Kay foundation conversion chart easily․

7․1 Shade Discrepancies and Adjustments

Shade discrepancies can occur due to lighting differences, skin tone changes, or formula variations․ To address this, test foundation shades on your jawline in natural light․ If your shade appears too light or dark, adjust by mixing nearby shades or layering products․ Undertones play a crucial role; cool tones may need pink-based shades, while warm tones suit yellow-based ones․ For seasonal adjustments, switch to lighter shades in winter and deeper tones in summer․ If oxidation occurs, opt for a shade with a slightly lighter base tone․ Customization is key, ensuring a seamless match for a natural look․ Always consult the Mary Kay Foundation Conversion Chart 2023 for guidance and achievable results․ Proper adjustments enhance your complexion, providing confidence and a flawless finish․

7․2 Color Oxidation and Correction

Color oxidation refers to the phenomenon where foundation changes shade after application, often darkening or developing an unwanted tone․ This occurs due to the interaction between the formula and skin chemistry․ To correct oxidation, choose foundation shades with lighter base tones, as they are less prone to darkening․ Opting for oil-free or matte formulas can also minimize oxidation․ Applying a primer creates a barrier, reducing the risk of color change․ If oxidation occurs, blend a lighter shade over the affected area or set with translucent powder to neutralize the tone․ Consulting the Mary Kay Foundation Conversion Chart 2023 helps identify the right shade to combat oxidation effectively․ By understanding and addressing this issue, users can achieve a consistent, long-lasting foundation application tailored to their skin type and tone․

7․3 Seasonal Skin Changes and Updates

Seasonal skin changes can significantly impact your foundation match, requiring adjustments to maintain a flawless look․ During colder months, skin may lighten and become drier, while warmer weather can darken skin tone and increase oil production․ The Mary Kay Foundation Conversion Chart 2023 helps users adapt by identifying complementary shades for their evolving skin tone and type․ For instance, switching to a lighter, hydrating formula in winter or a matte, oil-control option in summer ensures optimal coverage; Regularly updating your foundation choice based on seasonal shifts prevents mismatched tones and addresses texture concerns․ By referencing the chart, users can seamlessly transition their beauty routine, ensuring their foundation remains perfectly suited to their skin’s needs throughout the year; This adaptability guarantees a polished, natural appearance regardless of seasonal changes․

Future Trends in Foundation Matching Technology

AI-driven virtual try-ons and personalized shade recommendations are revolutionizing foundation matching․ Advanced tools analyze skin tone and undertones for precise matches, offering a futuristic approach to beauty customization and inclusivity․

8․1 AI and Virtual Try-On Tools

AI and virtual try-on tools are transforming the beauty industry by offering personalized foundation matching experiences․ These technologies use facial analysis to detect skin tone, undertones, and texture, providing accurate shade recommendations․ Virtual try-ons allow users to see how different foundations look on their skin without physical application, enhancing the shopping experience․ Advanced algorithms learn from user preferences, improving suggestions over time․ This innovation ensures inclusivity, catering to diverse skin types and tones․ By integrating AI, the process becomes more efficient and precise, making it easier for users to find their perfect match․ This trend is expected to dominate the future of beauty, offering a seamless and engaging way to discover the ideal foundation shade․ The combination of AI and virtual try-ons is redefining how consumers interact with beauty products, making the process more intuitive and enjoyable․

8․2 Sustainable and Inclusive Formulations

The beauty industry is increasingly prioritizing sustainable and inclusive formulations, and Mary Kay is at the forefront of this movement․ By incorporating eco-friendly packaging and cruelty-free testing, Mary Kay ensures its products align with ethical consumer demands․ The brand also focuses on creating inclusive shade ranges that cater to diverse skin tones and types, reflecting its commitment to global beauty standards․ Sustainable formulations emphasize the use of high-quality, plant-based ingredients that promote skin health while minimizing environmental impact․ This approach not only resonates with environmentally conscious consumers but also ensures that everyone can find a foundation that matches their unique needs․ By blending innovation with inclusivity, Mary Kay continues to set a benchmark for sustainable and ethical beauty practices, making it a preferred choice for discerning users worldwide․

8․3 Expanding Shade Ranges for Diversity

Mary Kay has made significant strides in expanding its foundation shade range to cater to diverse skin tones and undertones․ Recognizing the importance of inclusivity, the brand continuously updates its offerings to ensure every individual can find their perfect match․ This expansion is reflected in the 2023 Foundation Conversion Chart, which now includes a broader spectrum of shades․ By addressing the needs of global consumers, Mary Kay promotes beauty for all, regardless of skin color or type․ The enhanced range not only boosts customer satisfaction but also sets a new standard in the cosmetics industry․ This commitment to diversity underscores Mary Kay’s mission to empower women worldwide, ensuring everyone feels confident and beautiful in their own skin․

lynn trash schedule 2024 pdf

The 2024 Lynn Trash Schedule provides essential details on waste collection, recycling, and bulk pickup, ensuring residents can maintain a clean and organized community effectively.

Overview of the 2024-2025 Trash and Recycling Schedule

The 2024-2025 Lynn Trash and Recycling Schedule outlines the city’s waste management plan, detailing collection dates, recycling guidelines, and bulk pickup procedures. Residents can access this information via mailed calendars or online resources. The schedule includes regular trash and recyclable pickups, holiday adjustments, and special collection programs for yard waste and bulk items. It also provides contact details for services like bin repairs and additional container rentals. This comprehensive guide helps residents stay informed and contribute to maintaining Lynn’s cleanliness and sustainability throughout the year.

Importance of the Lynn Trash Schedule PDF

The Lynn Trash Schedule PDF is a vital resource for residents, providing a clear and accessible guide to waste management. It ensures residents stay informed about collection dates, recycling guidelines, and special programs. By referencing the PDF, residents can avoid missed pickups and maintain compliance with city regulations. The document is easily downloadable and serves as a quick reference for scheduling bulky item pickups or understanding disposal rules. This resource is essential for keeping the community clean and promoting sustainable waste practices throughout the year.

Regular Trash Collection Schedule

Trash and recyclables must be placed curbside by 7 a.m. on collection days, no earlier than 5 p.m. the previous day. Collection occurs weekly, with schedules adjusted during holidays.

Placement Guidelines for Trash and Recyclables

Trash and recyclables must be placed curbside by 7 a.m. on collection days, no earlier than 5 p.m. the previous day. Use designated bins with lids secure. Overflow trash requires purple bags from approved vendors. Recyclables should be loose in bins, not bagged. Needles must be in rigid containers and returned to City Hall. Yard waste is collected on specific weeks and can be dropped off Saturdays at designated locations. Ensure items are properly prepared to avoid missed pickups and maintain community cleanliness.

Frequency of Trash pickup in Lynn

Trash pickup in Lynn occurs weekly on assigned days, with schedules varying by neighborhood. Regular collection ensures consistent waste removal. Holidays may alter pickup times, with adjustments noted in the 2024 schedule. Residents can access the full calendar online or via mailed copies to stay informed. Proper scheduling helps maintain cleanliness and efficiency in the community.

Recycling Collection Details

Recycling in Lynn is collected weekly on designated days, focusing on materials like paper, plastic, and glass. Proper preparation ensures efficient processing and supports sustainability goals.

Materials Accepted for Recycling

Lynn’s recycling program accepts paper, cardboard, glass, plastic bottles, and cans. Residents are encouraged to rinse containers and remove lids. Proper sorting ensures materials are processed efficiently. The 2024 Lynn Trash Schedule PDF provides a detailed list of acceptable items, promoting sustainability and reducing landfill waste. By participating, residents contribute to a cleaner environment and support eco-friendly practices. Always refer to the official guidelines to ensure compliance and maximize the effectiveness of recycling efforts throughout the community.

Preparation Tips for Recyclables

Prepare recyclables by rinsing food and liquid residues from containers. Remove lids, labels, and caps, as they may not be recyclable. Flatten cardboard and paper products to save space. Bundle newspapers, magazines, and cardboard separately for efficient collection. Avoid mixing recyclables with trash or non-recyclable items. Check the 2024 Lynn Trash Schedule PDF for specific guidelines on preparing materials like glass, plastic, and metal. Proper preparation ensures materials are processed correctly, contributing to a successful recycling program and a cleaner community.

Bulk Item Pickup

Bulk items require advance scheduling with Capitol Waste Services at 1-855-533-3400. Ensure items comply with city guidelines to avoid disposal issues.

Process for Scheduling Bulky Item Collection

To schedule bulky item pickup, residents must contact Capitol Waste Services at 1-855-533-3400. Provide details about the items and their quantities for proper arrangement. A specific pickup date will be assigned, ensuring adherence to city regulations. Items must be placed curbside on the designated day, following all preparation guidelines. This streamlined process helps maintain efficient waste management and keeps Lynn’s neighborhoods clean. Proper scheduling is essential to avoid missed collections or non-compliance with disposal rules.

Restrictions on Bulk Waste Disposal

Bulk waste disposal in Lynn has specific restrictions to ensure efficient collection and environmental safety. Items must not be placed on the ground and must follow guidelines to avoid contamination. Certain materials, such as loose needles, require rigid containers and must be returned to City Hall. Prohibited items cannot be mixed with regular trash or recyclables. Residents must adhere to these rules to prevent collection issues and maintain community standards. Non-compliance may result in items not being collected, ensuring Lynn remains clean and environmentally responsible;

Holiday Adjustments

Holidays like New Year’s, Christmas, and Thanksgiving impact trash collection schedules, requiring residents to check the 2024 Lynn Trash Schedule PDF for specific adjustments and arrangements.

Holidays Impacting Trash Collection

Holidays such as New Year’s Day, Christmas Day, and Thanksgiving Day impact trash collection schedules in Lynn. Collections are typically delayed or suspended on these days, with makeup days scheduled as needed. Residents should refer to the 2024 Lynn Trash Schedule PDF for specific holiday adjustments, ensuring they place trash and recyclables out on the correct dates. The schedule outlines how holidays affect regular pickup times, helping residents avoid missed collections. By checking the PDF, residents can stay informed and maintain proper waste management during holiday periods.

Special Collection Arrangements During Holidays

During holidays like Thanksgiving Day (11/28/2024), Lynn trash collection adjusts to ensure uninterrupted service. Residents can schedule bulk item pickups by contacting Capitol Waste Services at 1-855-533-3400. Special arrangements are in place to accommodate holiday waste, with detailed schedules available in the 2024-2025 Trash and Recycling Schedule PDF. This document provides clear guidelines for holiday collections, ensuring residents stay informed and maintain proper waste disposal practices throughout the year.

Additional Disposal Options

Residents can dispose of yard waste and leaves on designated Saturdays from April to December. Hazardous waste requires special handling, with needles needing rigid containers for safe disposal.

Yard Waste and Leaf Collection

Yard waste and leaves are collected on specific Saturdays from April to December. Residents can drop off these items between 7:30 a.m. and 2:30 p.m. Additionally, curbside pickup is available on designated weeks, ensuring proper disposal and helping maintain community cleanliness. This service is part of Lynn’s commitment to efficient waste management, making it easier for residents to keep their properties tidy throughout the year. Proper scheduling and adherence to guidelines are essential for smooth collection processes.

Hazardous Waste Disposal Guidelines

Hazardous waste, such as batteries, electronics, and chemicals, requires special disposal. Residents must not place these items in regular trash or recyclables. Needles and sharps must be in rigid containers and returned to City Hall. Proper disposal of hazardous materials is crucial to protect the environment and public health. The city provides specific drop-off locations and guidelines to ensure safe handling. Residents are encouraged to check the Lynn trash schedule PDF for detailed instructions and designated collection events for hazardous waste, ensuring compliance with local regulations and safety standards.

Accessing the 2024 Trash Schedule PDF

Residents can download the 2024 Lynn Trash Schedule PDF from the official city website or request a mailed copy for easy reference and planning.

Downloading the Schedule from Official Sources

The 2024 Lynn Trash Schedule PDF is available for download on the City of Lynn’s official website. Residents can visit the Department of Public Works (DPW) section, where the schedule is posted as a downloadable PDF. The document includes detailed collection dates, recycling guidelines, and holiday adjustments. Additionally, the PDF is formatted for easy printing, allowing residents to keep a physical copy for quick reference. For convenience, the schedule is also accessible via the city’s waste management portal, ensuring everyone stays informed about trash and recycling collections throughout the year.

Key Features of the 2024-2025 PDF Document

The 2024-2025 Lynn Trash Schedule PDF is a comprehensive guide detailing collection dates, recycling guidelines, and bulk pickup procedures. It includes a calendar view of trash and recyclable pickup days, holiday adjustments, and street sweeping schedules. The document also outlines acceptable materials for recycling, preparation tips, and restrictions on bulk waste disposal. Additionally, it provides contact information for the Department of Public Works (DPW) and details on maintenance fees, which cover trash removal, leaf collection, and other community services. The PDF is designed to be user-friendly and easily printable for residents’ convenience.

Community Resources

Residents can contact the Lynn DPW at 781-586-8015 for trash-related inquiries or visit lynnma.gov for downloadable resources and schedules.

Contact Information for Trash-Related Inquiries

For questions or concerns about trash collection, residents can contact the Lynn Department of Public Works (DPW) at 781-586-8015. Additional inquiries about bulky item pickups or bin repairs can be directed to Capitol Waste Services at 1-855-533-3400. The city also provides online resources, including downloadable schedules and guidelines, through the official website at lynnma.gov. Residents are encouraged to use these contacts to ensure proper waste management and stay informed about collection schedules and services.

Local Services for Waste Management Support

The City of Lynn offers various local services to support waste management. Residents can utilize the Department of Public Works (DPW) for bin repairs and replacements by contacting them at 781-586-8015. Additionally, Capitol Waste Services provides bulk item pickup scheduling at 1-855-533-3400. The city also hosts Trash & Recycling Bin Repair Days to assist residents with waste container maintenance. For yard waste, drop-off locations are available on Saturdays during specified periods. These services, along with online resources at lynnma.gov, ensure comprehensive waste management support for the community.

Street Sweeping and Leaf Collection

Street sweeping in Lynn occurs from late October to December and late April to May. Leaf collection is available at designated drop-off locations on Saturdays during specific periods. Residents can also place yard waste curbside on their regular trash days during designated weeks. For exact schedules, visit lynnma.gov.

Street Sweeping Schedule and Rules

Street sweeping in Lynn is conducted from late October to December and again from late April to May. Residents are required to move vehicles and avoid obstructing the sweepers. Proper placement of trash and recyclables is essential to ensure effective cleaning. The city enforces strict rules to maintain cleanliness and safety during these periods. For specific dates and detailed rules, residents can refer to the official city website or the 2024 Lynn Trash Schedule PDF. Adherence to these guidelines helps maintain community hygiene and infrastructure.

Leaf Collection Program Details

Lynn offers a structured leaf collection program, with designated curbside pickup weeks and drop-off options. Residents can place yard waste curbside on specific weeks, such as September 18, October 9, and December 4, 2023, and April 8, 2024. Additionally, drop-off services are available every Saturday at the DPW facility (250 Commercial Street) from 7:30 a.m. to 2:30 p.m. through December 16, 2023, and from April 6 to December 14, 2024. Leaves must be in paper bags or labeled barrels, and plastic bags are prohibited. For more details, refer to the 2024 Lynn Trash Schedule PDF at lynnma.gov.

Payment and Maintenance Fees

Maintenance fees cover trash removal, water, sewer, and common area upkeep. A single trash bill is mailed in July, with payments due August 1st and October 1st.

Trash Removal Fees and Payment Options

Residents in Lynn are responsible for paying trash removal fees, which are billed annually. A single trash bill is mailed in July, coinciding with the fiscal year 2025. Payments are due on August 1st and October 1st, offering flexibility for residents. The fees cover essential services like trash collection, recycling, and maintenance of common areas. Payment options include online transactions, check payments, or in-person submissions at City Hall. For questions or billing inquiries, residents can contact the Lynn Department of Public Works or refer to the 2024-2025 trash schedule PDF for detailed information.

Maintenance Services Covered by Fees

Maintenance fees in Lynn cover essential services such as water, sewer, and trash removal. These fees also fund leaf pickup, road repairs, and upkeep of common areas like bathhouses and swimming pools. The annual billing ensures consistent service delivery, benefiting all residents and supporting community needs for a clean environment.

gmg daniel boone manual

Welcome to the GMG Daniel Boone Manual! This guide provides comprehensive instructions for safe assembly, operation, and maintenance of your pellet grill․ Understand its features, troubleshooting, and optimal usage for delicious results․

Overview of the Daniel Boone Pellet Grill

The Daniel Boone Pellet Grill is a versatile and innovative cooking solution designed for outdoor enthusiasts․ It combines advanced pellet-grilling technology with user-friendly features, making it ideal for both beginners and experienced grillers․ The grill is equipped with a robust digital controller for precise temperature management and WiFi connectivity for remote monitoring․ Its durable construction ensures long-lasting performance, while the spacious cooking area accommodates various meal sizes․ The Daniel Boone model is part of the Green Mountain Grills lineup, known for delivering consistent results and enhanced flavor through the use of high-quality GMG pellets․ This grill is perfect for those seeking a reliable and high-performance grilling experience․

Key Components and Features

The Daniel Boone Pellet Grill features a digital controller for precise temperature adjustments, ensuring consistent cooking results․ It includes a WiFi connectivity option, allowing users to monitor and control the grill remotely via a smartphone app; The grill is equipped with a large cooking surface, ideal for accommodating multiple dishes․ Additional components include a heat shield, grease tray, and thermal sensor for efficient heat distribution and cleanup․ The construction is durable, with a heavy-duty steel build designed to withstand outdoor conditions․ These features, combined with GMG’s proprietary pellet technology, make the Daniel Boone a highly functional and efficient grilling solution for various cooking needs․

Safety Guidelines and Precautions

Always follow safety guidelines to ensure safe operation․ Keep the grill away from flammable materials and never leave it unattended while in use․ Proper setup and maintenance are crucial for preventing accidents and ensuring optimal performance․

Important Safety Information Before Initial Start-Up

Before using your GMG Daniel Boone grill, ensure all safety precautions are followed․ Always read the manual thoroughly and understand its contents․ Keep the grill at least 24 inches away from flammable materials․ Never operate the grill indoors or in enclosed spaces․ Ensure proper ventilation to avoid carbon monoxide buildup․ Avoid over-tightening any connections, as this may cause damage․ Always close all lids and doors before starting the grill․ Wear protective gloves and eyewear during assembly and operation․ Keep children and pets away from the grill while it is in use․ Follow all local fire safety regulations and guidelines․

Proper Placement and Clearance Requirements

Position your GMG Daniel Boone grill on a level, stable, and heat-resistant surface․ Maintain a minimum clearance of 24 inches from any flammable materials, such as wood, leaves, or overhangs․ Ensure the grill is at least 12 inches away from walls and 36 inches from windows and doors to prevent heat exposure․ Keep the area around the grill clear of obstacles for safe access․ Avoid placing the grill in enclosed spaces, such as garages or gazebos, to ensure proper ventilation․ Always follow local fire codes and manufacturer recommendations for placement and clearance to ensure safe and efficient operation of your pellet grill․

Essential Pre-Operation Checks

Before using your GMG Daniel Boone grill, perform a series of essential checks to ensure safe and efficient operation․ First, verify that all components are properly assembled and free from damage․ Check the pellet hopper for adequate fuel levels and ensure the auger is clear of obstructions․ Test the digital controller by turning it on and verifying the display functions correctly․ Inspect the chimney and vents for blockages to ensure proper airflow․ Confirm that the grease tray and heat shield are correctly positioned․ Finally, ensure all safety features, such as automatic shut-off, are functioning as intended․ These checks help prevent issues and ensure a seamless grilling experience․

Assembly and Installation

Begin by carefully unpacking and inventorying all parts․ Follow the step-by-step instructions for assembling the grill, ensuring proper alignment and secure fastening of components․ Position the heat shield and grease tray correctly for optimal performance and safety․ Refer to the manual for detailed guidance to avoid errors during assembly․

Unpacking and Inventory of Parts

Start by carefully unpacking the grill and all accessories from the box․ Inspect each component for damage or defects․ Inventory all parts, including the grill body, lid, shelves, heat shield, grease tray, and digital controller․ Ensure no items are missing by cross-referencing with the manual’s parts list․ Organize the components logically to avoid misplacement during assembly․ Pay special attention to small hardware like screws and bolts, as they are essential for securing the grill’s structure․ If any part is damaged or missing, contact customer support immediately․ A thorough inventory ensures a smooth assembly process and prevents delays․

Step-by-Step Assembly Instructions

Begin by assembling the base and attaching the wheels for mobility․ Next, install the pellet hopper and connect it to the grill body, ensuring a secure fit․ Attach the heat shield and grease tray according to the manual’s diagrams to direct heat and grease properly․ Mount the digital controller and connect the necessary wiring, following the provided instructions․ Finally, place the cooking grates and shelves, making sure they are level and secure․ Double-check all connections and tighten any loose bolts․ Refer to the manual for specific torque values to avoid over-tightening․ Proper assembly ensures safe and efficient operation of your Daniel Boone grill․

Positioning the Heat Shield and Grease Tray

Position the heat shield with the V-shaped bottom centered over the firepot to ensure even heat distribution․ Secure it firmly to prevent movement․ Place the grease tray with the half-moon cutout aligned to the left around the thermal sensor․ This setup directs grease away from the firepot, minimizing flare-ups․ Tighten all bolts to recommended torque specifications․ Proper positioning enhances performance, safety, and cleanup efficiency․ Follow manual guidelines for precise alignment and secure fastening to ensure optimal grill operation․

Operating the Daniel Boone Grill

Master the Daniel Boone Grill with a seamless start-up process, precise temperature control, and WiFi connectivity via the GMG app for remote monitoring and adjustments․

Start-Up and Initial Setup Process

Before starting, ensure all covers and doors are closed․ Power on the grill and follow the digital controller prompts for initial setup․ Perform a pre-fire check to verify proper component function․ Ensure the heat shield and grease tray are correctly positioned․ Set your desired temperature using the control panel or GMG app via WiFi․ Allow the grill to preheat for 10-15 minutes before adding pellets․ Monitor the temperature closely during the first use to ensure it stabilizes․ Always maintain proper clearance from flammable materials․ Refer to the manual for detailed instructions to ensure a safe and efficient start-up process․

Understanding the Digital Controller

The digital controller is the central command system of your GMG Daniel Boone grill, allowing precise temperature control and monitoring․ It features an intuitive interface with a clear LCD display, enabling easy navigation through settings like temperature, timers, and pellet levels․ The controller is WiFi-enabled, connecting to the GMG app for remote monitoring and adjustments․ During initial setup, familiarize yourself with the control panel, ensuring proper function of all buttons and displays․ Use the controller to set your desired cooking temperature, which the grill will automatically maintain․ Regularly check the pellet level indicator to ensure uninterrupted operation․ Proper use of the digital controller ensures consistent cooking results and enhances your grilling experience․

Temperature Control and Monitoring

Accurate temperature control is essential for optimal grilling performance․ The GMG Daniel Boone grill features a digital controller that allows you to set and maintain precise temperatures between 150°F and 500°F․ Monitor the temperature using the built-in LCD display or through the GMG app via WiFi connectivity․ The system automatically adjusts pellet feed to maintain your desired temperature, ensuring consistent heat distribution․ Regularly check the temperature sensors for accuracy and clean them as needed to prevent interference․ Proper monitoring ensures your grill operates efficiently, delivering perfect results for smoking, roasting, or searing․ Use the temperature probes for meat to achieve ideal internal temperatures, enhancing your grilling experience and ensuring food safety․

Key Features of the Daniel Boone Prime

The Daniel Boone Prime offers advanced features like WiFi connectivity, a digital temperature controller, and compatibility with GMG rubs and sauces for enhanced flavor profiles․

WiFi Connectivity and Smart Grill Technology

The Daniel Boone Prime features WiFi connectivity, enabling remote monitoring and control through the GMG app․ This smart technology allows users to adjust temperatures, monitor cooking progress, and receive notifications directly from their smartphones․ The system ensures precise temperature control, making it easier to achieve perfect grilling results․ Additionally, the app provides access to a library of recipes and guides, helping you optimize your grilling experience․ With this advanced feature, you can manage your grill from the comfort of your home, ensuring your meals are cooked to perfection every time․

Using GMG Rubs and Sauces for Enhanced Flavor

Enhance your grilling experience with GMG Rubs and Sauces, specifically designed to complement the Daniel Boone grill’s performance․ These products offer a variety of flavor profiles, from spicy to smoky, to elevate your dishes․ Apply rubs liberally to meats before cooking for a rich, savory crust, while sauces can be brushed on during or after grilling for a tangy, sweet finish․ Both are crafted to work seamlessly with the grill’s pellet-based cooking system, ensuring bold, consistent flavors․ Experiment with different combinations to create unique taste experiences that impress family and friends․ These accessories are perfect for unlocking the full potential of your Daniel Boone grill․

Advanced Grill Components and Accessories

The Daniel Boone grill features advanced components like WiFi connectivity for smart control and a digital controller for precise temperature management․ Accessories such as grill covers and replacement parts ensure longevity and optimal performance․ Optional add-ons like heat shields and grease trays enhance functionality, while GMG rubs and sauces elevate flavor profiles․ These components and accessories are designed to maximize your grilling experience, offering versatility and convenience․ Explore the range of optional accessories to customize your setup and enjoy unparalleled grilling results with your Daniel Boone pellet grill․

Maintenance and Upkeep

Regular cleaning and inspections are essential to keep your Daniel Boone grill performing optimally․ Clean the grill surfaces and components after each use, and store it properly during off-season․ Ensure all parts are in good condition to maintain longevity and safety․ Proper upkeep ensures consistent performance and flavorful results every time you grill․

Cleaning the Grill and Its Components

Cleaning your Daniel Boone grill regularly is crucial for maintaining its performance and longevity․ After each use, brush the grates with a wire brush to remove food residue․ Vacuum or wipe away ash and debris from the fire pot and heat deflector․ The grease tray should be emptied and washed with mild soap and water․ For tougher buildup, mix baking soda and water to create a paste, apply it to affected areas, and let it sit before scrubbing․ Always allow the grill to cool completely before cleaning․ Regular maintenance ensures optimal flavor and prevents damage․ Deep clean the grill periodically, especially during off-season storage, to keep it in prime condition․

Regular Maintenance for Optimal Performance

Regular maintenance is essential to ensure your Daniel Boone grill operates efficiently and lasts for years․ Check and clean the burn pot, heat deflector, and grease tray after each use to prevent residue buildup․ Lubricate moving parts like the auger and fans periodically to maintain smooth operation․ Inspect electrical components and connections for wear or damage․ Empty the ash and grease containers regularly to avoid overflow․ Always store the grill in a dry, covered area during off-season to protect it from rust and moisture․ Performing these tasks consistently will help maintain your grill’s performance, prevent malfunctions, and ensure consistent cooking results every time․

Storage and Protection During Off-Season

Proper storage and protection of your Daniel Boone grill during the off-season are crucial to maintain its condition and longevity․ Clean the grill thoroughly, removing all ash and grease residue․ Cover the grill with a high-quality, weather-resistant cover to protect it from moisture and debris․ Store it in a dry, well-ventilated area, such as a garage or shed, to prevent rust and corrosion․ Avoid leaving the grill exposed to direct sunlight or extreme weather conditions․ For added protection, apply a rust-inhibiting coating to metal surfaces․ Ensure the grill is completely cool before covering to prevent moisture buildup․ Regular inspection during storage can help address any issues promptly, ensuring your grill remains ready for the next grilling season․

Troubleshooting Common Issues

Troubleshooting your Daniel Boone grill involves identifying and resolving issues like temperature fluctuations, pellet jams, or connectivity problems․ Always refer to the manual for solutions․ Ensure proper pellet quality and clear any blockages․ Check electrical connections and WiFi settings․ Restart the grill if needed․ Regular maintenance, like cleaning sensors and verifying proper airflow, can prevent issues․ If problems persist, consult the warranty or contact GMG support for assistance․ Keep your grill functioning optimally with these simple steps․ Addressing issues promptly ensures consistent performance and delicious results every time․ Always follow safety guidelines when troubleshooting․

Identifying and Resolving Common Problems

Common issues with the Daniel Boone grill include pellet jams, temperature fluctuations, and connectivity problems․ Identify these by monitoring performance and error codes․ To resolve, ensure pellets are dry and free-flowing․ Clear blockages in the auger or firepot․ For temperature issues, check pellet quality and proper airflow․ Restart the grill if necessary․ Connectivity problems can be addressed by resetting WiFi settings or ensuring a stable network connection․ Regularly clean sensors and components to maintain accuracy․ Consult the manual or GMG support for advanced troubleshooting․ Always follow safety guidelines when resolving issues to ensure optimal grill performance and longevity․ Proper maintenance can prevent many common problems․

Warranty Information and Support

Your Daniel Boone grill is backed by a limited warranty covering defects in workmanship and materials for two years from the date of first retail purchase․ During this period, GMG will address manufacturing defects through repair or replacement․ For warranty claims or support, contact GMG directly via their official website or customer service email․ Ensure to register your grill and retain proof of purchase for warranty validation․ GMG also offers extensive online resources, including manuals and troubleshooting guides, to help resolve common issues․ Their support team is available to assist with technical queries, ensuring your grilling experience remains seamless and enjoyable․

Accessories and Replacement Parts

Discover essential accessories for your Daniel Boone grill, including covers, replacement parts, and cooking utensils․ Visit the official GMG website for authentic purchases and compatibility․

Optional Accessories for Enhanced Grilling

Enhance your grilling experience with optional accessories designed for the Daniel Boone grill․ A durable grill cover protects your investment from the elements, while premium cooking utensils like tongs, forks, and brushes ensure precise control․ Upgrade your flavor game with GMG rubs and sauces, specially crafted to complement your pellet-grilled dishes․ Additionally, explore the range of pellet varieties to experiment with unique smoke profiles․ For added convenience, consider a pellet hopper extension or a grill light for nighttime cooking․ These accessories are available on the official GMG website, ensuring compatibility and quality․ Elevate your grilling setup with these thoughtful enhancements for a superior cooking experience․

Shopping for Replacement Parts

Shopping for replacement parts for your Daniel Boone grill is straightforward, ensuring your grill remains in top condition․ Visit the official GMG website for authentic components, including burn pots, heat shields, and grease trays․ These parts are designed to fit seamlessly, maintaining optimal performance․ Additionally, explore pellet hoppers, digital controllers, and other accessories to upgrade or replace worn-out elements․ Always prioritize genuine GMG parts to guarantee quality and compatibility․ For convenience, downloadable PDF manuals guide you through identification and installation of specific components․ Keep your grill running efficiently by investing in reliable replacement parts tailored to your Daniel Boone model․

Thank you for following the Daniel Boone manual․ With proper care and use, your grill will deliver exceptional results․ Happy grilling and enjoy!

Final Tips for Getting the Most Out of Your Grill

To maximize your grilling experience with the Daniel Boone, ensure regular cleaning of the grill and components for optimal performance․ Always use GMG-branded pellets for consistent flavor and reliability․ Experiment with GMG Rubs and Sauces to enhance your dishes․ Maintain proper temperature control during cooking for evenly cooked meals․ Store the grill in a dry, protected area during off-season to prevent damage․ Refer to the manual for troubleshooting common issues and warranty details․ Explore new recipes and settings to fully utilize the grill’s capabilities․ By following these tips, you can enjoy years of delicious grilling with your Daniel Boone pellet grill․