iodine clock reaction experiment pdf

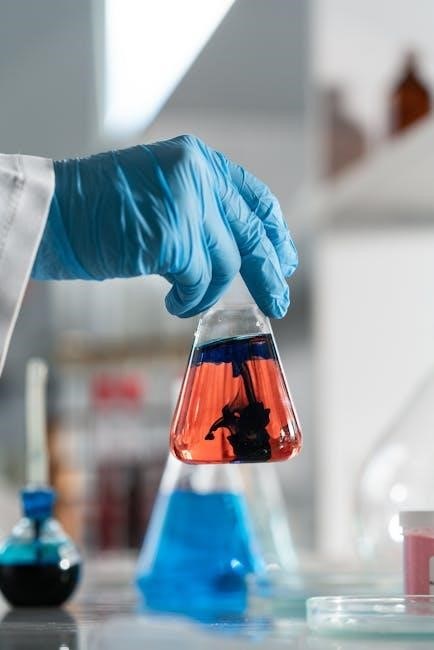
The iodine clock reaction is a classic chemistry experiment demonstrating reaction kinetics. It involves iodine, starch, and sodium thiosulfate, showcasing a visible color change from colorless to blue-black, illustrating reaction rates and chemical kinetics principles. This experiment is widely used in education to study reaction mechanisms and the factors influencing reaction speeds, such as concentration and temperature. It provides a practical approach to understanding kinetic concepts and the role of catalysts in chemical reactions.

Historical Background and Significance

The iodine clock reaction is a well-known experiment in chemistry education, first introduced to demonstrate reaction kinetics. It highlights the visible color change from colorless to blue-black when starch reacts with iodine, indicating the end of the reaction. This experiment has been widely used to teach students about reaction rates, the role of catalysts, and the factors influencing chemical kinetics. Its simplicity and dramatic visual outcome make it a cornerstone in chemistry curricula, helping students grasp complex concepts in an engaging and interactive way.

Purpose and Objectives of the Experiment

The primary purpose of the iodine clock reaction experiment is to investigate reaction kinetics by observing the time-dependent transformation of reactants to products. The experiment aims to determine the rate law and reaction order by measuring the time taken for the color change from colorless to blue-black, indicating iodine’s presence. Additionally, it explores factors affecting reaction rates, such as concentration, temperature, and catalysts. This hands-on activity helps students understand kinetic principles, data analysis, and the application of the Arrhenius equation in real-time chemical processes.

Chemical Principles Behind the Reaction

The iodine clock reaction involves a redox process where iodide ions are oxidized to iodine, which reacts with starch to form a blue-black complex. Sodium thiosulfate reduces iodine, stopping the reaction abruptly, creating a visible “clock” effect that demonstrates reaction kinetics and concentration-dependent rates.

Overview of the Iodine Clock Reaction Mechanism

The iodine clock reaction involves a redox process where iodide ions (I⁻) are oxidized to iodine (I₂) by an oxidizing agent, such as hydrogen peroxide or persulfate. The liberated iodine reacts with starch to form a blue-black complex, serving as a visual indicator. Sodium thiosulfate (Na₂S₂O₃) then reduces the iodine, halting the reaction abruptly. This sequence creates a ticking effect, allowing the study of reaction rates and the factors influencing them, such as concentration, temperature, and catalysts. The reaction’s timing and color change make it a practical tool for demonstrating kinetic principles.

Role of Iodine, Starch, and Sodium Thiosulfate

In the iodine clock reaction, iodine (I₂) acts as the central species whose production and consumption drive the reaction. Starch serves as an indicator, forming a blue-black complex with iodine, signaling its presence. Sodium thiosulfate (Na₂S₂O₃) functions as a reducing agent, reacting with iodine to halt the reaction abruptly. These components work together to create a visible and measurable reaction, allowing the study of reaction kinetics and the factors influencing them, such as concentration and temperature.

Materials and Equipment Needed

Iodine serves as a key reactant and indicator in the reaction, while starch acts as a visual indicator, forming a blue-black complex with iodine. Sodium thiosulfate reduces iodine, stopping the reaction abruptly. Together, these components enable the study of reaction kinetics and the factors influencing reaction rates.

Chemicals Required for the Experiment

The iodine clock reaction requires iodine tincture, sodium thiosulfate, potassium iodide, and starch solution. Hydrogen peroxide and vitamin C tablets are optional for variations. Distilled water is used for solution preparation. Acidic conditions may be achieved with dilute hydrochloric acid. Catalysts like ammonium ceric sulfate can be added to control reaction speeds. All chemicals should be handled with care, wearing gloves and goggles, and worked with in a well-ventilated area to ensure safety and precise reaction control.

Equipment and Safety Gear

Essential equipment includes measuring tools like graduated cylinders, beakers, and pipettes for precise solution preparation. Stir rods, thermometers, and timing devices are crucial for monitoring reactions. Safety gear such as gloves, goggles, and lab coats is mandatory to protect against chemical exposure. A well-ventilated workspace and spill trays are recommended for handling potentially hazardous substances. Additional items like paper towels and neutralizing agents should be on hand for emergencies. Proper safety protocols ensure a controlled and safe experimental environment for accurate and reliable results.

Preparation of Solutions and Reactants

Preparation involves mixing hydrogen peroxide with potassium iodide, starch, and sodium thiosulfate. Solutions are made using distilled water, ensuring precise measurements for consistent results.

Step-by-Step Solution Preparation

Start by preparing the starch solution: dissolve 1g of starch in 100ml of boiling water, stirring until clear. Next, prepare sodium thiosulfate by dissolving 4g in 100ml water. Mix 10ml of hydrogen peroxide with 10ml of potassium iodide solution. Add a few drops of starch solution to the iodide mixture. Finally, slowly add the sodium thiosulfate solution while observing the color change. Ensure all solutions are accurately measured and prepared to maintain consistent reaction conditions.

Measurement and Dilution Techniques

Accurate measurements are critical for precise reaction outcomes. Use volumetric flasks and pipettes to prepare solutions with exact concentrations. Dilute concentrated stocks by transferring measured volumes to larger flasks and topping up with distilled water. For example, dilute hydrogen peroxide by mixing 10ml with 90ml water to achieve a 10% solution. Record all measurements to ensure reproducibility. Proper dilution ensures consistent reaction rates, allowing for reliable data collection and analysis during the experiment.

Procedure for Conducting the Experiment

Mix hydrogen peroxide and potassium iodide solutions with starch in a beaker. Add sodium thiosulfate and swirl gently. Observe the color change from colorless to blue-black, timing the reaction. Use a stopwatch to record the time accurately. Repeat the process with varying concentrations of reactants to study rate changes. Ensure all steps are conducted in a well-lit, controlled environment to observe reactions clearly and consistently. This method allows for precise data collection and analysis of reaction kinetics.

Mixing Reactants and Observing the Reaction

Begin by combining hydrogen peroxide and potassium iodide solutions in a beaker. Add starch solution, stirring gently to mix. Introduce sodium thiosulfate, swirling the mixture to initiate the reaction. Observe the colorless solution turning blue-black as iodine reacts with starch. Record the exact time of the color change using a stopwatch. Repeat the process with varying concentrations to study reaction rates. Ensure consistent mixing and observation to gather accurate data. This step-by-step approach allows for precise analysis of reaction kinetics and chemical principles.

Timing and Recording the Reaction Progress

Start a stopwatch as soon as sodium thiosulfate is added to the mixture. Record the exact time when the solution transitions from colorless to blue-black. Repeat the experiment with varying concentrations of reactants, ensuring consistent timing and observation. Note the time intervals and concentrations accurately. This data helps determine the reaction rate and analyze how different factors influence the reaction’s speed. Consistent and precise timing is crucial for reliable results in studying the kinetics of the iodine clock reaction.

Safety Considerations and Precautions

Wear goggles, gloves, and lab coats to prevent skin and eye contact. Work in a well-ventilated area and handle chemicals cautiously. Ensure proper disposal of reactive substances and have a spill kit nearby. In case of exposure, flush with water and seek immediate assistance. Follow all safety protocols to minimize risks during the experiment.

Handling Chemicals Safely

When handling chemicals in the iodine clock reaction, wear protective gear like gloves, goggles, and a lab coat to avoid skin and eye exposure. Ensure all chemicals are measured accurately and diluted properly to prevent accidental concentration errors. Store reactive substances in labeled containers and keep them out of reach of children. Handle iodine and sodium thiosulfate with care, as they can cause irritation. Use glassware and utensils specifically designed for chemical experiments to minimize risks. Always follow the recommended safety protocols for each chemical involved.

Disposal and Emergency Procedures

Dispose of all chemical waste according to local regulations and guidelines. Neutralize spills of iodine or sodium thiosulfate with sodium thiosulfate solution before cleaning. Contain and absorb spills using paper towels or sand. Flush affected skin with water and rinse eyes thoroughly if exposed. In case of ingestion, seek immediate medical attention. Properly label and store leftover chemicals. Dispose of reaction mixtures and waste in designated containers to prevent environmental contamination. Ensure all disposal methods comply with safety and environmental standards to minimize hazards.

Observations and Results

The reaction progresses with a distinct color change from colorless to blue-black, indicating iodine formation. Timing the interval provides data to calculate the reaction rate accurately.

Visual Indicators of the Reaction Progress

The iodine clock reaction is characterized by a distinct color change, serving as a visual indicator of reaction progress. Initially, the solution is colorless due to the absence of free iodine. As the reaction proceeds, iodine is released and reacts with starch, forming a dark blue complex. This sudden and noticeable change from colorless to blue-black signifies the endpoint of the reaction. The timing of this color change allows for accurate measurement of the reaction rate, making it a clear and observable indicator of the reaction’s progression.

Recording and Analyzing Data

Accurate data recording is crucial in the iodine clock reaction. Time intervals between reactant mixing and the color change are measured to determine reaction rates. Data analysis involves calculating rate constants and plotting graphs to visualize trends. By comparing results under varying conditions, the rate law and reaction orders are determined. This process helps students understand kinetic principles and the factors influencing reaction speeds, providing hands-on experience in chemical kinetics and data interpretation.

Kinetic Analysis of the Reaction

Kinetic analysis involves determining the rate law and rate constant. The method of initial rates is used to calculate reaction orders and understand the reaction mechanism.

Determining the Rate Law and Rate Constant

Determining the rate law involves measuring reaction rates at varying concentrations. The rate constant (k) is calculated using the Arrhenius equation. Initial rates method helps identify reaction orders for each reactant, establishing the rate law. Temperature and catalysts significantly affect k, influencing reaction speed. Accurate measurements ensure reliable data for kinetic analysis, providing insights into the reaction mechanism and controlling factors. This step is crucial for understanding the iodine clock reaction dynamics and validating kinetic principles.

Calculating Reaction Orders

Reaction orders are determined by varying reactant concentrations while measuring initial rates. The method of initial rates helps identify how each reactant’s concentration affects the rate. By analyzing rate data, the reaction order for each reactant is calculated. The sum of these orders gives the overall reaction order. This step is crucial for understanding the reaction mechanism and how concentration changes influence the rate. External factors like temperature can also affect the rate constant, providing deeper insights into the reaction’s kinetic behavior and controlling factors.

Factors Affecting the Reaction Rate

The reaction rate is influenced by concentration, temperature, and catalysts. Increasing reactant concentration or temperature typically accelerates the reaction. Catalysts lower activation energy, enhancing reaction speed without being consumed.

Effect of Concentration on Reaction Rate

The concentration of reactants significantly influences the reaction rate. Higher concentrations increase the frequency of molecular collisions, accelerating the reaction. In the iodine clock experiment, varying the concentrations of iodide or persulfate ions demonstrates this effect. By measuring the time taken for the solution to change color, students can observe how concentration changes impact the reaction’s speed. This aligns with the rate law, where the reaction rate is proportional to the product of reactant concentrations. The method of initial rates is often used to quantify this relationship.

Influence of Temperature and Catalysts

Temperature significantly impacts reaction rates, as higher temperatures increase molecular energy, accelerating collisions. The iodine clock reaction demonstrates this through the Arrhenius equation, where rate constants rise with temperature. Catalysts, such as sodium thiosulfate, lower activation energy, speeding up the reaction without being consumed. By modifying temperatures or introducing catalysts, students can observe how these factors alter the reaction’s timing and color change. This provides practical insights into kinetic principles, enabling a deeper understanding of how external conditions influence chemical reactions in real-world scenarios.

Educational Applications and Extensions

The iodine clock reaction serves as an engaging, hands-on tool for teaching chemical kinetics and reaction rates. It encourages STEM integration and scientific inquiry among students.

Teaching Kinetics and Chemical Reactions

The iodine clock reaction is an effective tool for teaching kinetics, allowing students to observe and measure reaction rates. By varying concentrations and temperatures, students can explore how these factors influence reaction speeds. This hands-on approach helps students grasp key concepts such as the rate law, rate constants, and reaction orders. It also introduces the role of catalysts and the principles of the Arrhenius equation, making complex kinetic concepts more accessible and engaging for learners.

Integrating the Experiment into STEM Curricula

The iodine clock reaction is a valuable addition to STEM education, combining chemistry, physics, and mathematics. It aligns with curriculum standards by teaching kinetics, data analysis, and scientific inquiry. The experiment encourages critical thinking and problem-solving through hands-on activities. Its visual nature makes it engaging for students, while its simplicity allows for easy integration into lesson plans. It also promotes interdisciplinary learning, connecting chemical reactions to real-world applications and fostering a deeper understanding of scientific principles.

The iodine clock reaction is a valuable educational tool, illustrating key chemical principles and encouraging scientific inquiry. Its simplicity and visual appeal make it ideal for STEM education.

Significance of the Experiment in Chemistry Education

The iodine clock reaction is a cornerstone in chemistry education, offering a hands-on approach to understanding kinetics and reaction mechanisms. It simplifies complex concepts like reaction rates, catalysts, and concentration effects, making them accessible to students. The experiment’s visual appeal, with its dramatic color change, captivates learners and reinforces theoretical knowledge. By aligning with curriculum standards, it prepares students for advanced studies while fostering critical thinking and scientific inquiry. Its adaptability to various educational levels makes it a versatile tool for teaching chemistry principles effectively.

Real-World Applications of the Iodine Clock Reaction

Beyond education, the iodine clock reaction has practical applications in chemistry and industry. It demonstrates principles used in water treatment, where iodine is employed for disinfection. The reaction’s timing mechanism inspires research in controlled drug delivery systems. Additionally, it illustrates oxidation-reduction processes relevant to food preservation and pharmaceuticals. Understanding reaction kinetics from this experiment aids in optimizing industrial processes, highlighting its value beyond the classroom in advancing chemical technologies and solving real-world problems.

7 habits worksheets pdf

The 7 Habits Worksheets are practical tools designed to help individuals apply Stephen Covey’s framework for personal development․ These resources guide users in reflecting on habits, identifying areas for improvement, and creating actionable plans to foster growth․

1․1 Overview of the 7 Habits Framework

The 7 Habits Framework, introduced by Stephen Covey, is a holistic approach to personal effectiveness․ It emphasizes proactive behavior, beginning with the end in mind, and prioritizing tasks․ The habits include being proactive, starting with a clear vision, managing time effectively, fostering win-win relationships, seeking understanding, synergizing, and self-renewal․ These principles guide individuals in aligning their actions with personal values, enhancing relationships, and achieving long-term goals․ The framework is interconnected, with each habit building on the previous one to create a foundation for lasting personal and professional growth․ Worksheets based on this framework help users apply these habits practically․

1․2 Importance of Worksheets in Personal Development

Worksheets are essential tools for applying the 7 Habits framework, offering structured exercises to reflect on personal growth․ They help identify areas for improvement, set actionable goals, and track progress․ By providing a space for self-reflection, worksheets empower individuals to align their actions with personal values․ They also make abstract concepts actionable, enabling users to focus on physical, mental, social/emotional, and spiritual growth․ These resources are invaluable for anyone seeking to implement the 7 Habits effectively, fostering accountability and clarity in their personal development journey․ Regular use of worksheets accelerates habit formation and sustains long-term positive change․

Habit 1: Be Proactive

Habit 1 focuses on taking responsibility for your life and choices․ Worksheets help identify proactive behaviors, encouraging personal accountability and initiative to achieve goals effectively․

2․1 Understanding Proactive Behavior

Proactive behavior involves taking initiative and responsibility for one’s actions and outcomes․ It emphasizes self-awareness, choice, and accountability․ Worksheets for Habit 1 guide users in identifying reactive patterns and shifting focus to proactive approaches․ By examining personal paradigms and practicing self-reflection, individuals can cultivate a mindset that embraces responsibility and initiative․ This foundational shift enables individuals to move beyond mere reaction to purposeful action, aligning their efforts with personal and professional goals․ The exercises encourage users to recognize their circle of influence and focus on what they can control, fostering a proactive lifestyle․

2․2 Worksheet Activities for Taking Responsibility

Worksheets for Habit 1 include exercises that help individuals recognize and embrace responsibility․ Activities focus on identifying areas where proactive choices can replace reactive behavior․ Users are prompted to reflect on personal accountability, list specific responsibilities, and create action plans to address challenges․ One exercise involves writing a personal mission statement, while another asks users to evaluate their circle of influence and prioritize tasks within it․ These tools empower individuals to take ownership of their lives, fostering a mindset of accountability and initiative․ Practical steps guide users in applying proactive principles to real-life scenarios․

Habit 2: Begin with the End in Mind

This habit focuses on creating a clear vision for personal and professional life․ Worksheets guide users in defining a mission statement and aligning goals with core values․

3․1 Creating a Personal Vision Statement

A personal vision statement is a powerful tool for clarifying life’s purpose and goals․ Worksheets provide prompts to reflect on core values, long-term aspirations, and priorities․ Users are guided to draft a concise statement that serves as a roadmap for decision-making and personal growth․ This exercise helps individuals align daily actions with their overarching mission, fostering a sense of direction and purpose․ By defining a clear vision, one can better prioritize efforts and stay focused on what truly matters․ This step is foundational for effective goal-setting and habit development․

3․2 Setting Long-Term Goals Worksheet

The long-term goals worksheet helps individuals break down their vision into actionable objectives․ It guides users in identifying specific, measurable goals aligned with their personal mission․ By categorizing goals into life areas like career, relationships, and health, the worksheet ensures a balanced approach․ Users are prompted to set target dates and evaluate progress, fostering accountability․ This tool encourages prioritization and focus, ensuring efforts align with core values․ Regular reflection and adjustment are emphasized, making it easier to stay on track and achieve lasting success․ The worksheet is a cornerstone for translating vision into reality․

Habit 3: Put First Things First

This habit focuses on effective time management and prioritization․ It encourages individuals to schedule tasks based on importance and urgency, ensuring alignment with personal values․

4;1 Time Management and Prioritization

Time management and prioritization are cornerstone skills for effectiveness․ The 7 Habits framework emphasizes organizing tasks by importance and urgency․ By focusing on what truly matters, individuals can reduce stress and boost productivity․ Worksheets often include a prioritization matrix, helping users categorize activities into four quadrants: urgent and important, important but not urgent, urgent but not important, and neither․ This tool encourages aligning daily tasks with long-term goals, fostering a balanced and purpose-driven lifestyle․ Regular practice with these exercises helps develop disciplines that lead to greater control over time and energy․

4․2 Weekly Schedule Template for Effectiveness

The weekly schedule template is a powerful tool for organizing time and tasks․ It helps users plan their days with purpose, aligning activities with long-term goals․ The template typically includes sections for daily priorities, key responsibilities, and time blocks․ By scheduling tasks based on importance and deadlines, individuals can manage their workload more efficiently․ The template also allows for reflection and adjustment, ensuring a balanced approach to productivity․ Regular use of this tool fosters discipline and accountability, making it easier to stay focused on what truly matters․ It’s a practical way to turn time management into a habit for lasting effectiveness․

Habit 4: Think Win-Win

The weekly schedule template helps individuals organize tasks and time, aligning activities with long-term goals․ It includes sections for daily priorities and responsibilities, promoting efficient time management and productivity․ By scheduling tasks based on importance and deadlines, users can maintain focus on what truly matters․ Regular use fosters discipline and accountability, making time management a habit for lasting effectiveness․

5․1 Developing an Abundance Mentality

An abundance mentality fosters the belief that success and resources are plentiful, encouraging collaboration over competition․ Worksheets for Habit 4 guide users in reflecting on relationships and opportunities where everyone can benefit․ By identifying win-win scenarios and practicing empathy, individuals cultivate trust and mutual respect․ These exercises help shift focus from scarcity to shared success, promoting a mindset that values long-term relationships and collective growth․ This approach not only strengthens personal and professional connections but also aligns actions with ethical and principled behavior, fostering a culture of cooperation and mutual benefit․

5․2 Building Positive Relationships Worksheet

This worksheet helps users cultivate strong, meaningful connections by focusing on empathy and mutual understanding․ It includes exercises to identify positive interactions, reflect on communication styles, and practice active listening․ Users are prompted to list ways to show appreciation and resolve conflicts constructively․ The worksheet also encourages setting goals to strengthen relationships, fostering a win-win approach in personal and professional interactions․ By applying these strategies, individuals can build trust, enhance collaboration, and create a supportive network that aligns with the principles of Habit 4: Think Win-Win․ This tool empowers users to nurture relationships effectively․

Habit 5: Seek First to Understand, Then to Be Understood

This habit emphasizes effective communication by prioritizing empathy and active listening․ Worksheets guide users in practicing understanding others’ perspectives before seeking to be understood, fostering deeper connections․

6․1 Improving Communication Skills

Improving communication skills is central to Habit 5․ Worksheets provide exercises to enhance active listening and empathy, encouraging users to pause before reacting and choose thoughtful responses․ By reflecting on personal interactions and identifying areas for growth, individuals can develop deeper understanding and more meaningful connections․ These tools help bridge communication gaps, fostering environments where both parties feel heard and valued․ Regular practice with these exercises leads to improved relationships and more effective dialogue in personal and professional settings․

6․2 Active Listening Exercise Worksheet

The Active Listening Exercise Worksheet is designed to enhance understanding and empathy in interactions․ It includes prompts to practice reflecting, clarifying, and asking open-ended questions․ Users are guided to identify personal communication habits and areas for improvement․ The worksheet encourages focused attention on others’ perspectives, reducing misunderstandings․ By regularly using this tool, individuals can develop deeper connections and more effective communication skills․ This resource is an essential component of Habit 5, fostering a culture of understanding and respect in both personal and professional relationships․

Habit 6: Synergize

Habit 6 focuses on collaboration, combining diverse perspectives to create innovative solutions, fostering effective teamwork and mutual success in achieving collective goals․

7․1 The Power of Collaboration

Synergy emerges when individuals collaborate, blending unique strengths and ideas to achieve outcomes greater than individual efforts․ Worksheets encourage identifying collaboration opportunities, fostering open communication, and valuing diverse perspectives to unlock creative solutions and shared success․

7․2 Teamwork and Synergy-Building Activities

Teamwork and synergy-building activities foster collaboration and mutual understanding․ Worksheets include exercises like brainstorming sessions, group problem-solving, and shared goal setting․ These activities encourage individuals to value diverse perspectives, leading to innovative solutions․ By working together, teams learn to leverage strengths and overcome weaknesses, creating a supportive environment for growth․ Synergy is achieved when the collective outcome exceeds individual contributions, enhancing creativity and productivity․ These exercises help build trust, communication, and respect, essential for effective teamwork and long-term success․

Habit 7: Sharpen the Saw

Habit 7 focuses on self-care and personal renewal across the four key dimensions: physical, mental, social/emotional, and spiritual․ Regular reflection and self-renewal ensure personal effectiveness and balance, fostering long-term well-being and growth․

8․1 Self-Care and Personal Renewal

Self-care and personal renewal are vital for maintaining balance and effectiveness․ Worksheets for Habit 7 guide users to assess their well-being across physical, mental, social/emotional, and spiritual dimensions; By identifying areas needing attention, individuals can create tailored plans to rejuvenate and strengthen these aspects of their lives․ Regular reflection and intentional self-care practices help prevent burnout, fostering resilience and continuous personal growth․ These exercises encourage holistic health, ensuring that individuals are fully equipped to embrace life’s challenges with energy and purpose․

8․2 Balancing the Four Key Dimensions Worksheet

The Balancing the Four Key Dimensions Worksheet helps individuals assess and harmonize their physical, mental, social/emotional, and spiritual well-being․ Users reflect on each dimension, identifying strengths and areas for improvement․ The worksheet guides goal-setting and provides space for tracking progress, ensuring a holistic approach to self-care․ By focusing on renewal and balance, this tool supports sustained personal growth and effectiveness․ Regular use promotes awareness and intentional habits, fostering a life of purpose and fulfillment across all life areas․

The Four Key Dimensions of Life

The four key dimensions of life—physical, mental, social/emotional, and spiritual—are essential for holistic personal development․ They provide a framework for balancing health, growth, relationships, and values․

9․1 Physical Dimension: Health and Wellness

The physical dimension focuses on maintaining health and wellness through regular exercise, balanced nutrition, and sufficient sleep․ Worksheets in this area guide users to assess their current habits and set realistic goals for improvement․ Activities include tracking daily exercise routines, planning meals, and creating schedules to ensure adequate rest․ By prioritizing physical health, individuals build the energy and resilience needed to pursue personal and professional goals effectively․ These practices lay a strong foundation for overall well-being and support the development of the other dimensions․

9․2 Mental Dimension: Intellectual Growth

The mental dimension emphasizes the importance of intellectual growth through continuous learning and self-reflection․ Worksheets in this area encourage users to set goals for reading, learning new skills, and engaging in mentally stimulating activities․ They also prompt individuals to reflect on their thought patterns and beliefs, fostering a mindset of curiosity and adaptability․ By nurturing intellectual growth, individuals enhance their problem-solving abilities and stay open to new ideas, which supports personal and professional development․ This dimension reinforces the habit of sharpening the saw by prioritizing mental renewal and expansion․

9․3 Social/Emotional Dimension: Relationships

The social/emotional dimension focuses on fostering healthy relationships and emotional intelligence․ Worksheets in this area help users assess their communication skills, empathy, and ability to build trust․ Activities include identifying ways to strengthen relationships, practicing active listening, and resolving conflicts constructively․ By cultivating emotional awareness and positive interactions, individuals can create supportive networks and collaborative environments․ This dimension aligns with habits like “Seek First to Understand” and “Think Win-Win,” encouraging harmony and mutual respect in personal and professional relationships․ Nurturing this dimension enhances emotional well-being and interpersonal effectiveness․

9․4 Spiritual Dimension: Personal Values

The spiritual dimension revolves around personal values and purpose, guiding individuals to align their actions with their core beliefs․ Worksheets in this area help users reflect on their mission statement, life’s purpose, and ethical standards․ Activities include identifying personal values, assessing alignment with daily actions, and setting goals to live authentically․ This dimension is tied to “Begin with the End in Mind,” encouraging a life of integrity and meaning․ By nurturing this dimension, individuals gain clarity, purpose, and a strong moral compass, leading to fulfillment and inner peace․ It’s about living a life that truly reflects who they are․

Goal Setting with 7 Habits Worksheets

The 7 Habits Worksheets provide structured guidance for setting and achieving personal and professional goals․ They help users assess current habits, identify areas for improvement, and create actionable plans aligned with their vision and values․

10․1 Identifying Personal and Professional Goals

The 7 Habits Worksheets offer a structured approach to identifying personal and professional goals․ Users are prompted to reflect on their values, vision, and priorities, ensuring alignment between their objectives and long-term aspirations․ By categorizing goals into physical, mental, social/emotional, and spiritual dimensions, individuals can create a holistic plan․ The worksheets encourage setting SMART (Specific, Measurable, Achievable, Relevant, Time-bound) goals, fostering clarity and focus․ This process helps individuals prioritize effectively, balancing personal growth with professional success, and ensures that their efforts contribute meaningfully to their overall life mission․

10․2 Creating an Action Plan Template

The 7 Habits Worksheets include an action plan template to help individuals turn their goals into concrete steps․ This tool enables users to break down objectives into manageable tasks, assign responsibilities, and set realistic deadlines․ By aligning actions with their personal mission and values, individuals ensure their efforts remain purpose-driven․ The template also includes space for tracking progress, fostering accountability and motivation․ This structured approach empowers users to move from planning to execution, ensuring their goals are achievable and aligned with the principles of the 7 Habits framework․ Regular reviews and adjustments are encouraged for continuous improvement․

Printable Resources for the 7 Habits

The 7 Habits Worksheets are available as free PDF downloads, offering structured exercises for personal reflection and goal-setting․ These printable resources include vision statements, goal templates, and progress trackers, designed to align with each habit․ Users can easily customize them to suit their personal or professional needs, making them versatile tools for individual growth and development․ Available online, these resources provide a practical starting point for anyone looking to adopt the 7 Habits framework in their daily life․

11․1 Free PDF Worksheets Available Online

The 7 Habits Worksheets are accessible as free PDF downloads, offering a comprehensive guide for personal development․ These resources include vision statements, goal templates, and progress trackers, designed to align with each habit․ Users can easily customize them to suit their personal or professional needs, making them versatile tools for individual growth and development․ Available online, these resources provide a practical starting point for anyone looking to adopt the 7 Habits framework in their daily life․ They are perfect for educators, professionals, and individuals seeking structured exercises for self-improvement․

11․2 Customizable Templates for Different Needs

The 7 Habits Worksheets offer customizable templates tailored to individual preferences and goals․ These adaptable resources cater to diverse needs, whether for personal growth, education, or professional development․ Users can modify sections to focus on specific habits, such as time management or relationship-building․ Educators and professionals appreciate the flexibility, as they can tailor templates for students or team members․ The ability to personalize content ensures the worksheets remain relevant and effective for various audiences, making them invaluable tools for fostering habit development across different contexts and requirements․ This adaptability enhances their practicality and user engagement․

Implementing the 7 Habits in Daily Life

Start by integrating one habit at a time, using worksheets to track progress․ Align daily actions with the 7 Habits framework for lasting change and growth․

12․1 Practical Steps for Habit Development

Start with self-assessment using worksheets to identify areas needing improvement․ Focus on one habit at a time, setting specific, measurable goals․ Create a daily routine incorporating habit practices, such as proactive planning or active listening․ Track progress weekly using templates to stay accountable․ Reflect on challenges and celebrate small wins to maintain motivation․ Share goals with a trusted partner for added support․ Gradually integrate all seven habits to build a balanced, effective lifestyle․ Consistency and patience are key to lasting change and personal growth․

12․2 Tracking Progress with Worksheets

Worksheets are invaluable for monitoring progress in habit development․ Regularly review habit trackers to assess improvements and identify areas needing more focus․ Use goal-setting templates to break down objectives into manageable steps․ Reflect on weekly schedules to ensure alignment with priorities․ Progress tracking fosters accountability and provides a clear view of growth over time․ Celebrate milestones to stay motivated and adjust strategies as needed․ Consistent use of these tools enhances self-awareness and helps maintain momentum on the journey to adopting the 7 Habits․ Visibility of progress encourages persistence and long-term success․

13․1 Summary of the Benefits of 7 Habits Worksheets

The 7 Habits Worksheets provide a clear, structured approach to personal development, helping users assess their habits, set goals, and track progress․ They enhance self-awareness, improve time management, and foster positive relationships․ By focusing on the four key life dimensions—physical, mental, social/emotional, and spiritual—these tools empower individuals to create a balanced, effective lifestyle․ The worksheets’ practical exercises and reflective prompts make them invaluable for anyone seeking personal growth and long-term effectiveness․ They are accessible, customizable, and serve as a powerful resource for implementing the 7 Habits framework in daily life․

13․2 Encouragement to Start the Journey

Embrace the transformative power of the 7 Habits Worksheets and take the first step toward personal growth․ These tools offer a clear path to self-improvement, helping you cultivate effectiveness in all areas of life․ With free, customizable resources, you can begin your journey at your own pace, reflecting on your habits and setting meaningful goals․ The structured framework provides balance and clarity, empowering you to prioritize what truly matters․ Don’t wait—start today and unlock a life of purpose, synergy, and fulfillment․ The worksheets are your guide to a brighter, more intentional future․ Begin now and see the difference!

instructions for laser x

Laser X is an innovative, portable laser tag system using infrared technology for safe, high-energy gameplay. It offers versatile modes, team settings, and extended range for ultimate fun.

What is Laser X?

Laser X is an advanced, high-tech gaming system designed for immersive laser tag experiences. It uses infrared beams, not actual lasers, ensuring safety while providing precise gameplay. The system includes blasters and receivers that track hits, allowing players to engage in dynamic battles. Unlike traditional laser tag, Laser X is portable and can be played anywhere, making it ideal for home use or outdoor events. It supports multiple play modes, including blaster-to-blaster, blaster-to-chest receiver, and target practice. With adjustable team settings and color combinations, Laser X offers flexibility for players of all ages. Its user-friendly design and easy setup make it accessible for both casual and competitive gaming. Whether for family fun or friendly competitions, Laser X brings the excitement of laser tag directly to your environment.

Key Features of Laser X

Laser X is equipped with cutting-edge features that enhance gameplay and user experience; It uses infrared technology for safe and accurate shooting, with a range of up to 200 feet. The system supports multiple play modes, including blaster-to-blaster combat, blaster-to-chest receiver battles, and target practice. Players can choose from 20 different team color combinations, adding diversity to team-based gameplay. The Ultra Mode allows for multi-color teams, expanding customization options. Battery life is optimized for extended play sessions, and the equipment is designed for easy setup and portability. Safety is prioritized, with clear guidelines for eye protection and proper usage. These features make Laser X a versatile and engaging option for both casual and competitive players, ensuring endless fun in various settings.

How Laser X Differs from Traditional Laser Tag

Laser X offers a more accessible and flexible alternative to traditional laser tag. Unlike arena-based systems requiring specific venues, Laser X is portable and can be used indoors or outdoors. It uses infrared technology, ensuring safety and eliminating the need for specialized vests. With a range of up to 200 feet, Laser X accommodates larger play areas and diverse gameplay. Multiple modes, such as blaster-to-blaster and target practice, enhance versatility. Battery-powered operation and easy setup make it convenient for casual play, allowing users to enjoy laser tag fun without the constraints of a dedicated arena. Its adaptability and safety features make Laser X an ideal choice for home use, providing an engaging experience for players of all ages.

Setting Up Your Laser X

Start by unboxing and installing batteries in both the blaster and the Laser X Tower. Use a Phillips screwdriver to secure the batteries and power up the system.

Unboxing and Initial Setup

When you unbox your Laser X system, you’ll find the blasters, chest receivers, and the Laser X Tower. Ensure all components are included and undamaged. Start by reading the instruction manual carefully to familiarize yourself with the setup process. Insert the required batteries into the blasters and the tower, following the polarity guidelines to avoid damage. Use a Phillips screwdriver (not included) to install batteries if needed. Power up the Laser X Tower and ensure it is functioning properly. Before gameplay, test the infrared beam range and accuracy to confirm everything is working as expected. Keep the instructions handy for future reference, especially for troubleshooting or adjusting settings. Proper setup ensures optimal performance and fun for all players. Always follow safety guidelines and usage instructions provided in the manual.

Installing Batteries in the Blaster

To install batteries in your Laser X blaster, first locate the battery compartment on the underside of the blaster. Use a Phillips screwdriver to remove the screws and open the compartment. Insert the required AA batteries, ensuring the positive and negative terminals align correctly. Avoid short-circuiting the terminals, as this can damage the blaster. Replace the compartment cover securely. If the blaster does not power on after installing batteries, check the connections and ensure batteries are fresh. Drain batteries quickly if left in team settings, so remove them when not in use. Proper battery installation ensures optimal performance and prevents equipment damage. Always refer to the instruction manual for specific guidelines. Battery safety is crucial for maintaining your Laser X gear and ensuring longevity. Follow these steps carefully to enjoy uninterrupted gameplay. Battery installation is a simple process when done correctly. Always handle batteries with care.

Powering Up the Laser X Tower

To power up the Laser X Tower, locate the power button on the device. Press and hold it until the LED indicators light up, signaling the tower is activating. The tower may take a few seconds to initialize. Ensure the tower is placed on a stable surface for optimal performance. The Laser X Tower operates in conjunction with the blasters, enabling gameplay modes and tracking scores. When not in use, turn the tower off to conserve battery life. Leaving it in team settings can drain batteries quickly. For the best experience, connect the tower to a power source on a different circuit than other devices to avoid interference. Always follow the instructions provided to ensure proper functionality and safety. The tower is a central component of the Laser X system, enhancing your gaming experience with its advanced features. Proper activation ensures seamless gameplay for all participants.

Understanding the Gameplay

Laser X offers dynamic gameplay modes, including Blaster to Blaster, Blaster to Chest Receiver, and Blaster to Game Target. Test your speed and accuracy in each mode with infrared technology, team settings, and hit tracking for exciting competition and fun.

Blaster to Blaster Combat

Blaster to Blaster Combat is a thrilling mode where players engage in direct battles using their Laser X blasters. Each player aims at the targets located on their opponent’s blaster, creating a fast-paced, action-packed experience. The infrared beam technology ensures accurate and safe gameplay, with a range of up to 300 feet. Players can choose from multiple team settings or opt for free-for-all battles, adding flexibility to the game. The system registers hits through the chest receiver or armband, providing instant feedback. This mode is ideal for small groups or one-on-one challenges, promoting strategic thinking and quick reflexes. With its user-friendly design and customizable options, Blaster to Blaster Combat makes Laser X a standout choice for both kids and adults seeking exciting indoor or outdoor adventures.

Blaster to Chest Receiver Gameplay

Blaster to Chest Receiver Gameplay offers an exciting way to test your speed and accuracy. Players wear a chest receiver that registers hits from opponents’ blasters. The infrared beam technology ensures precise targeting, and the receiver provides instant feedback through vibrations, sounds, or lights when hit. This mode is ideal for team-based play or individual challenges, promoting strategic movement and quick reflexes. The chest receiver can be paired with armbands for additional targets, enhancing the gameplay experience. With a range of up to 300 feet, players can engage in both close-quarters and long-distance battles. The system supports multiple team settings, allowing for customizable gameplay. Blaster to Chest Receiver Gameplay is perfect for those seeking a dynamic and immersive Laser X experience, whether indoors or outdoors.

Blaster to Game Target Mode

Blaster to Game Target Mode is designed to test your speed and skill in a competitive environment. This mode allows players to engage with stationary or moving targets, perfect for refining accuracy and tactical thinking. The infrared beam technology ensures precise targeting, and the system provides immediate feedback when a target is hit. Players can practice solo or compete against others to achieve the highest score. The mode supports team settings, enabling collaborative gameplay where players can work together to hit targets efficiently. With a range of up to 300 feet, the Blaster to Game Target Mode offers versatility for both indoor and outdoor play. This mode is ideal for players looking to improve their aiming skills and enjoy a fun, challenging experience with friends or family. It’s a great way to enhance your Laser X experience.

Technical Specifications

Laser X uses infrared technology with a range of up to 200 feet, ensuring accurate and reliable gameplay. It features long battery life and supports 20 team color combinations for customization.

Range and Accuracy of the Infrared Beam

The infrared beam in Laser X offers a range of up to 200 feet, ensuring accurate and reliable performance. This advanced technology allows for precise targeting, making gameplay both exciting and fair. Unlike real lasers, Laser X uses safe infrared beams, eliminating eye safety concerns. The long range and pinpoint accuracy enable players to engage in battles across various environments, from indoor rooms to outdoor spaces. This technology ensures that hits are registered correctly, enhancing the overall gaming experience. With its robust range and accuracy, Laser X provides endless fun and competitive play for users of all ages. The infrared system is both efficient and durable, making it ideal for extended play sessions without compromising performance. This feature-rich design ensures that Laser X stands out as a top choice for home laser tag systems.

How the Infrared Technology Works

Laser X utilizes advanced infrared (IR) technology to create a safe and immersive gaming experience. The system emits a controlled infrared beam from the blaster, which is detected by receivers on the target, such as the chest receiver or game target. Unlike real lasers, IR beams are completely safe for eyes and skin, making them ideal for all ages. The technology operates on a frequency that ensures reliable signal transmission, even in various lighting conditions. When a player pulls the trigger, the blaster sends a coded IR signal, which is then decoded by the receiver to confirm a hit. This technology allows for accurate and responsive gameplay, with minimal interference from external light sources. The IR system is both efficient and durable, ensuring consistent performance during extended play sessions. This makes Laser X a reliable and enjoyable option for home or outdoor laser tag games.

Battery Life and Power Management

Laser X systems are designed to optimize battery life, ensuring extended gameplay sessions. The blasters and receivers typically operate on alkaline or rechargeable batteries, providing up to 40 hours of playtime depending on usage. To conserve power, the gear automatically enters a low-power mode when inactive for a short period. It’s important to turn off the devices when not in use to prevent unnecessary battery drain. Leaving the equipment in team settings or ultra mode can reduce battery life, so switching to standby or turning it off is recommended. Regular maintenance, such as cleaning the battery terminals and avoiding short circuits, helps maintain optimal performance. Always use high-quality batteries and follow the manufacturer’s guidelines for disposal. Proper power management ensures your Laser X gear remains reliable and ready for uninterrupted fun.

Team Settings and Color Combinations

Laser X offers flexible team settings and vibrant color combinations to enhance gameplay. Players can select from 20 different team colors, providing a wide range of customization options. The Team Selector switch allows easy switching between teams, while Ultra Mode unlocks multi-color team configurations for dynamic gameplay. Each color combination is displayed on the blaster, making it easy to identify teammates and opponents. This feature ensures clarity during battles and adds a visually engaging element to the game. The ability to customize teams encourages strategic play and teamwork, making Laser X ideal for group activities. Whether playing in small or large groups, the diverse color options ensure everyone can join in the fun with unique team identities. This feature adds depth and variety to the gameplay experience, making it enjoyable for players of all ages and skill levels.

Safety Precautions

Laser X uses infrared beams, not real lasers. Always wear eye protection and follow usage guidelines to avoid accidents. Avoid improper handling to ensure safe and enjoyable gameplay.

Important Safety Information

Laser X uses infrared beams, not real lasers, ensuring safe gameplay. Avoid direct eye exposure to the infrared beam. Adult supervision is recommended for children. Do not aim at animals or sensitive electronics. Use only the provided batteries and follow installation instructions to prevent damage. Keep the equipment away from water and extreme temperatures. Store the blasters and accessories securely when not in use. If a malfunction occurs, discontinue use and consult the troubleshooting guide. Always turn off the gear when not in use to conserve battery life. Never short-circuit the battery terminals. For optimal performance, follow all usage guidelines and maintenance tips provided in the manual. Proper care ensures longevity and safe enjoyment of the Laser X system.

Eye Protection and Usage Guidelines

While Laser X uses infrared beams, not actual lasers, it’s important to follow safety guidelines. Avoid direct eye exposure to the infrared beam, as prolonged exposure could cause discomfort. Adults should supervise children during gameplay to ensure safe practices. Do not aim the blaster at animals, people’s faces, or sensitive electronic devices. Always use the blasters and accessories as intended. If you experience any discomfort or vision issues, discontinue use immediately. Wear eye protection if you have sensitive eyes or are concerned about light exposure. Never modify the equipment, as this could compromise safety. Follow all usage instructions carefully to ensure a fun and safe experience for everyone involved. Proper adherence to these guidelines will help maintain the longevity of your Laser X system and ensure enjoyable gameplay for years to come.

Maintenance and Troubleshooting

Regularly clean the blasters and receivers with a soft cloth. Store equipment in a dry place to prevent damage. Replace exhausted batteries promptly to avoid drainage issues. Check connections and ensure proper alignment for optimal performance. If issues persist, consult the user manual or contact customer support for assistance. Proper care extends the lifespan of your Laser X system and ensures smooth gameplay.

Cleaning and Storing the Equipment

Proper maintenance ensures optimal performance and longevity of your Laser X gear. Use a soft, dry cloth to wipe down blasters, receivers, and targets, avoiding harsh chemicals. For stubborn dirt, lightly dampen the cloth with water. Regularly inspect lenses for dust or debris, as obstruction can affect accuracy. Store equipment in a cool, dry place away from direct sunlight to prevent damage. Remove batteries from blasters and receivers when not in use for extended periods to prevent corrosion. Organize components in the original packaging or a protective case to avoid scratches or breaks. Always ensure the gear is turned off before cleaning or storing. By following these steps, you’ll maintain your Laser X system in prime condition for future gameplay.

Resolving Common Issues

If your Laser X equipment isn’t functioning properly, start by checking the battery levels and ensuring they are installed correctly. Weak or dead batteries can disrupt performance. Next, verify that all components are turned on and set to the same team mode. If issues persist, restart the system by turning it off, waiting a few seconds, and powering it back on. For misaligned beams or inaccurate hits, clean the lenses thoroughly. If the problem remains, consult the user manual or contact customer support for assistance. Regular maintenance and proper storage can also help prevent common issues, ensuring smooth and enjoyable gameplay every time.

Advanced Customization

Laser X allows switching between team modes and Ultra Mode for multi-color teams, enabling up to 20 color combinations and enhanced gameplay for more players.

Switching Between Team Modes

Switching between team modes in Laser X is straightforward, allowing players to customize their gameplay experience. To change teams, simply slide the Team Selector switch located on the blaster to your desired team color. This feature enables up to 20 different team color combinations, making it easy to organize multiplayer battles. For multi-color team modes, activate Ultra Mode, which unlocks additional settings for more dynamic gameplay. Ensure the switch is firmly set to avoid accidental changes during play. This flexibility in team settings enhances the versatility of Laser X, catering to both casual and competitive players. Always remember to turn off your gear when not in use to conserve battery life.

Using Ultra Mode for Multi-Color Teams

Ultra Mode unlocks multi-color team functionality, allowing for dynamic and vibrant gameplay. To activate, slide the Team Selector switch to the Ultra position. This mode enables up to 20 different color combinations, making it ideal for larger groups or themed events. The blasters and receivers will display a rainbow of colors, indicating Ultra Mode is active. Players can cycle through colors using the selector switch. This feature adds flexibility and creativity to team battles. For optimal performance, ensure all devices are set to the same Ultra Mode. Reset by turning the blaster off and on again. Ultra Mode enhances the visual experience and allows for more strategic teamplay. It’s perfect for creating unique game scenarios or adding variety to traditional matches.

Laser X offers endless fun and excitement for players of all ages. Follow the instructions carefully to maximize performance and safety. Enjoy thrilling games with friends and family!

Final Tips for Optimal Performance

To maximize your Laser X experience, ensure your infrared beam has a clear line of sight for optimal range and accuracy. Regularly clean the sensors and lenses to maintain performance. Always fully charge or replace batteries before extended play sessions to avoid interruptions. Experiment with different team settings and color combinations to find your preferred strategy. Familiarize yourself with all game modes, including Blaster to Blaster, Blaster to Chest Receiver, and Blaster to Game Target, to diversify your gameplay. Practice reloading quickly and strategically to stay competitive. Turn off your gear when not in use to conserve battery life. Finally, stay mobile and use cover to avoid being an easy target. By following these tips, you’ll enhance your skills and enjoy a more immersive and enjoyable Laser X experience with friends and family.

Enjoying Laser X with Friends and Family

Laser X is designed to bring people together, offering endless fun for players of all ages. Its portability and versatility make it perfect for backyard gatherings, parties, or even indoor events. With up to 20 different team color combinations, you can easily organize group battles or friendly competitions. The system supports both team-based play and free-for-all modes, allowing you to tailor the experience to your group’s preferences. To make the most of your sessions, ensure everyone understands the rules and boundaries beforehand. Encourage players to stay active, communicate, and strategize to maximize the excitement. Whether you’re playing with family or friends, Laser X creates unforgettable moments of laughter and adventure. So, grab your blasters, team up, and get ready to immerse yourselves in a thrilling experience that everyone will cherish.

instructions for vinyl decal application

Vinyl decals offer a versatile way to personalize surfaces like cars, windows, and more. They come in various designs, from simple lettering to intricate artwork, making them a popular choice for both aesthetic and promotional purposes. With proper tools and techniques, applying vinyl decals can be a straightforward DIY project. This guide covers everything you need to know to achieve professional-looking results, whether you’re a beginner or an experienced crafter.

1.1 What Are Vinyl Decals?

Vinyl decals are thin, adhesive-backed vinyl sheets cut into specific shapes, designs, or lettering. They are designed to be applied to various surfaces, such as cars, windows, and walls, for decorative, promotional, or informational purposes. Made from durable, weather-resistant materials, vinyl decals can be removable or permanent, depending on the type. They are widely used for personalizing items, branding products, or adding artistic flair to spaces, making them a popular choice for both DIY projects and professional applications.

1.2 Common Uses of Vinyl Decals

Vinyl decals are widely used for personalizing vehicles, windows, laptops, and water bottles. They are also popular for promotional purposes, such as branding products or creating eye-catching signage. Additionally, decals are used for decorative designs on walls, floors, and furniture. Their versatility makes them ideal for both temporary and permanent applications, offering a durable and weather-resistant way to enhance surfaces with custom designs, logos, or messages.

Tools and Materials Needed

A squeegee, cutting tool, transfer tape, and cleaning solution are essential. Additional materials include a ruler, knife, or scissors for precise cuts and a laminator for added protection.

2.1 Essential Tools for Application

A squeegee is crucial for smoothing the vinyl and removing air bubbles. A cutting tool or knife helps trim excess material precisely. Transfer tape ensures the decal adheres properly to the surface. A ruler or measuring tape aids in aligning the decal accurately. Scissors or a craft knife are handy for smaller cuts. Optional tools include a heat gun or infrared lamp for curved surfaces. These tools collectively ensure a professional and bubble-free application.

2.2 Recommended Materials for Different Surfaces

For cars, use automotive-grade vinyl for durability and UV resistance. Windows benefit from clear or frosted vinyl for visibility. Curved surfaces require flexible cast vinyl to prevent cracking. Indoor walls or signs can use removable vinyl to avoid damage. Choose permanent vinyl for long-term outdoor use. Specialty materials like reflective or metallic vinyl add visual impact. Always match the vinyl type to the surface for optimal adhesion and longevity.

Preparing the Surface

Proper surface preparation is crucial for successful vinyl decal application. Ensure the surface is clean, dry, and free of dirt, oils, or old adhesives. Lightly sand rough areas for better adhesion. For curved or uneven surfaces, use techniques to flatten or stabilize the area temporarily. Avoid applying decals in direct sunlight or extreme temperatures. A well-prepared surface guarantees a smooth, bubble-free application and long-lasting results.

3.1 Cleaning the Surface

Cleaning the surface is the first step in preparing for vinyl decal application. Use a mild soap and warm water to remove dirt, grime, and oils. Avoid harsh chemicals that might damage the surface. For tough stains or old adhesives, a gentle adhesive remover can be effective. Rinse thoroughly with clean water and let the surface air dry completely. A clean, dry surface ensures proper adhesion and prevents bubbles or peeling. This step is essential for a professional-looking result.

3.2 Drying the Surface

After cleaning, ensure the surface is completely dry before applying the vinyl decal. Use a lint-free cloth or microfiber to gently pat the area, avoiding streaks or scratches. Allow the surface to air dry naturally, as heat can damage certain materials. If moisture remains, it can prevent proper adhesion. A dry surface is essential for the decal to stick evenly and last longer. Always inspect the surface for any remaining moisture before proceeding with the application.

3.3 Removing Old Decals

To remove old decals, start by applying heat with a hairdryer or heat gun to soften the adhesive. Gently scrape the decal using a plastic scraper or an old credit card. Avoid using sharp tools to prevent surface damage. Once the decal is removed, clean the area with a solvent like alcohol or adhesive remover to eliminate residue. Ensure the surface is dry and free of old adhesive before applying a new decal for proper adhesion. This step is crucial for a smooth application process.

3.4 Preparing Different Types of Surfaces (e.g., cars, windows, curved surfaces)

For cars, ensure the paint is clean and free of wax or dirt. Windows should be streak-free and free of old decals. Curved surfaces may require heat to make the vinyl more flexible. Always inspect the surface for irregularities and address them before applying the decal; Proper preparation ensures the vinyl adheres evenly and lasts longer. Different surfaces may need specific treatments, so tailor your approach based on the material and shape for optimal results.

Application Methods

Vinyl decals can be applied using wet or dry methods. The wet method involves water or a solution for easier positioning, while the dry method is simpler. Both techniques require precision for optimal results, especially on curved or uneven surfaces. Proper alignment and smoothing ensure a professional finish, making the application process efficient and long-lasting.

4;1 Wet Installation Method

The wet installation method involves applying a water-based solution to the decal’s adhesive side or the surface. This allows for easy repositioning and reduces air bubbles. Start by spraying the solution onto the surface or the decal’s backing paper. Gently place the decal, ensuring proper alignment. Use a squeegee or credit card to press out excess water and bubbles. Allow the decal to dry completely before sealing. This method is ideal for large or intricate designs, as it offers more flexibility during application.

4.2 Dry Installation Method

The dry installation method is a popular choice for vinyl decals, especially for beginners. Start by peeling the decal from its backing paper and aligning it on the surface. Use a credit card, squeegee, or similar tool to smooth the decal from one edge to the other, ensuring no air bubbles form. This method works best on clean, dry surfaces and is ideal for small to medium-sized decals. It offers immediate results and minimizes the risk of bubbles, making it perfect for smooth surfaces like glass or metal.

4.3 Pros and Cons of Each Method

The wet method allows for easier alignment and is ideal for large or complex designs, as it minimizes air bubbles. However, it requires more time to dry and may not be suitable for all surfaces. The dry method is quicker and simpler, with no drying time, making it perfect for small decals and smooth surfaces. However, it can trap air bubbles if not applied carefully. Choosing the right method depends on the size, complexity, and surface type of your decal application.

Aligning and Positioning the Decal

Proper alignment and positioning are crucial for a professional-looking result. Use tools like measuring tapes or laser guides to ensure accuracy and symmetry on your surface.

5.1 Centering the Decal

Centering a vinyl decal ensures a balanced and visually appealing application. Measure the surface and decal dimensions to mark the center point. Align the decal’s midpoint with the surface’s midpoint, using a straight edge or laser guide for accuracy. Gently position the decal, smoothing it outward from the center to prevent air bubbles. This method works well for symmetric designs and uniform surfaces, ensuring a professional finish. Proper centering enhances the decal’s visibility and overall impact.

5.2 Using Alignment Tools

Alignment tools like laser guides, measuring tapes, and squeegees are essential for precise decal placement. A laser guide ensures straight alignment, while a measuring tape helps center the decal. Use a squeegee to smooth the decal while maintaining alignment. For intricate designs, grid paper or digital alignment apps can aid accuracy. Always place the decal starting from the center and smooth outward to avoid air bubbles. Proper tool usage guarantees a professional finish and prevents costly reapplications. Aligning tools streamline the process, ensuring your decal looks its best.

Applying the Decal

Apply the decal starting from the center, using a squeegee to smooth outward. This ensures air bubbles are minimized. Work methodically for a flawless finish.

6.1 Smooth Application Techniques

For a smooth application, start by aligning the decal with the surface. Use a squeegee or credit card to press firmly, beginning from the center and moving outward. This technique ensures even adhesion and prevents air bubbles. Apply steady, consistent pressure to avoid stretching the vinyl. Work slowly to maintain control, especially on curved or uneven surfaces. This method guarantees a professional finish with minimal effort.

6.2 Using a Squeegee for Bubble-Free Application

A squeegee is essential for achieving a bubble-free application. Start by placing the decal on the surface, then gently press the squeegee from the center outward. Use smooth, even strokes to push out air bubbles. For stubborn bubbles, apply more pressure or use a needle to carefully puncture and smooth them. This tool ensures a flawless finish and prevents air pockets from forming, making the decal look professional and long-lasting.

6.3 Handling Air Bubbles and Wrinkles

Air bubbles and wrinkles can occur during application. For bubbles, use a needle or pin to prick them, then smooth with a squeegee or credit card. For wrinkles, apply gentle heat with a hairdryer to relax the vinyl, allowing it to conform to the surface. Repeat smoothing until the decal lies flat. These techniques ensure a professional finish and prevent damage to the vinyl. Proper handling prevents long-term issues and maintains the decal’s appearance.

Finishing Touches

Finishing touches ensure your vinyl decal looks professional and lasts longer. This step involves trimming excess vinyl and sealing for durability.

7.1 Trimming Excess Vinyl

Trimming excess vinyl is essential for a clean finish. Use a sharp utility knife or precision cutter to carefully remove any overhanging material around the edges. For intricate designs, consider a craft knife for precision. Ensure the decal is firmly applied before trimming to avoid peeling. Start from one corner and work your way around, applying light pressure to prevent cutting too deeply. This step ensures the decal blends seamlessly with the surface.

7.2 Sealing the Decal for Durability

Sealing your vinyl decal enhances its longevity and protects it from environmental factors. Apply a clear laminate or sealant specifically designed for vinyl decals. Use a soft brush or spray bottle to evenly coat the decal, ensuring full coverage. Allow the sealant to dry completely, following the manufacturer’s instructions. For added durability, especially on exterior surfaces, consider using a heat gun to cure the sealant. This step ensures your decal withstands UV exposure, moisture, and abrasion, maintaining its vibrant appearance for years.

Aftercare and Maintenance

Regularly clean the decal with mild soap and water. Avoid harsh chemicals or abrasive materials to prevent damage. For exterior decals, apply a UV-protective sealant annually to ensure longevity and maintain appearance.

8.1 Cleaning the Decal

To maintain your vinyl decal’s appearance, clean it regularly using mild soap and water. Gently scrub with a soft cloth or sponge, avoiding harsh chemicals or abrasive materials. For exterior decals, rinse thoroughly with clean water to remove dirt and debris. Avoid using high-pressure washes, as they may damage the vinyl. Regular cleaning prevents dirt buildup and ensures the decal remains vibrant and intact for years.

8.2 Avoiding Harsh Chemicals and Abrasives

Avoid using harsh chemicals like ammonia, bleach, or acidic cleaners, as they can damage the vinyl or cause discoloration. Abrasive materials, such as scrubbers or rough cloths, should also be avoided to prevent scratching the decal. Instead, opt for mild soap solutions and soft, non-abrasive cloths for cleaning. This prevents deterioration and ensures the decal remains intact and vibrant over time. Regular care with gentle products extends the lifespan of your vinyl decal.

Common Mistakes to Avoid

Ensure proper surface preparation to prevent adhesion issues. Avoid applying decals in extreme weather or without aligning them correctly. These mistakes can lead to uneven results or peeling.

9.1 Incorrect Surface Preparation

One of the most common mistakes is failing to clean the surface properly before applying the decal. Dirt, dust, or oils can prevent the vinyl from adhering correctly, leading to peeling or bubbling.

Additionally, not allowing the surface to dry completely after cleaning can trap moisture, causing air bubbles or uneven adhesion. Always ensure the surface is spotless and dry for a successful application. Proper preparation is key to a long-lasting, professional finish.

9.2 Improper Alignment

Improper alignment is a common mistake that can ruin the appearance of your decal. If the decal is not centered or evenly spaced, it may look crooked or unprofessional. Always measure the surface and use alignment tools like a laser level or grid paper to ensure accuracy. Rushing the alignment process can lead to misplacement, so take your time to position the decal correctly before applying it. Proper alignment is crucial for achieving a polished, professional finish.

9;3 Applying in Unsuitable Weather Conditions

Applying vinyl decals in unsuitable weather conditions can lead to poor adhesion and uneven results. Extreme heat, cold, humidity, or wind can interfere with the decal’s ability to stick properly. Moisture, in particular, can cause air bubbles or peeling. Always check the weather forecast and apply decals in a dry, stable environment. Ideal temperatures for application typically range between 50°F and 90°F (10°C to 32°C). Avoid applying decals in direct sunlight or during rain to ensure optimal results and longevity.

Troubleshooting Tips

Identify common issues like air bubbles or peeling edges and use practical solutions to ensure your decal adheres properly and maintains its appearance over time.

10.1 Fixing Air Bubbles

To fix air bubbles, use a small needle or pin to carefully puncture the bubble. Gently press the air out using a squeegee or credit card, smoothing the vinyl outward. For stubborn bubbles, apply heat with a hairdryer to soften the vinyl, then repeat the process. Avoid using sharp or abrasive tools, as they may damage the decal. This method ensures a smooth, bubble-free finish and extends the decal’s longevity. Always work patiently to prevent further issues.

10.2 Repairing Peeling Edges

If edges begin to peel, use a hairdryer to gently heat the area, softening the vinyl. Apply a small amount of clear adhesive, such as nail polish or vinyl-specific adhesive, to the edge. Press firmly with a squeegee or credit card to secure it. Avoid harsh chemicals, as they may damage the decal. This method provides a temporary fix but can extend the life of the decal. Repeat as needed, ensuring the surface remains clean and dry for optimal adhesion.

Tips for Specific Surfaces

For cars, ensure surfaces are clean and dry. On windows, avoid harsh chemicals. For curved surfaces, use heat guns to conform vinyl. Always test adhesion first.

11.1 Applying Decals on Cars

Applying vinyl decals on cars requires precise preparation. Clean the surface thoroughly with a mild detergent to remove dirt and oils. For curved areas, use a heat gun to conform the vinyl. Avoid applying decals in direct sunlight or extreme temperatures. Wet installation is ideal for large decals, while dry installation works best for smaller ones. Test the adhesion on a small area first. Use a squeegee to ensure bubble-free application and trim excess vinyl carefully to avoid damaging the decal or paint.

11.2 Applying Decals on Windows

Applying vinyl decals on windows is a great way to enhance visibility and style. Clean the glass thoroughly with a mild detergent to ensure proper adhesion. For smooth application, use the dry method, as it reduces the risk of water spots. Align the decal carefully, starting from the center and smoothing outward with a squeegee or credit card. Avoid applying decals in direct sunlight or cold temperatures. For curved windows, gently heat the vinyl with a heat gun to conform it to the surface. Ensure the decal is bubble-free for a professional finish.

11.3 Applying Decals on Curved Surfaces

Applying vinyl decals on curved surfaces requires precision and patience. Start by cleaning the surface thoroughly. Use the dry installation method, as it provides better control. Align the decal carefully, ensuring it is centered and evenly spaced. Gently heat the vinyl with a heat gun to help it conform to the curve. Apply firm, even pressure with a squeegee or similar tool, working from the center outward. This technique minimizes air bubbles and ensures a smooth, professional finish on any curved surface.

Mastering vinyl decal application involves careful preparation, the right tools, and attention to detail. Whether you’re working on flat surfaces, cars, or curves, following proper techniques ensures a professional finish. Remember to clean thoroughly, avoid harsh chemicals, and handle air bubbles promptly. With practice, you’ll achieve stunning results that last. Always consider the surface type and environmental conditions for optimal durability. Happy crafting!

cessna 172s maintenance manual

The Cessna 172S Maintenance Manual is an essential guide for owners and technicians, providing detailed procedures, standards, and compliance requirements. It ensures safety and optimal aircraft performance, serving as a comprehensive resource for proper maintenance practices.

1.1 Importance of the Maintenance Manual

The Cessna 172S Maintenance Manual is crucial for ensuring the aircraft operates safely and efficiently. It provides standardized procedures for inspections, repairs, and upgrades, guaranteeing compliance with FAA regulations and manufacturer guidelines. By following the manual, owners and technicians can prevent potential issues, reduce maintenance costs, and extend the aircraft’s lifespan. It serves as a foundational resource for both routine and complex maintenance tasks, ensuring reliability and performance.

The manual also includes checklists and troubleshooting guides, enabling prompt resolution of issues. Regular adherence to its instructions helps maintain airworthiness and enhances overall flight safety; Its detailed protocols ensure that all maintenance activities are thorough and compliant with industry standards.

1.2 Key Features of the Cessna 172S

The Cessna 172S Skyhawk SP is renowned for its durability, reliability, and versatility. It features a robust airframe design, a 180-horsepower engine, and a spacious cabin. The aircraft is equipped with advanced avionics, including a Garmin G1000 NXi flight deck, enhancing navigation and safety. Its fuel capacity and efficient performance make it ideal for both training and personal use. The 172S also incorporates a progressive maintenance program, ensuring consistent upkeep and extending its service life. Its user-friendly design and cost-effective operation contribute to its popularity among pilots and flight schools worldwide.

Pre-Flight Inspection Checklist

The Cessna 172S pre-flight inspection checklist ensures a thorough evaluation of critical systems, including controls, tires, fuel, and instruments, to guarantee airworthiness and safety before every flight.

2.1 Exterior Inspection

  • The exterior inspection ensures the aircraft’s structural integrity and safety. Check tires for wear, wings for damage, and fuel tanks for leaks or damage.
  • Inspect control surfaces, including ailerons, elevators, and rudder, for proper alignment and freedom of movement.
  • Verify all lights, antennas, and sensors are secure and functioning correctly.
  • Examine the fuselage for dents, cracks, or corrosion that could compromise airworthiness.
  • Ensure all access panels and cowling are securely fastened.

2.2 Interior Inspection

  • The interior inspection focuses on safety and functionality. Check seats, seatbelts, and harnesses for condition and proper securing.
  • Examine the instrument panel for operational gauges, warning lights, and circuit breakers.
  • Inspect the avionics and communication systems for damage or malfunction;
  • Verify the emergency equipment, such as fire extinguishers and first-aid kits, are present and accessible.
  • Ensure all interior components, including flooring and overhead compartments, are in good condition.

2.3 Engine and Fuel System Check

  • Inspect the fuel tanks for leaks, dents, or corrosion, ensuring proper sealing and integrity.
  • Check fuel lines and connections for damage or blockages, verifying secure attachments.
  • Monitor oil levels and condition, looking for signs of contamination or depletion.
  • Examine the coolant system for proper function and absence of leaks.
  • Inspect belts and hoses for wear, cracks, or fraying, ensuring they are securely fastened.
  • Check the air filter for cleanliness and the carburetor for proper operation.
  • Verify the exhaust system for leaks or damage, ensuring all components are secure.
  • Inspect the propeller for nicks, cracks, or imbalance, ensuring smooth operation.

Routine Maintenance Procedures

Regular maintenance ensures the Cessna 172S operates safely and efficiently. Tasks include oil changes, tire pressure checks, and inspections of brakes, lights, and control surfaces.

3.1 100-Hour Inspection Requirements

The 100-hour inspection is a critical routine maintenance task for the Cessna 172S, ensuring compliance with safety standards. It involves a detailed examination of the engine, propeller, and airframe, including oil analysis, spark plug replacement, and inspection of control surfaces. This inspection is typically required every 100 flight hours and is often combined with the annual inspection. Costs range from $1,000 to $4,000, depending on the maintenance shop. The Progressive Care Program helps streamline these requirements, ensuring timely and thorough completion of all necessary checks.

3.2 Annual Inspection Checklist

The annual inspection is a comprehensive process ensuring the Cessna 172S’s airworthiness. It includes detailed checks of the airframe, engine, propeller, avionics, and control surfaces. The checklist is designed to meet FAA standards, covering all critical components. Costs typically range from $1,000 to $4,000, depending on the maintenance shop. The Progressive Care Program assists in managing these inspections, ensuring they are completed efficiently and in accordance with the required schedule.

3.3 Progressive Care Program Overview

The Progressive Care Program is a structured maintenance schedule designed to ensure the Cessna 172S is serviced at specific intervals. It covers 100-hour inspections, annual checks, and parts replacement, aligning with FAA requirements. This program helps maintain aircraft reliability, safety, and performance while reducing long-term maintenance costs. It also provides a clear timeline for inspections and updates, ensuring compliance and extending the aircraft’s operational life.

Emergency Procedures and Troubleshooting

The manual provides detailed checklists and troubleshooting steps for emergencies like engine failures, precautionary landings, and system malfunctions, ensuring pilot preparedness and compliance with FAA standards.

4.1 Engine Failure Protocols

In the event of engine failure, the Cessna 172S Maintenance Manual outlines critical steps to ensure safety. Pilots must immediately reduce airspeed, secure the engine, and feather the propeller if equipped. The manual provides detailed checklists for troubleshooting potential causes, such as fuel starvation or system malfunctions. Emergency landing procedures are emphasized, including selecting a suitable landing site and notifying air traffic control. Post-landing inspections and documentation are also required to address the root cause and prevent future occurrences. Compliance with these protocols is essential for minimizing risks and ensuring effective resolution.

4.2 Precautionary Landing Procedures

The Cessna 172S Maintenance Manual details precautionary landing procedures to address situations requiring immediate but controlled landings. Pilots should assess conditions, configure the aircraft for landing, and select a safe site. The manual emphasizes following specific checklists to secure systems, reduce speed, and stabilize the aircraft. Post-landing, inspections and documentation are crucial to identify issues and prevent future occurrences. These protocols ensure safety and minimize potential damage during unexpected landings, aligning with best practices for emergency preparedness and aircraft maintenance.

4;4 Common Issues and Solutions

The Cessna 172S Maintenance Manual addresses common issues such as engine oil leaks, avionics malfunctions, and fuel system contamination. Solutions include regular inspections, timely replacement of worn parts, and adherence to troubleshooting checklists. Electrical system faults are often resolved by checking circuit breakers and wiring connections. Additionally, addressing issues like carburetor ice or propeller wear early prevents costly repairs; The manual provides step-by-step guidance to identify and resolve these problems efficiently, ensuring optimal aircraft performance and safety. Proper documentation of repairs is also emphasized for future reference.

Cost of Maintaining a Cessna 172S

The annual maintenance cost for a Cessna 172S typically ranges from $1,000 to $4,000, influenced by factors such as the aircraft’s age and maintenance shop.

5.1 Annual Maintenance Cost Breakdown

The annual maintenance cost for a Cessna 172S typically ranges from $1,000 to $4,000. This includes a detailed inspection of the aircraft’s systems, engine, and avionics. The Progressive Care Program, which ensures compliance with maintenance requirements, can cost around $1,500 annually. Additional expenses may arise from replacement parts, labor fees, and unexpected repairs. Routine checks, such as oil changes and tire inspections, are also factored into the overall cost. These expenses vary depending on the aircraft’s condition, usage, and the maintenance shop’s rates.

5.2 Factors Influencing Maintenance Expenses

The cost of maintaining a Cessna 172S varies based on factors such as the aircraft’s age, usage, and operating conditions. Flight hours, flight training operations, and the need for unexpected repairs also impact expenses. Labor rates at maintenance shops and the availability of parts can drive costs higher. Additionally, compliance with programs like the Progressive Care Program may add to annual maintenance bills. The model year and overall aircraft condition further influence the total expenditure, making it essential to budget for both routine and unforeseen maintenance needs.

Upgrades and Modifications

Upgrades and modifications for the Cessna 172S can enhance performance, safety, and comfort. Popular upgrades include engine improvements, avionics enhancements, and interior refinements, boosting value and functionality.

6.1 Performance Enhancement Upgrades

Performance enhancement upgrades for the Cessna 172S can significantly improve speed, efficiency, and overall aircraft capabilities. Common upgrades include engine modifications, such as STC-approved engine upgrades, which increase horsepower and climb rates. Propeller upgrades, like composite or constant-speed designs, also enhance performance. Additionally, lightweight interior options and aerodynamic improvements can reduce drag and boost fuel efficiency. These upgrades not only enhance pilot experience but also increase the aircraft’s value and versatility, making them a worthwhile investment for both recreational and professional use;

6.2 Avionics and Safety Upgrades

Avionics and safety upgrades for the Cessna 172S enhance flight safety, navigation, and communication. Popular upgrades include GPS systems, ADS-B compliance, and advanced weather radar. Installation of Terrain Awareness Warning Systems (TAWS) and synthetic vision technology improves situational awareness. Upgrading to modern autopilot systems ensures smoother flight operations. Additionally, safety enhancements like emergency locator transponders (ELTs) and cockpit voice recorders can be integrated. These upgrades not only meet current aviation standards but also increase the aircraft’s operational efficiency and resale value, making it a safer and more reliable choice for pilots.

Safety Best Practices

Adhering to FAA regulations and conducting thorough pre-flight inspections ensures optimal safety. Consistent compliance with maintenance protocols and checklists minimizes risks, enhancing overall aircraft reliability and pilot confidence.

7.1 Compliance with FAA Regulations

Compliance with FAA regulations is critical for ensuring the safety and airworthiness of the Cessna 172S. The maintenance manual outlines specific guidelines that must be followed, including regular inspections and adherence to certified procedures. Failure to comply can result in legal penalties and compromised safety. By following FAA standards, aircraft owners and technicians can ensure the aircraft operates within approved limits, maintaining its reliability and performance. Proper documentation of all maintenance activities is also required to demonstrate compliance and satisfy regulatory audits.

7.2 Pilot Responsibilities

Pilots play a crucial role in maintaining the Cessna 172S by adhering to pre-flight and post-flight inspection checklists. They must ensure all systems are functioning correctly before and after each flight. Pilots are also responsible for reporting any discrepancies or issues to maintenance personnel promptly. Additionally, they must comply with all safety protocols and operational guidelines outlined in the maintenance manual. Proper documentation of flight hours and maintenance activities is essential for scheduling routine inspections. Ongoing training and familiarity with the aircraft’s systems enhance safety and efficiency, ensuring optimal performance and longevity of the Cessna 172S.

Documentation and Record-Keeping

Accurate documentation is critical for maintaining compliance and tracking the Cessna 172S’s airworthiness. Detailed maintenance logs, inspection records, and repair histories ensure transparency and accountability, supporting long-term aircraft reliability.

8.1 Maintenance Log Requirements

Maintenance logs are essential for tracking the Cessna 172S’s airworthiness and ensuring compliance with FAA regulations. Logs must include detailed records of inspections, repairs, and parts replacements, with entries dated and signed by certified technicians. Annual and 100-hour inspections must be documented thoroughly, including specific checks performed and any deficiencies addressed. These records serve as a historical reference for the aircraft’s condition and are critical for maintaining safety and resale value. Accurate and complete logs are legally required and must be readily available for review by aviation authorities.

8.2 Importance of Accurate Documentation

Accurate documentation is critical for ensuring the Cessna 172S’s airworthiness, safety, and compliance with FAA regulations. Detailed records of maintenance, inspections, and repairs provide a clear history of the aircraft’s condition, aiding in troubleshooting and preventing potential issues. Proper documentation also protects the aircraft’s value and simplifies compliance audits. Inaccuracies or omissions can lead to legal and safety risks, making precise record-keeping essential for both operational integrity and long-term aircraft reliability.

Role of Authorized Service Centers

Cessna Service Stations provide access to official maintenance manuals, parts, and technical support, ensuring compliance with FAA standards and manufacturer specifications for reliable and safe aircraft operation.

9.1 Cessna Service Stations

Cessna Service Stations are authorized facilities equipped to perform maintenance, repairs, and inspections on Cessna 172S aircraft. They have access to official maintenance manuals, illustrated parts catalogs, and technical support directly from Cessna. These stations employ certified technicians with expertise in Cessna-specific systems, ensuring compliance with FAA regulations and manufacturer standards. They provide genuine Cessna parts, reducing downtime and ensuring reliability. Regular maintenance at these centers helps maintain aircraft performance, safety, and value, while adhering to progressive care programs and annual inspection requirements.

9.2 Benefits of Using Authorized Centers

Using authorized Cessna Service Centers ensures compliance with FAA regulations and manufacturer standards, guaranteeing safety and reliability. These centers utilize genuine Cessna parts, reducing the risk of faulty components and ensuring optimal performance. Certified technicians with specialized training provide expert care, minimizing downtime and extending aircraft lifespan. Regular maintenance at these facilities helps maintain resale value and ensures adherence to progressive care programs. Owners benefit from increased safety, reduced long-term costs, and peace of mind knowing their aircraft is maintained to the highest standards.

Future Trends in Cessna 172S Maintenance

Future trends in Cessna 172S maintenance include digital tools, software updates, and sustainability initiatives, enhancing efficiency, reducing environmental impact, and improving performance through real-time monitoring.

10.1 Digital Tools and Software Updates

Digital tools and software updates are revolutionizing Cessna 172S maintenance, offering enhanced diagnostics, real-time monitoring, and streamlined record-keeping. Electronic manuals and diagnostic systems enable predictive maintenance, reducing downtime. Software updates optimize engine performance, avionics, and safety systems. Digital logbooks improve compliance and traceability, while data analytics provide insights for proactive maintenance. These advancements integrate seamlessly with existing systems, ensuring the Cessna 172S remains at the forefront of modern aviation technology, enhancing safety and efficiency for years to come.

10.2 Sustainability Initiatives

Sustainability initiatives for the Cessna 172S focus on reducing environmental impact through eco-friendly practices; These include fuel-efficient engine upgrades, waste reduction programs, and the use of recyclable materials in maintenance. Advanced technologies aim to minimize emissions and optimize resource use. Cessna also promotes sustainable aviation fuels and energy-efficient systems. These efforts align with global environmental goals, ensuring the aircraft remains environmentally responsible while maintaining performance. Such initiatives not only benefit the planet but also enhance the aircraft’s long-term viability for future generations of pilots and owners.

wifi repeater user manual

A WiFi Repeater is a device designed to extend wireless network coverage, eliminating dead zones and improving internet accessibility in homes, offices, or small businesses. It operates by amplifying and rebroadcasting the signal from an existing router, ensuring a stable and strong connection across a broader area. This cost-effective solution enhances connectivity for devices like smartphones, laptops, and smart home appliances, providing seamless browsing, streaming, and online activities. It supports both wired and wireless setups, making it versatile for various networking needs.

What is a WiFi Repeater?

A WiFi Repeater is a networking device designed to extend the coverage of an existing wireless network. It works by receiving the signal from a router, amplifying it, and rebroadcasting it to areas with weak or no connectivity. This ensures a stronger and more stable internet connection in dead zones. The device operates in two primary modes: Repeater Mode, which extends the range of the main network, and Access Point (AP) Mode, which creates a new wireless network for additional devices. It supports both wired and wireless setups, making it a versatile solution for homes, offices, and small businesses seeking to enhance their wireless connectivity.

Purpose and Benefits of Using a WiFi Repeater

A WiFi Repeater is primarily used to extend the coverage of an existing wireless network, eliminating dead zones and ensuring a stable connection in areas with weak signal strength. Its key benefit is to amplify and rebroadcast the router’s signal, providing seamless internet access to devices in remote or hard-to-reach locations. By improving connectivity, it enhances browsing, streaming, and online activities for smartphones, laptops, and smart home devices. The repeater is a cost-effective solution for expanding network reach without the need for additional wiring. It is ideal for homes, offices, and small businesses, offering a reliable and efficient way to optimize wireless performance.

Working Modes

A WiFi Repeater operates in two primary modes: Repeater Mode and Access Point (AP) Mode. Repeater Mode extends an existing WiFi signal, while AP Mode creates a new network.

Repeater Mode

In Repeater Mode, the WiFi Repeater acts as a signal amplifier, extending the coverage of an existing wireless network. It connects to the main router and rebroadcasts the signal, eliminating dead zones and improving connectivity in areas with weak reception. This mode is ideal for expanding network reach in large spaces or overcoming physical obstructions like walls. The repeater effectively doubles the signal strength, ensuring devices in remote areas can access the internet seamlessly. It maintains the same network name (SSID) as the primary router, allowing devices to roam between the main and extended networks without interruption. This setup is cost-effective and requires minimal configuration, making it a practical solution for enhancing wireless coverage.

AP Mode

In AP (Access Point) Mode, the WiFi Repeater functions as a central hub, creating a new wireless network while maintaining a wired connection to the main router. This mode is ideal for expanding network capacity and supporting multiple devices. The repeater connects to the primary router via an Ethernet cable, ensuring a stable and dedicated link. It then broadcasts its own WiFi signal, allowing devices to connect directly to it. AP Mode is particularly useful for small businesses or homes requiring a robust network infrastructure. It supports both wired and wireless devices, offering enhanced flexibility and reliability. This setup ensures a strong and consistent connection, making it perfect for environments with high bandwidth demands.

Differences Between Repeater and AP Modes

Repeater Mode extends an existing WiFi network by rebroadcasting the signal, while AP Mode creates a new network via a wired connection to the main router. In Repeater Mode, the device acts as a bridge, amplifying the signal to cover dead zones. It’s ideal for expanding wireless coverage without adding wires. AP Mode, however, establishes a dedicated network, supporting both wired and wireless devices, and is better suited for environments needing a robust, centralized network. Repeater Mode is wireless-only, while AP Mode often uses an Ethernet connection for stability. Each mode serves distinct networking needs, offering flexibility for different setups and requirements.

Quick Installation Guide

Plug the WiFi Repeater into a power outlet near your main router. Wait for the LED to stop flashing. Access the admin page via a web browser to complete the setup.

Physical Setup and Power-On

Begin by placing the WiFi Repeater near your main router to ensure optimal signal reception. Plug the device into a nearby power outlet using the provided adapter. Wait for the LED indicators to light up and stabilize, indicating the device is powered on. The power LED will typically glow solid once the device is ready for configuration. Ensure the repeater is positioned in an elevated location to maximize coverage area. Avoid placing it near physical obstructions or electronic devices that may cause interference. Once powered on, the repeater will be ready to establish a connection with your main router and extend the WiFi signal.

Entering Admin Page

To access the WiFi Repeater’s admin page, open a web browser and type the device’s default IP address, typically 192.168.10.1 or 192.168.0.1, in the address bar; Press Enter to load the login page. Use the default admin credentials, usually admin for both username and password, unless customized. If prompted, create a new admin password for security. Once logged in, you can configure settings like WiFi channels, encryption, and device management. If you encounter issues, ensure the repeater is properly connected and powered on. Resetting the device to factory settings may resolve login problems, allowing you to regain access using default credentials.

Selecting the Mode (Repeater/AP)

After accessing the admin page, navigate to the mode selection menu to choose between Repeater Mode and AP Mode. In Repeater Mode, the device extends the coverage of an existing WiFi network, amplifying the signal to eliminate dead zones. In AP Mode, it creates a new wireless access point, allowing wired devices to connect via Ethernet. Select the mode based on your networking needs: Repeater Mode for signal extension or AP Mode for creating a new network. Save your settings to apply the changes. Ensure the mode aligns with your network configuration to optimize performance and connectivity for all devices.

Setting Up the WiFi Repeater

Setting up your WiFi Repeater involves connecting it to your main router, either via WPS or manual setup, and accessing the admin page for configuration.

Using WPS (Wi-Fi Protected Setup)

Using WPS (Wi-Fi Protected Setup) simplifies the process of connecting your WiFi Repeater to your main router. Press the WPS button on both devices, and they will automatically sync, extending your network. This method eliminates the need to manually enter passwords, making setup quick and straightforward. Ensure the repeater is powered on and within range of the main router for a successful connection. Once connected, the LED indicator will confirm the link. WPS is a convenient and secure way to expand your network without technical hassle, perfect for users seeking an easy setup experience. Always verify WPS compatibility with your devices beforehand.

Manual Setup via Web Interface

To manually set up your WiFi Repeater, access the admin page by typing the device’s IP address (e.g., 192.168.10.1) in a web browser. Log in using the default admin credentials (typically “admin” for both username and password). Once logged in, navigate to the Repeater Mode section. Select your main router’s WiFi network from the list of available networks and enter its password. Configure the repeater’s WiFi settings, such as SSID and channel, to ensure optimal performance. Enable security settings like WPA2 for protection. Save your changes and reboot the device to apply the settings. This method offers greater control over customization and network configuration.

Connecting to the Repeater Network

To connect to the repeater network, open your device’s WiFi settings and select the repeater’s SSID, which may appear as “Repeater_” followed by the main router’s name. Enter the WiFi password, typically the same as your primary network. If prompted, log in to the repeater’s web interface (via its IP address) to configure the WiFi settings. Once connected, your device will obtain an IP address and establish a stable link. Ensure the connection is successful by checking for internet access. If issues arise, restart the repeater or move closer to it to improve signal strength. This process ensures seamless integration into your extended network.

Configuring the WiFi Repeater

Access the admin page via the repeater’s IP address to configure settings like WiFi mode, security, and firmware updates for optimal performance and network stability.

Accessing the Admin Page

To access the admin page of your WiFi repeater, connect your device to the repeater’s network and open a web browser. Type the default IP address (typically 192.168.10.1) in the address bar. Log in using the default admin username and password (usually “admin” for both). Once logged in, you can configure settings such as WiFi mode, security options, and firmware updates. Ensure your device is connected to the repeater’s network before attempting to access the admin page. If you’ve changed the default login credentials, use those instead. This interface allows you to customize and optimize your repeater’s performance for better network coverage and security.

Setting Up Repeater Mode

To set up Repeater Mode, connect your WiFi repeater to a power source near your main router. Once powered on, access the admin page via a web browser using the repeater’s IP address. Log in with your admin credentials. Navigate to the mode selection menu and choose “Repeater Mode.” The device will then scan for nearby WiFi networks. Select your main router’s network from the list and enter its password to establish a connection. The repeater will automatically sync with your router and extend its coverage. This mode allows seamless extension of your existing WiFi network without the need for additional wiring, improving connectivity in dead zones. Ensure the repeater is placed optimally for best results.

Setting Up AP Mode

To configure AP Mode, start by powering on the WiFi repeater near your main router. Access the admin page via a web browser using the repeater’s IP address, typically found in the manual. Log in with your admin credentials and navigate to the mode selection menu, where you’ll choose “AP Mode.” This mode allows you to create a new WiFi network, separate from your main one, ideal for connecting additional devices. You’ll need to set up the network name and password. Connect the repeater to your main router using an Ethernet cable for a wired connection or enter the main router’s WiFi password for a wireless link. Once configured, the repeater will act as a new access point, providing a dedicated network for devices to connect to, enhancing coverage and flexibility. Ensure optimal placement for the best signal strength and consider security settings to protect your new network.

Configuring Security Settings

Configuring security settings for your WiFi repeater is essential to protect your network from unauthorized access. Start by logging into the admin page using your credentials. Enable WPA3 encryption for the highest security level and set a strong, unique password. Disable WPS if not needed, as it can pose a security risk. Consider setting up a guest network to isolate visitors from your main network. Regularly update your firmware to patch security vulnerabilities. Use a firewall if available and limit device access by MAC address for added security. Ensure all connected devices use the same encryption standards to maintain network integrity and protect sensitive data.

Optimizing Performance

Place the repeater centrally, minimize obstructions, and use WiFi analyzer apps to select the best channel. Enable QoS settings to prioritize traffic and update firmware regularly for improved speed and stability.

Placement Tips for Maximum Coverage

Positioning your WiFi repeater correctly is crucial for optimal performance. Place it in a central location, away from walls and obstructions, to ensure even signal distribution. Avoid areas with high interference, such as near microwaves or cordless phones. Elevating the device can improve coverage, as it allows the signal to spread more effectively. Additionally, ensure it’s within the range of your main router to maintain a strong connection. Using a WiFi analyzer app can help identify the best spot by visualizing signal strength across your space. Experiment with different locations and monitor performance to find the ideal placement.

Using WiFi Analyzer Apps

WiFi analyzer apps are essential tools for optimizing your WiFi repeater’s performance. They help identify signal strength, channel overlap, and interference from nearby networks. By analyzing your WiFi environment, these apps can guide you in selecting the best channel for your repeater, reducing congestion and improving connectivity. Popular options include WiFi Analyzer for Windows and Android, and Network Analyzer for iOS. These tools provide visual graphs of signal distribution, enabling you to pinpoint areas of weak coverage and adjust your repeater’s placement accordingly. Regular use of WiFi analyzer apps ensures your network operates at peak performance, minimizing dropouts and slow speeds.

Selecting the Best Channel

Selecting the best WiFi channel is crucial for optimizing your repeater’s performance. Use WiFi analyzer apps to scan nearby networks and identify channel congestion. Channels 1, 6, and 11 are often recommended due to their non-overlapping frequencies. Avoid channels with heavy usage to minimize interference. If your repeater supports auto-channel selection, enable this feature to let the device choose the least congested option. For manual selection, log into the admin page, navigate to wireless settings, and choose a channel with the least overlap. Regularly check and update your channel selection to maintain optimal performance, especially in dynamic environments with changing WiFi traffic patterns.

Troubleshooting Common Issues

Common issues include the repeater not connecting to the main router, devices failing to connect to the repeater network, and slow speeds due to weak signal strength.

Repeater Not Connecting to Main Router

If your WiFi repeater fails to connect to the main router, ensure it is powered on and within range of the main network. Check for physical obstructions or interference from other devices. Verify that the repeater is correctly configured to match the main router’s SSID and password. Restart both the router and repeater to reset the connection. Update the repeater’s firmware to the latest version, as outdated software can cause compatibility issues. Access the repeater’s admin page via its IP address to reset settings or re-establish the connection. If issues persist, factory-reset the device and reconfigure it from scratch.

Devices Not Connecting to Repeater Network

If devices are unable to connect to the repeater network, ensure the repeater is properly configured and the network name (SSID) is correctly entered on your devices. Check that the WiFi password matches the one set up on the repeater. Restart both the device and the repeater to refresh the connection. Move devices closer to the repeater to improve signal strength. Verify that the repeater’s firmware is up to date, as outdated versions may cause compatibility issues. Use the WPS button on the repeater and device for a quick connection. Ensure the repeater is not overloaded with too many devices, as this can reduce performance and prevent connections.

Slow Speeds and Signal Strength Issues

Slow speeds and weak signal strength can occur due to physical obstructions, distance from the main router, or interference from other devices. To address this, ensure the repeater is placed in a central location with minimal obstacles. Use WiFi analyzer apps to identify the least congested channel and switch to it. Updating the repeater’s firmware can also improve performance. Additionally, reducing the number of connected devices may help, as overcrowding can degrade speed. Restarting both the repeater and connected devices often resolves temporary issues. If problems persist, consider adjusting the repeater’s position or upgrading to a more advanced model for better coverage and stability.

Advanced Settings

Access the admin page to configure IP settings, enable DHCP, and set up a guest network. Regular firmware updates ensure optimal performance and security for your repeater.

Firmware Update

Regular firmware updates are essential to ensure your WiFi repeater operates at peak performance. To update, access the admin page via a web browser. Navigate to the ‘Firmware Update’ section, check for available updates, and follow on-screen instructions to download and install the latest version. This process enhances security, improves functionality, and fixes any bugs. Always use the manufacturer’s official website to source firmware updates to avoid malware risks. Updating firmware periodically ensures compatibility with new devices and maintains stable connections. Never interrupt the update process to prevent device corruption. Keep your repeater up-to-date for optimal performance and reliability.

IP Settings and DHCP Configuration

Configuring IP settings and DHCP on your WiFi repeater ensures proper network functionality. Access the admin page via a web browser, navigate to the LAN settings section, and manually set the IP address, subnet mask, and gateway if required. DHCP configuration allows automatic IP assignment to connected devices. Enable DHCP for seamless device connectivity unless static IPs are needed. Customizing these settings optimizes network performance and prevents conflicts. Refer to the user manual for detailed instructions or contact support for advanced configurations. Proper IP and DHCP setup guarantees a stable and efficient network environment for all devices connected to the repeater.

Setting Up a Guest Network

To set up a guest network on your WiFi repeater, log into the admin page using a web browser. Navigate to the “Advanced Settings” or “Wireless Settings” section. Enable the “Guest Network” option and configure the SSID (network name) and security settings, such as WPA2 encryption, to protect the network. Set a strong password to ensure security. Optionally, you can limit bandwidth usage and access times for guest devices. Save your settings and test the guest network by connecting a device. This feature allows visitors to access the internet without compromising the security of your primary network or devices. Ensure the guest network is isolated from your main network for added privacy and security.

Maintenance and Care

Regularly update firmware, clean dust from vents, and restart the device periodically to ensure optimal performance. Check for physical damage and replace if necessary.

Regularly Updating Firmware

Regular firmware updates ensure your WiFi repeater performs optimally, with improved security, enhanced features, and better compatibility. Check the admin page for updates, download, and install them. Always follow the manufacturer’s instructions to avoid interruptions. Updating firmware can resolve connectivity issues, boost speed, and add new functionalities. Use a wired connection during updates to prevent loss of connectivity. Schedule updates during low-usage periods to minimize disruptions. Keep your device up-to-date to maintain peak performance and protect against potential vulnerabilities. Regular updates are crucial for a stable and secure network experience. Ensure your repeater stays current with the latest software for the best results.

Cleaning the Device

Cleaning your WiFi repeater regularly ensures optimal performance and longevity. Use a soft, dry cloth to gently wipe down the exterior, removing dust and dirt. Avoid liquid cleaners, as they may damage internal components. For vents or small crevices, use compressed air or a soft-bristled brush to remove dust buildup. Ensure the device is powered off before cleaning to prevent electrical issues. Regular cleaning prevents overheating and maintains signal strength. Avoid exposing the device to harsh chemicals or moisture. Clean the antennas and ports carefully to ensure proper connectivity. By keeping your repeater clean, you maintain reliable performance and extend its lifespan. Schedule periodic cleaning for optimal functionality.

Restarting the Repeater

Restarting your WiFi repeater is a simple yet effective way to resolve connectivity issues and improve performance. To restart, unplug the device from the power source, wait for 10-15 seconds, and plug it back in. This process, known as a power cycle, clears temporary glitches and resets the device to its default state. Regular restarts can help maintain stable connections and optimize signal strength. If you experience slow speeds or dropped connections, restarting the repeater is often the first step to restore proper functionality. It’s a quick and easy solution to common problems without requiring advanced technical knowledge or tools.

A WiFi repeater enhances network coverage and performance. Regular restarts and optimal placement ensure stable connections. For troubleshooting and maintenance, consult the user manual.

Final Tips for Optimal Use

For the best experience, place your WiFi repeater in a central location to maximize coverage. Use WiFi analyzer apps to identify the least congested channel and reduce interference. Regularly update the firmware to ensure security and performance improvements. Restart the device periodically to clear cached data and resolve connectivity issues. Consider setting up a guest network for visitors to protect your main network and limit bandwidth usage. Always refer to the user manual for specific instructions tailored to your model. By following these tips, you can enjoy a stable, fast, and secure wireless connection throughout your space.

Resources for Further Assistance

For additional support, refer to your WiFi repeater’s official user manual or visit the manufacturer’s website for detailed guides and troubleshooting tips. Online forums and tech support communities can also provide solutions to common issues. Many WiFi repeater models offer dedicated customer service hotlines for personalized assistance. Additionally, WiFi analyzer apps and setup tutorials on YouTube can help optimize your network. If you encounter specific problems, check the Frequently Asked Questions (FAQ) section on the manufacturer’s site or contact their support team directly for further guidance.

bosch oven instruction manual

Safety Precautions

Always follow the instruction manual to ensure safe operation. Never immerse the oven or its parts in water. Check for damage before use and avoid overheating. Keep children away while cooking.

1.1 General Safety Information

Read this instruction manual carefully before using your Bosch oven. Always retain the manual for future reference or for subsequent owners. Ensure the appliance is installed correctly by a qualified professional to avoid hazards. Do not connect the oven if it is damaged during transit or unpacking. This appliance is designed for domestic use only and should be built into kitchen units as specified. Never leave children unattended near the oven while it is in operation. Avoid exposing the oven to excessive moisture or water, as this can cause electrical issues. Always follow the recommended safety guidelines to ensure safe and correct operation of your Bosch oven.

1.2 Specific Warnings and Cautions

When using your Bosch oven, ensure all safety precautions are strictly followed. Never place flammable materials, such as towels or curtains, near the appliance. Avoid overheating the oven, as this can lead to malfunction or fire hazards. Do not use abrasive cleaners or sharp objects, as they may damage the oven surfaces. Always ensure the oven is turned off and cooled down before cleaning. Never attempt to repair the appliance yourself, as this can result in serious injury or further damage. For any issues, contact a qualified technician. Keep the oven vent unobstructed to ensure proper airflow and prevent carbon monoxide buildup. Always follow the manufacturer’s guidelines for temperature settings and cooking times to ensure safe operation.

1.3 Handling and Avoiding Common Mistakes

Proper handling of your Bosch oven is essential for safe and efficient use. Avoid common mistakes like overheating, which can damage the appliance. Never leave cooking unattended, especially when using the grill or high-temperature settings. Always use oven mitts or tongs to handle hot dishes to prevent burns. Do not place metal utensils or aluminum foil directly on the oven floor, as this can cause sparks or damage. Ensure racks are properly positioned before cooking to avoid uneven heating. Regularly clean the oven to prevent grease buildup, which can lead to fires. Never ignore error codes; consult the manual or contact support immediately. By following these guidelines, you can extend the lifespan of your oven and ensure optimal performance.

Installation Instructions

Ensure proper installation by following the instruction manual. Check for damage before connecting. Follow manufacturer guidelines to ensure safe and correct functionality.

2.1 Pre-Installation Checklist

Before installing your Bosch oven, ensure the following:

  • Check for damage: Inspect the appliance for any transit damage.
  • Ensure proper location: Verify the oven is intended for built-in installation in a kitchen.
  • Retain the manual: Keep the instruction manual for future reference.
  • Review guidelines: Familiarize yourself with the installation instructions provided.

These steps ensure a safe and correct installation process for your Bosch oven.

2.2 Step-by-Step Installation Guide

Follow these steps to install your Bosch oven correctly:

  1. Prepare the site: Ensure the installation area is clear and meets the oven’s dimensions.
  2. Unpack carefully: Remove the oven from its packaging, taking care to avoid damage.
  3. Position the oven: Align it with the designated space, ensuring it is level and secure.
  4. Connect electrical components: Attach the power cord to a suitable outlet, following safety guidelines.
  5. Secure the appliance: Use the provided hardware to fasten the oven into place.
  6. Test the oven: Turn it on and check all functions to ensure proper operation.

Refer to the instruction manual for specific details and safety precautions.

2.3 Post-Installation Checks

After installing your Bosch oven, perform these checks:

  • Leveling: Ensure the oven is perfectly level to guarantee even cooking.
  • Electrical connection: Verify that all connections are secure and meet safety standards.
  • Ventilation: Check that ventilation systems are functioning properly to prevent heat buildup.
  • Functionality: Test all controls, heating elements, and lighting to ensure they work correctly.
  • Surrounding area: Confirm that the oven is installed with adequate clearance from adjacent surfaces.
  • Manual review: Ensure all installation steps align with the instruction manual.

These checks ensure your Bosch oven is installed safely and operates efficiently.

Operating the Bosch Oven

Read the instruction manual to understand basic controls and advanced functions. Preheat the oven as instructed, and use the cooking modes for optimal results.

3.1 Basic Controls and Functions

The Bosch oven features a user-friendly interface with a touch control panel and intuitive knobs. The temperature control knob allows precise heat adjustment, while the timer function helps monitor cooking duration. The oven light provides visibility of your dishes without opening the door. Basic cooking modes include conventional heating, convection, and grill functions, ensuring versatile cooking options. Always refer to the instruction manual for specific model details, as controls may vary.

Understanding these basic functions ensures safe and efficient operation. Familiarize yourself with the display screen for real-time updates on temperature and cooking progress.

3.2 Advanced Cooking Functions

The Bosch oven offers advanced cooking functions for enhanced performance. Features like steam cooking and multi-rack cooking allow for precise control over moisture and even heating. The automatic temperature control ensures consistent results, while the delayed start function enables convenient meal planning.

Additional modes such as slow cooking and proofing cater to specific culinary needs. The pyrolytic cleaning function simplifies maintenance by reducing food residue to ash.

  • Steam cooking: Maintains moisture for tender dishes.
  • Multi-rack: Accommodates multiple dishes simultaneously.
  • Smart sensors: Automatically adjust cooking parameters.

These advanced functions optimize cooking flexibility and efficiency. Always refer to your model-specific manual for detailed instructions.

3.4 Troubleshooting Common Issues

If your Bosch oven isn’t functioning properly, check for common issues. Oven not heating may indicate a faulty heating element or incorrect power supply. Uneven cooking could result from improper rack placement or blocked vents.

  • Error codes: Refer to the manual for specific code meanings and solutions.
  • Display malfunction: Restart the oven or check for software updates.

For minor issues, reset the oven by turning it off and on. Always consult the user manual for model-specific troubleshooting steps. If problems persist, contact Bosch support for professional assistance.

Maintenance and Care

Regularly clean the Bosch oven to prevent food residue buildup. Use gentle cleaners and avoid abrasive materials. Check for damage and ensure all parts are securely fastened. Steam cleaning is recommended for efficient maintenance.

4.1 Cleaning the Oven

Regular cleaning is essential for maintaining your Bosch oven’s performance and hygiene. Turn off the oven and let it cool completely before cleaning. For tough food residue, use the steam cleaning function by placing water in the oven cavity. Avoid harsh chemicals, as they may damage the surfaces. Use a soft, damp cloth to wipe down racks and interior walls. For stubborn stains, mix a mild soap with warm water and apply gently. Never use abrasive scrubbers or sharp objects, as they can scratch the enamel. Clean the exterior with a gentle detergent to prevent fingerprints and smudges. For glass doors, use a glass cleaner and a lint-free cloth. Regular cleaning prevents grease buildup and ensures optimal cooking results. Refer to your instruction manual for model-specific cleaning recommendations.

4.2 Regular Maintenance Tasks

Performing regular maintenance ensures your Bosch oven operates efficiently and prolongs its lifespan. Clean the oven racks and shelves periodically to prevent food residue buildup. Check the oven door seals for wear and tear, as damaged seals can affect heating performance. Inspect the heating elements for visible damage and ensure all internal components are secure. Regularly clean the ventilation system to maintain proper airflow. For models with a steam function, descale the water tank as recommended in the instruction manual. Always use genuine Bosch parts for replacements to ensure compatibility and safety. Schedule annual professional maintenance if required by your model. By adhering to these tasks, you can maintain optimal functionality and prevent potential issues.

4.3 Caring for Specific Parts

Proper care of specific parts ensures your Bosch oven remains in excellent condition. Clean oven racks and shelves with mild soap and warm water, avoiding abrasive cleaners that may damage the finish. For glass parts, use a gentle glass cleaner to maintain clarity. The oven door should be wiped with a soft cloth after each use to prevent grease buildup. Regularly inspect and clean the control panel with a damp cloth, avoiding harsh chemicals that could damage the surface. For models with steam functions, descale the water tank periodically to prevent mineral deposits. Always refer to the instruction manual for specific cleaning recommendations for your model. Proper care extends the lifespan and performance of your appliance.

Understanding Error Codes

Familiarize yourself with common error codes to quickly identify issues. Refer to the instruction manual for specific solutions. Codes like E001 or E022 indicate specific malfunctions.
Always consult the manual for accurate troubleshooting guidance to resolve issues efficiently and safely.

5.1 Common Error Codes

Identify common error codes to diagnose oven issues quickly. Codes like E001 or E022 indicate specific malfunctions, such as heating problems or sensor issues. Always refer to the instruction manual for detailed explanations of each code. Understanding these codes helps you address problems effectively, ensuring your oven operates safely and efficiently. Regularly updating your knowledge of error codes can prevent minor issues from escalating. If unsure, consult the manual or contact Bosch support for assistance.

5.2 How to Resolve Error Codes

To resolve error codes on your Bosch oven, start by identifying the specific code displayed. Refer to the instruction manual for a detailed explanation of each code. For example, E001 may indicate a heating issue, while E022 could signal a sensor malfunction. Perform a soft reset by turning the oven off and on again. If the issue persists, check for loose connections or blockages. For complex errors, contact Bosch support or a certified technician. Always use genuine spare parts for repairs. Regular maintenance, as outlined in the manual, can help prevent recurring issues. Ensure you have the model number (E-Nr) handy for faster assistance.

Additional Resources

Visit Manua.ls for 1772 Bosch manuals. Contact support at (800) 944-2904 or access resources via the Bosch website for warranty and spare parts information.

6.1 Where to Find Manuals Online

Bosch oven manuals are readily available online. Visit Manua.ls to access over 1,772 Bosch manuals, including popular models like the Serie 2 HHF113BR0B and HBF133BR0. Additionally, the Bosch official website provides comprehensive documentation, allowing users to download PDF versions of instruction manuals by entering the appliance’s model number (E-Nr). For specific models, such as the HBN531E0B, direct links are available for easy access. These resources ensure that users can operate, install, and maintain their ovens safely and efficiently, with detailed guides covering everything from installation instructions to troubleshooting tips.

6.2 Contact Information for Support

For assistance with your Bosch oven, contact Bosch Customer Support at 1-800-944-2904. You can also visit their official website and use the contact form for inquiries. Additionally, online chat support is available for immediate help. Bosch provides dedicated support for troubleshooting, repair requests, and warranty-related questions. Their team is equipped to address specific model concerns, ensuring your appliance operates smoothly. For localized support, refer to the contact information provided in your instruction manual or on the Bosch website.

6.3 Warranty and Spare Parts Information

Your Bosch oven is covered by a comprehensive warranty program. To access warranty benefits, ensure your appliance is registered on the MyBosch platform. For spare parts, visit the Bosch website or contact authorized dealers. Always use original Bosch spare parts to maintain performance and safety. The instruction manual provides details on warranty terms and how to order genuine parts. For specific inquiries, refer to the warranty section or contact Bosch Customer Support at 1-800-944-2904. Proper maintenance with authentic parts ensures your oven operates efficiently and extends its lifespan.