oem shaft replacement guide

Shaft replacement is critical for maintaining optimal performance and longevity. This guide provides essential insights into OEM shaft replacement, emphasizing proper selection, installation, and maintenance techniques.

What Are OEM Shafts?

OEM (Original Equipment Manufacturer) shafts are components designed and produced by the original manufacturer of a vehicle or equipment. These shafts are built to precise specifications, ensuring compatibility, performance, and durability. Made from high-quality materials, they are engineered to meet the exact requirements of the original design. OEM shafts are preferred for their consistency and reliability, often featuring specific tolerances and finishes for optimal functionality. They are widely used in automotive, industrial, and even golf equipment, where precise fitment and performance are critical. OEM shafts are also backed by manufacturer warranties, ensuring trust and quality.

Why Shaft Replacement Is Important

Shaft replacement is essential for maintaining optimal performance, safety, and longevity of equipment. Over time, shafts can suffer from wear, damage, or corrosion, leading to reduced efficiency and potential failure. Replacing worn or damaged shafts ensures smooth operation, prevents costly breakdowns, and enhances overall reliability. Additionally, upgrading to a custom-fitted shaft can improve performance metrics such as distance and accuracy in golf or torque in machinery. Regular replacement also aligns with OEM specifications, ensuring compatibility and adherence to safety standards. Ignoring worn shafts can lead to catastrophic failures, making timely replacement a critical priority.

Understanding OEM Shaft Specifications

OEM shaft specifications ensure compatibility and performance. Key factors include tip size, material, and MPF ratings, which guide proper shaft selection for optimal club performance and durability.

  • Tip size (.370″ or .350″)
  • Material (steel, graphite, or hybrid)
  • MPF ratings for flex and torque

Shaft Types: Iron, Wood, and Hybrid Shafts

OEM shafts are categorized into three main types: iron, wood, and hybrid shafts. Iron shafts are durable and provide consistent performance, often preferred by experienced players. Wood shafts, traditionally made of steel or graphite, are lighter and offer increased flexibility for higher trajectories. Hybrid shafts combine elements of both, delivering a balance of distance and accuracy. Each type is designed for specific swing speeds and player preferences, ensuring optimal performance when matched correctly. Proper selection based on MPF ratings and swing dynamics is crucial for maximizing results.

Shaft Flex and Torque Ratings Explained

Shaft flex and torque ratings are crucial factors in determining a shaft’s performance. Flex refers to the shaft’s bending during a swing, impacting feel and ball flight. Torque measures the shaft’s resistance to twisting, affecting accuracy and distance. Properly matching these ratings to a golfer’s swing ensures optimal performance and consistency. OEM guides provide detailed specifications to help select the right shaft, balancing flex and torque for individual swing dynamics.

MPF Shaft Ratings and Their Significance

MPF (Moment of Inertia Performance Factor) ratings are crucial in evaluating shaft performance. They measure how consistently a shaft delivers energy to the ball, ensuring optimal distance and accuracy. Higher MPF ratings indicate better stability and reduced twisting during the swing. When replacing a shaft, consulting MPF ratings helps match the shaft to your swing characteristics, enhancing overall performance. This system eliminates guesswork, providing a data-driven approach to selecting the right OEM shaft for your clubs, ensuring consistency and precision in every shot.

Preparing for Shaft Replacement

Ensure you have the correct tools and equipment. Assess your current shaft’s condition and consult OEM guides for specific instructions and recommendations.

Tools and Equipment Needed for Shaft Replacement

Essential tools include a shaft extractor, torque wrench, and alignment jig. Additional items like a reamer, cutting tools, and a vice ensure precise removal and installation. Proper equipment guarantees safety and accuracy.

Assessing the Condition of Your Current Shaft

Evaluating your shaft’s condition is essential before replacement. Inspect for visible wear, dents, or rust. Check performance issues like reduced distance or accuracy. Measure flex and torque to ensure alignment with OEM specs. If damage or degradation is found, replacement is necessary. Always refer to OEM guidelines for accurate assessments and specifications to maintain optimal performance and longevity. This step ensures a smooth transition to a new shaft, tailored to your needs. Proper evaluation prevents future issues and enhances overall functionality.

Consulting OEM Guides and Manuals

Consulting OEM guides and manuals is essential for a successful shaft replacement. These resources provide detailed specifications, MPF ratings, and compatibility information. They ensure the selected shaft matches your equipment’s requirements. Manuals often include step-by-step instructions for installation and maintenance. By referencing OEM materials, you can avoid common mistakes and guarantee optimal performance. Always verify the manufacturer’s recommendations for your specific clubs or vehicle to achieve the best results. This step is crucial for both novice and experienced technicians.

The Shaft Replacement Process

The process involves safely removing the old shaft, installing the new one, and making precise adjustments for optimal performance and alignment.

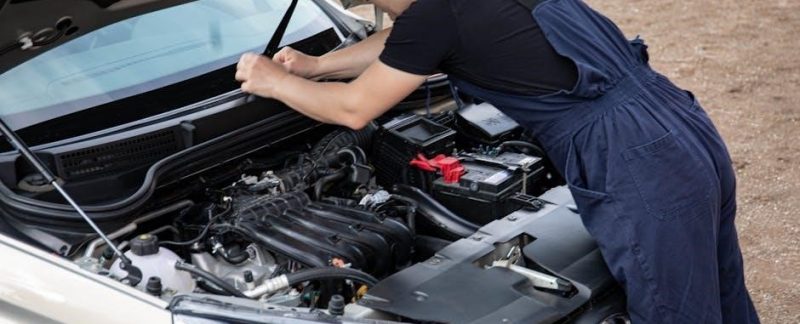
Removing the Old Shaft Safely

Removing the old shaft requires careful preparation to avoid damage. Begin by gathering necessary tools, such as a heat gun, shaft puller, and protective gloves. Apply gentle heat to the shaft-hosel bond to loosen the adhesive. Use a vise to secure the clubhead and carefully pull the shaft outward with the puller. If resistance occurs, repeat the heating process. Once removed, inspect the hosel for residual epoxy and clean it thoroughly. This ensures a smooth installation process for the new shaft. Always follow OEM guidelines for safe removal.

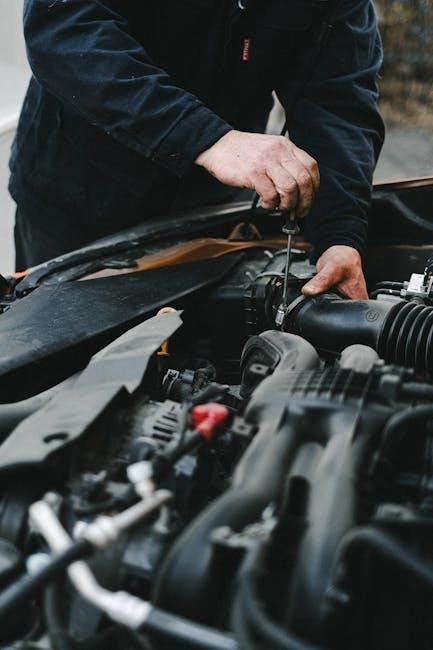
Installing the New Shaft

Installing the new shaft requires precision to ensure proper alignment and fitment. Begin by aligning the shaft with the clubhead or equipment, ensuring it is seated correctly. Use the appropriate tools, such as a shaft installer or epoxy, to secure it firmly. Follow the OEM manual for specific torque and alignment specifications. Double-check the shaft’s position and ensure it is fully seated before applying adhesive. Allow the epoxy to cure completely for a durable bond. Finally, verify the shaft’s performance with a test swing or operation to confirm optimal functionality.

Final Adjustments and Testing

After installing the new shaft, ensure all connections are secure and properly aligned. Conduct a series of dynamic tests, such as swing weight checks and flex assessments, to confirm optimal performance. Adjust the shaft’s positioning if necessary to achieve the desired feel and accuracy. Finally, perform a thorough inspection to verify that all components are functioning correctly and that the shaft is evenly seated. Proper testing ensures the shaft meets OEM specifications and delivers consistent results on the course.

Post-Installation Checks and Maintenance

After installation, perform static testing to ensure proper alignment and torque. Regular inspections and dynamic testing help maintain optimal performance and prevent potential issues over time.

Static Testing After Installation

Static testing after installing a new shaft ensures proper fitment and alignment. Begin with a visual inspection for any signs of damage or misalignment. Measure the shaft’s tip diameter and butt diameter using calipers to confirm OEM specifications. Check the shaft’s spine alignment, as improper alignment can affect performance. Use a torque wrench to ensure the shaft is securely fitted, adhering to OEM torque ratings. Finally, refer to the manufacturer’s guide for any specific static tests recommended for your shaft type. This step ensures reliability and optimal performance before dynamic testing begins.

Dynamic Testing for Optimal Performance

Dynamic testing involves assessing the shaft’s performance under real-world conditions; This includes measuring flex, torque, and tip deflection during actual swings. Using tools like launch monitors and swing robots, you can evaluate how the shaft behaves at impact and throughout the swing cycle. This step ensures the shaft delivers consistent results, maximizing distance and accuracy. Comparing results to OEM specifications helps verify optimal performance and identifies any needed adjustments for superior playability and durability.

Maintenance Tips for Shaft Longevity

Regular cleaning prevents dirt buildup. Inspect for damage or wear. Store in dry, cool environments. Schedule periodic checks to ensure optimal performance and durability over time.

Cleaning and Inspection of Shafts

Regular cleaning and inspection are vital for maintaining shaft longevity. Use a mild solvent to wipe away dirt and debris, ensuring no residue remains. Visually inspect for dents, scratches, or excessive wear. Check the tip and hosel for proper fit and alignment. Address any damage promptly to prevent performance issues. Cleaning prevents corrosion, while inspections help identify potential problems early. This routine ensures optimal performance and extends the life of your shaft. Regular maintenance is key to reliability and consistency in your game or application.

Proper Storage Techniques

Proper storage is essential to maintain the integrity of your OEM shafts. Store them in a cool, dry environment, avoiding direct sunlight and moisture. Never bend or flex shafts during storage, as this can cause permanent damage. Use protective covers or sleeves to prevent scratches and dust accumulation. Avoid exposing shafts to extreme temperatures or humidity, as this may alter their flex and torque ratings. Always store shafts in their original packaging if available, and ensure they are securely fastened to prevent movement. Regularly inspect stored shafts for signs of wear or damage before reinstalling them.

Scheduling Regular Maintenance

Regular maintenance is essential to ensure optimal performance and longevity of your shaft. Schedule inspections every 6-12 months to check for wear, damage, or misalignment.

Consult your OEM guide for recommended maintenance intervals. Clean and lubricate shafts as specified, and address any issues promptly to prevent premature wear. Proper scheduling ensures reliability and extends service life.

Selecting the Right Shaft for Your Needs

Consider factors like flex, torque, and tip size when choosing a shaft. Match specifications to your swing speed and performance goals for optimal results.

Factors to Consider When Choosing a Shaft

When selecting a shaft, consider tip size, MPF ratings, and material types like iron, wood, or hybrid. Ensure compatibility with your clubhead and swing characteristics. Proper shaft flex and torque ratings are crucial for consistent performance. Check OEM specifications for accurate fitting. Consult guides for recommendations tailored to your needs, ensuring optimal distance and accuracy. Always verify manufacturability and compatibility before finalizing your choice. Proper selection enhances overall performance and longevity of your equipment.

Matching Shaft Specifications to Your Swing

Matching shaft specifications to your swing is vital for optimal performance. Consider factors like flex, weight, and torque to align with your swing speed and style. Lighter shafts with higher torque can enhance distance for slower swings, while stiffer options suit faster tempos. Tip size, such as .370, must also align with club hosel requirements. Proper fitting ensures better accuracy and ball flight, making it essential to consult OEM guides or professionals for personalized recommendations.

Common Mistakes to Avoid

Using Incorrect Shaft Specifications

Ignoring OEM specifications and improper installation techniques are common errors. Ensure correct flex ratings and torque alignment to avoid performance issues and potential equipment damage.

Using incorrect shaft specifications can lead to poor performance and potential damage to your equipment. Ensure you select shafts that match your OEM specifications, including tip size, flex, and torque ratings. Incorrect shafts may result in reduced accuracy, distance, and durability. Always consult OEM guides or professionals to avoid mismatches. For example, a .370 iron shaft may not fit properly in certain hosels without modification. Proper MPF ratings and shaft type selection are crucial for optimal results. Ignoring these details can lead to subpar performance and costly repairs down the line.

Improper Installation Techniques

Improper installation techniques can lead to reduced performance and equipment lifespan. Common mistakes include ignoring manufacturer guidelines, using incorrect tip sizes, or failing to align shafts properly. Over-tightening or under-tightening components can cause premature wear. Additionally, not reaming or preparing the hosel correctly can result in poor fitment. Always follow OEM specifications and use appropriate tools to ensure a precise fit. Incorrect installation can compromise the integrity of the shaft and surrounding components, leading to suboptimal performance and potential damage.

Cost Considerations

Budgeting for shaft replacement involves comparing OEM and aftermarket options. OEM shafts often carry higher costs but ensure compatibility and performance. Plan accordingly to avoid overspending.

Budgeting for Shaft Replacement

Budgeting for shaft replacement requires considering costs of OEM and aftermarket options, with prices ranging from $50 to $300. Factors like flex ratings, torque, and materials impact expenses. OEM shafts often come with higher costs but offer superior quality and warranty benefits. Aftermarket shafts can be more affordable but may lack original specifications. Labor costs for installation should also be included in your budget. Researching current market prices and comparing options ensures you stay within your financial limits while meeting performance needs.

Cost Comparison: OEM vs. Aftermarket

OEM shafts are typically more expensive due to their precision engineering and brand-specific quality. Aftermarket options offer cost savings but may lack the exact OEM specifications. Both provide durability, but OEMs often include warranties, enhancing long-term value. Aftermarket shafts are budget-friendly yet still reliable, making them a viable choice for many. The decision hinges on balancing budget and performance needs, ensuring the best fit for your equipment and requirements.

Warranty and Support

OEM shafts often come with manufacturer warranties covering defects. Dedicated support teams assist with inquiries, ensuring proper replacement and maintenance guidance for optimal performance and durability.

OEM Warranty Coverage for Shafts

OEM shafts typically come with manufacturer warranties, ensuring protection against defects in materials and workmanship; Coverage periods vary by brand but often range from 1 to 2 years. Understanding warranty terms is crucial for maintaining coverage, as improper installation or unauthorized modifications may void it. Always verify OEM warranty details before purchasing or installing a new shaft to ensure compliance with manufacturer guidelines and maximize protection for your investment.

Customer Support and Service Options

Manufacturer-provided customer support is essential for a smooth OEM shaft replacement process. Most OEMs offer dedicated support teams to assist with troubleshooting and installation queries. Online resources, including detailed guides and FAQs, are readily available. Additionally, many manufacturers provide warranty coverage for their shafts, ensuring protection against defects. For complex issues, direct support lines and service centers can address concerns promptly. This comprehensive support system guarantees peace of mind and optimal results during and after replacement.

Replacing OEM shafts requires careful selection and installation. Proper maintenance ensures longevity, while adhering to guides enhances performance and durability for optimal results.

Final Thoughts on Shaft Replacement

Shaft replacement is crucial for optimizing performance and extending equipment life. Understanding OEM specifications and selecting the right shaft enhances durability and efficiency; Regular maintenance and proper storage prolong shaft longevity. This guide offers comprehensive insights for informed decisions. Invest in high-quality OEM shafts and follow the outlined steps to maximize potential for years to come.

aroeve mk01 manual

Product Overview

The AROEVE MK01 is a high-quality air purifier designed to effectively remove pollutants, allergens, and harmful particles from the air, improving indoor air quality․ Compact and stylish, it is ideal for small to medium-sized spaces, covering up to 215 square feet․ With its H13 HEPA filter, it efficiently captures smoke, pollen, dander, and other airborne contaminants, ensuring cleaner and healthier air for your home․

1․1 Key Features of the AROEVE MK01 Air Purifier

The AROEVE MK01 air purifier boasts several standout features, including a powerful H13 HEPA filter that captures 99․97% of particles as small as 0․3 microns, such as dust, pollen, and pet dander․ It offers three fan speed settings and a sleep mode for ultra-quiet operation, making it ideal for bedrooms․ The unit is compact, measuring 6․1D x 6․1W x 9․7H inches, and weighs just 3 pounds, allowing easy placement in small spaces․ It covers up to 215 square feet and operates at a low noise level of 22dB․ Additional features include an LED indicator for filter status and a user-friendly control panel with a reset button for convenient operation․

1․2 Design and Build Quality

The AROEVE MK01 air purifier features a sleek and compact design, making it a stylish addition to any room․ Its cylindrical shape with a white finish blends seamlessly with modern home decor․ Constructed from high-quality materials, the unit is durable and lightweight, weighing only 3 pounds, which allows for easy relocation․ The build quality ensures smooth operation, with a sturdy base that prevents wobbling․ The air purifier’s control panel is intuitive, with a simple interface that includes buttons for power, fan speed, and mode selection․ The overall design emphasizes functionality while maintaining an aesthetically pleasing appearance, ensuring it fits well in various settings, from bedrooms to living rooms․

1․3 Technical Specifications

The AROEVE MK01 air purifier is designed with advanced features to ensure optimal performance․ It covers an area of up to 215 square feet, making it suitable for small to medium-sized rooms․ The unit measures 6․1 inches in depth, 6․1 inches in width, and 9․7 inches in height, with a lightweight design of just 3 pounds for easy portability․ The air purifier operates at a low noise level of 22dB, ensuring quiet operation during sleep or work․ It features three fan speed settings, allowing users to adjust airflow according to their needs․ The H13 HEPA filter captures 99․97% of airborne particles as small as 0․3 microns, including dust, pollen, and pet dander, providing effective air purification․

Installation Guide

Unbox and remove all packaging materials․ Carefully take out the air purifier and ensure the filter is unpackaged․ Place the unit on a flat, stable surface away from walls for optimal airflow․ Plug in the power cord and press the power button to start the device․ Refer to the manual for detailed setup instructions․

2․1 Unboxing and Initial Setup

Start by carefully unboxing the AROEVE MK01 air purifier and removing all packaging materials․ Ensure the unit and accessories, such as the power cord, are intact; Locate the pre-installed filter and remove any plastic wrapping or protective packaging to ensure proper airflow․ Gently place the air purifier on a stable, flat surface, avoiding carpets or uneven ground․ Plug in the power cord and press the power button to initiate the device․ The LED indicator will light up, signaling the unit is ready for operation․ Refer to the manual for additional setup instructions to ensure optimal performance and safety․

2․2 Placing the Unit in the Optimal Location

For maximum efficiency, place the AROEVE MK01 in a central location within the room, ensuring at least 12 inches of clearance from walls and furniture․ This allows unobstructed airflow and even air circulation․ Avoid placing the unit in corners or near windows, as this can reduce its effectiveness․ It is also recommended to position the air purifier on a stable, elevated surface to enhance airflow and coverage․ Ensure the device is at least 3 feet away from any heating vents or radiators to prevent interference․ Proper placement ensures the MK01 can effectively purify the air in spaces up to 215 square feet․

2․3 Preparing the Filter for First Use

Before first use, ensure the filter is properly prepared․ Carefully remove the filter from its packaging and check for any plastic wrapping or protective covers․ Gently peel off any packaging materials from the filter surface to ensure it is fully exposed․ Do not wash or dampen the filter, as this may damage its efficiency․ Align the filter with the unit’s filter compartment, ensuring it fits securely․ Close the compartment tightly to maintain proper sealing․ Turn on the device to test airflow and ensure the filter is functioning correctly․ Proper preparation ensures optimal performance and longevity of the filter․

Operating Instructions

Press the ON/OFF button to start the device․ Adjust fan speed using the mode button․ Use sleep mode for quieter operation․ Check LED indicators for filter status․

3․1 Starting the Device

To start the AROEVE MK01 air purifier, ensure it is properly plugged into a power outlet․ Press the ON/OFF button located on the top control panel․ The device will begin operation in its default mode․ The LED indicator will illuminate, confirming the unit is active․ Before first use, make sure the filter is correctly installed and any packaging materials are removed․ If the red indicator light is on, check if the filter needs replacement or if there are any blockages․ Allow the device to run for a few minutes to begin purifying the air effectively․ For optimal performance, place the unit in an open area away from walls and obstructions․

3․2 Adjusting Fan Speed and Modes

To start the AROEVE MK01 air purifier, ensure it is properly plugged into a power outlet․ Press the ON/OFF button located on the top control panel․ The device will begin operation in its default mode․ The LED indicator will illuminate, confirming the unit is active․ Before first use, make sure the filter is correctly installed and any packaging materials are removed․ If the red indicator light is on, check if the filter needs replacement or if there are any blockages․ Allow the device to run for a few minutes to begin purifying the air effectively․ For optimal performance, place the unit in an open area away from walls and obstructions․

3․3 Using Sleep Mode

To activate Sleep Mode on the AROEVE MK01, press and hold the “ON/OFF & Modes” button until the device enters a quieter operation․ This mode reduces fan speed, minimizing noise levels to 22dB, ideal for uninterrupted sleep․ The LED indicator will dim, and the air purifier will automatically adjust to a lower setting․ Sleep Mode optimizes energy consumption and ensures continuous air purification without disturbances․ To exit Sleep Mode, press the button again to resume normal operation․ This feature is particularly useful for bedrooms, ensuring a peaceful environment while maintaining clean air quality throughout the night․

3․4 Understanding LED Indicators

The AROEVE MK01 features LED indicators that provide essential feedback about the device’s status․ The red indicator light signals when the filter needs replacement or if there’s a malfunction․ A steady blue light indicates normal operation, while a flashing blue light signals mode changes or adjustments․ The LED also dims in Sleep Mode to avoid disrupting your environment․ Understanding these indicators helps users maintain optimal performance and address issues promptly, ensuring efficient air purification and device longevity․

Maintenance and Cleaning

Regular maintenance ensures the AROEVE MK01 operates efficiently․ Clean the pre-filter monthly and replace filters as indicated by the red LED indicator for optimal performance․

4․1 Filter Replacement Guide

To ensure optimal performance, replace the filter in your AROEVE MK01 when the red indicator light turns on․ First, switch off and unplug the device․ Open the base cover by rotating it counterclockwise․ Carefully pull out the old filter and discard it․ Remove the packaging from the new filter and insert it, aligning it properly․ Close the base cover and plug in the device․ Press the reset button for 3-5 seconds to reset the filter light․ Clean or replace the pre-filter as needed for best results․ Regular filter replacement ensures effective air purification and prolongs the unit’s lifespan․

4․2 Cleaning the Pre-Filter

Cleaning the pre-filter regularly is essential for maintaining the AROEVE MK01’s efficiency․ Turn off and unplug the device before starting․ Open the base cover by rotating it counterclockwise to access the pre-filter․ Gently remove the pre-filter and vacuum it using a soft brush attachment to remove dust and debris․ For deeper cleaning, wash it with mild soap and lukewarm water, then allow it to air dry completely before reinstalling․ Avoid using harsh chemicals or abrasive materials, as they may damage the filter․ Cleaning the pre-filter every 1-2 months ensures optimal performance and prolongs the life of the main filter․

4․3 Regular Maintenance Tasks

Regular maintenance is crucial to ensure the AROEVE MK01 operates efficiently․ Check the filter every 1-3 months, depending on usage and air quality․ Replace the HEPA filter every 6-8 months or when the red indicator light turns on․ To replace, align the new filter’s tabs with the unit’s slots and twist counterclockwise․ Also, clean the exterior with a soft cloth to prevent dust buildup․ Avoid using harsh chemicals, as they may damage the surface․ Ensure proper air circulation by keeping the purifier at least 3 feet away from walls and furniture․ Regularly inspect and clean the pre-filter to maintain optimal performance․ Reset the filter indicator by pressing the reset button for 3 seconds after replacing the filter․

Safety Instructions

Always keep the AROEVE MK01 out of children’s reach and ensure it is placed on a stable, flat surface away from water to avoid electrical hazards․

5․1 General Safety Precautions

To ensure safe operation of the AROEVE MK01 air purifier, always follow these guidelines:
– Place the unit on a stable, flat surface away from water to prevent electrical hazards․
– Keep children away from the device to avoid accidental tampering․
– Do not insert fingers or objects into the air purifier’s vents or openings․
– Avoid exposure to extreme temperatures or humidity levels․
– Ensure the device is used only for its intended purpose and in accordance with the manual․
– Never operate the air purifier near open flames or sparks․
– Maintain proper ventilation in the room while the device is in use․
– Follow all electrical safety guidelines to prevent shocks or malfunctions․
By adhering to these precautions, you can ensure safe and effective performance of the AROEVE MK01 air purifier․

5․2 Electrical Safety Guidelines

For safe operation of the AROEVE MK01 air purifier, follow these electrical safety guidelines:
– Use the device only with the provided power cord and adapter to avoid electrical hazards․
– Plug the air purifier into a grounded electrical outlet to prevent shocks․
– Never overload the outlet with multiple high-power devices․

– Avoid using damaged cords or plugs, as this can lead to electrical fires or shocks․
– Keep the power cord away from water and heat sources to prevent damage․
– Unplug the device when cleaning, maintaining, or replacing filters to ensure safety․
– Do not modify the electrical components, as this voids the warranty and poses risks․
By adhering to these guidelines, you can ensure safe and reliable operation of the AROEVE MK01 air purifier․

5․3 Operating Environment Recommendations

To ensure optimal performance of the AROEVE MK01 air purifier, place it in an environment with a temperature range of 14°F to 104°F (-10°C to 40°C) and humidity below 80%․ Avoid direct sunlight or extreme heat sources, as this may damage the device․ Keep the unit at least 3 feet away from walls or obstacles to allow proper air circulation; Clean the pre-filter every 1-3 months, depending on usage, to maintain efficiency․ For best results, use the air purifier in rooms up to 215 square feet, such as bedrooms, living rooms, or offices․ Avoid placing it near strong chemicals or odors, as this may affect filter performance and air quality․

Troubleshooting Common Issues

Common issues include the red indicator light staying on, device not turning on, or unusual noises․ Check power supply, filters, and ensure proper unit placement for resolution․

6․1 Red Indicator Light

The red indicator light on the AROEVE MK01 signals that the filter needs replacement or cleaning․ To resolve this, check and replace the HEPA or pre-filter as needed; Ensure all filters are properly installed and clean․ If the issue persists, refer to the user manual for additional troubleshooting steps․ Proper maintenance ensures optimal performance and air quality․ Always follow the manufacturer’s guidelines for filter replacement and cleaning to keep your air purifier functioning effectively․ Regular checks can prevent operational issues and maintain clean air circulation in your home environment․ This simple step helps extend the life of your device․

6․2 Device Not Turning On

If the AROEVE MK01 does not turn on, first ensure it is properly plugged into a working electrical outlet․ Check the power cord for any visible damage or kinks․ Verify that the outlet is functioning by testing it with another device․ If the issue persists, inspect the power button for any obstructions or malfunctions․ Additionally, ensure that no safety features or child locks are activated․ If all else fails, consult the user manual or contact customer support for further assistance․ Addressing this issue promptly ensures uninterrupted operation and continued air purification․ Regular checks can help maintain the device’s functionality and extend its lifespan․ Always refer to the manual for troubleshooting guidance․

6․3 Unusual Noises

If the AROEVE MK01 emits unusual noises, it may indicate an issue with the fan or internal components․ First, ensure the pre-filter and HEPA filter are clean and properly installed, as dust buildup can cause vibrations․ Check for any loose or misaligned parts inside the unit․ If the noise persists, it could be due to a faulty motor or fan blade․ In such cases, turn off the device and unplug it for safety․ Contact customer support for professional assistance or replacement․ Regular maintenance, such as cleaning the pre-filter and replacing the HEPA filter, can help prevent such issues․ Always refer to the user manual for troubleshooting guidance before attempting any repairs․

Warranty and Customer Support

The AROEVE MK01 comes with a comprehensive warranty covering manufacturing defects․ For inquiries or issues, contact customer support at support@aroeve․com․ The warranty details are outlined in the PDF manual․

7․1 Warranty Coverage Details

The AROEVE MK01 air purifier is backed by a comprehensive warranty that covers manufacturing defects and ensures customer satisfaction․ The warranty period typically lasts for a specified duration, during which any defective parts or malfunctioning units can be repaired or replaced free of charge․ For detailed terms and conditions, including the warranty’s start date, coverage scope, and exclusions, refer to the official PDF manual․ Additionally, the warranty may vary depending on the region and purchase location, so it’s essential to review the documentation provided with your purchase or contact customer support for clarification․

7․2 Contacting Customer Service

For any inquiries or support regarding the AROEVE MK01 air purifier, customers can contact the dedicated customer service team․ The official PDF manual provides detailed contact information, ensuring easy access to assistance; You can reach customer service via email at support@aroeve․com for troubleshooting, warranty-related questions, or general product inquiries․ The team is committed to providing prompt and helpful support to ensure a satisfactory user experience․

User Manual and Resources

The AROEVE MK01 user manual is available for download as a PDF from the official website or authorized retailers․ It provides comprehensive guidance on installation, operation, and maintenance, ensuring optimal performance․ Additionally, online support and FAQs are accessible to address common questions and troubleshooting․

8․1 Downloading the PDF Manual

To download the AROEVE MK01 PDF manual, visit the official AROEVE website or authorized retailers․ Navigate to the “Support” or “Resources” section, where you’ll find a direct link to the manual․ The PDF is free to download and provides detailed instructions for installation, operation, and maintenance․ It also includes troubleshooting tips and technical specifications․ Ensure you download the correct manual for the MK01 model to access accurate information․ If you encounter issues, contact customer support at support@aroeve․com for assistance․ The manual is essential for optimizing your air purifier’s performance and addressing any operational concerns effectively․

8․2 Online Support and FAQs

AROEVE provides comprehensive online support and FAQs to address common questions and concerns about the MK01 air purifier․ Visit their official website or refer to the PDF manual for detailed FAQs covering installation, operation, and troubleshooting․ The support section includes guides for resolving issues like the red indicator light, device malfunctions, and noise problems․ Additionally, customer service can be reached at support@aroeve․com for personalized assistance․ The FAQs are designed to help users optimize their air purifier’s performance and resolve issues quickly, ensuring a seamless experience with the AROEVE MK01․

User Reviews and Ratings

Users praise the AROEVE MK01 for its effectiveness, quiet operation, and value․ Common critiques include the red indicator light staying on․ Overall, satisfaction is high․

9․1 Overall Satisfaction

Users of the AROEVE MK01 air purifier have expressed high overall satisfaction with its performance․ Many have praised its effectiveness in improving indoor air quality, noting a significant reduction in allergens and odors․ The compact design and quiet operation are frequently highlighted as positive features, making it ideal for bedrooms and small spaces․ Customers also appreciate the intuitive controls and the sleep mode, which enhances usability․ While some users mentioned minor concerns, such as the red indicator light staying on, the majority agree that the MK01 provides excellent value for its price․ Overall, it is well-regarded for its reliability and efficiency in maintaining clean air․

9․2 Common Praise and Criticisms

The AROEVE MK01 has received widespread praise for its effectiveness in reducing airborne pollutants and allergens, with many users noting a noticeable improvement in air quality․ Its compact design and quiet operation, particularly in sleep mode, are frequently commended․ The ease of use and affordable price point are also highlighted as major positives․ Customers appreciate the intuitive controls and the ability to cover small to medium-sized spaces efficiently․

Some users have criticized the red indicator light for being too bright and persistent, which can be distracting in dark rooms․ Others mention that the filter replacement frequency can be a minor inconvenience․ Despite these, the overall consensus remains positive, with the MK01 being a reliable choice for everyday use․

club car ds service manual pdf

The Club Car DS Service Manual is a comprehensive guide for maintaining‚ troubleshooting‚ and repairing Club Car DS models. Available as a PDF‚ it covers various model years‚ ensuring users have detailed instructions for optimal performance and compliance with safety standards.

1.1 Overview of the Club Car DS Service Manual

The Club Car DS Service Manual is a detailed resource designed to assist users in maintaining‚ troubleshooting‚ and repairing Club Car DS golf carts. Covering both gasoline and electric models‚ the manual provides comprehensive guidance for various model years‚ including 2004‚ 2009-2012‚ and 2014 versions. It includes sections on routine maintenance‚ battery care‚ inspections‚ and step-by-step repair procedures. The manual also offers diagnostic techniques and tools‚ ensuring users can identify and resolve common issues effectively. Available as a downloadable PDF‚ it serves as an essential reference for owners‚ technicians‚ and enthusiasts‚ promoting safe and efficient servicing of Club Car DS vehicles.

1.2 Importance of the Service Manual

The Club Car DS Service Manual is crucial for ensuring the longevity and optimal performance of Club Car vehicles. It provides essential information for maintaining safety‚ preventing damage‚ and conducting proper repairs. By following the manual‚ users can avoid costly mistakes and ensure compliance with manufacturer standards. The guide is invaluable for both novice owners and experienced technicians‚ offering clear instructions and specifications. Regular use of the manual helps maintain vehicle reliability‚ reduces downtime‚ and ensures safe operation. It is a must-have resource for anyone servicing or owning a Club Car DS model‚ covering critical aspects of maintenance and repair effectively.

1.3 Key Features of the Manual

The Club Car DS Service Manual is a comprehensive resource packed with detailed maintenance procedures‚ troubleshooting guides‚ and repair instructions. It includes model-specific information for various years‚ such as 2004‚ 2009-2012‚ and 2014 models‚ ensuring clarity and relevance. The manual features step-by-step repair procedures‚ parts identification‚ and safety guidelines to ensure proper servicing. Additionally‚ it provides inspection checklists‚ battery care tips‚ and diagnostic techniques‚ making it a versatile tool for both professionals and DIY enthusiasts. The manual also offers download links for easy access and contact information for Club Car technical support‚ further enhancing its utility. These features make it an indispensable guide for maintaining and repairing Club Car DS vehicles efficiently and safely.

Safety Guidelines and Precautions

The manual emphasizes strict adherence to safety guidelines to prevent vehicle damage and ensure user safety. Always wear protective equipment and handle chemicals with care.

2.1 General Safety Practices

The Club Car DS Service Manual outlines essential safety practices to ensure safe servicing and maintenance. Always follow proper procedures to prevent injuries and vehicle damage. Before starting any maintenance‚ disconnect the battery to avoid accidental start-ups. Use jack stands to secure the vehicle and ensure it is on level ground. Avoid wearing loose clothing or jewelry that could get caught in moving parts. Keep tools and work areas organized to prevent accidents. Never attempt repairs without proper knowledge or tools. Always refer to the manual for specific instructions and guidelines. Safety practices are critical to protecting both the technician and the vehicle from potential harm.

2.2 Protective Equipment Requirements

Wearing proper protective equipment is crucial when servicing Club Car DS vehicles to prevent injuries. Safety glasses or goggles should always be worn to protect eyes from debris or chemicals. Gloves are essential to prevent cuts‚ abrasions‚ and electrical shocks. Steel-toe shoes or work boots are recommended to protect feet from heavy tools or falling parts. A face shield is necessary during welding or grinding tasks. Ensure all personal protective equipment (PPE) meets safety standards and is in good condition. Never use substandard or damaged gear. Additional protection‚ such as non-slip gloves or chemical-resistant eyewear‚ may be required for specific tasks. Always prioritize safety by using appropriate PPE as outlined in the manual.

2.3 Handling Chemicals and Materials Safely

Proper handling of chemicals and materials is essential to ensure safety and prevent potential hazards. Always wear protective gloves and eyewear when working with chemicals or batteries. Use jack stands and supports to stabilize the vehicle during repairs to avoid accidental damage. Store chemicals in well-ventilated areas‚ away from open flames or sparks‚ and follow the manufacturer’s instructions for use and disposal. Never mix incompatible substances‚ as this can lead to dangerous reactions. Keep a fire extinguisher nearby and ensure good ventilation to prevent inhalation of fumes. Dispose of hazardous materials according to local regulations and environmental guidelines. Always refer to the manual for specific safety precautions.

Maintenance Procedures

Regular maintenance is crucial for ensuring the longevity and performance of your Club Car DS. Follow the manual’s guidelines for routine checks‚ inspections‚ and care to maintain reliability and safety. Use approved tools and materials‚ and adhere to scheduled service intervals to prevent wear and tear. Proper upkeep of batteries‚ brakes‚ and electrical systems is essential for optimal functionality. Keep detailed records of all maintenance activities to track the vehicle’s condition and plan future services effectively. Always refer to the manual for specific procedures and recommendations tailored to your Club Car DS model.

3.1 Routine Maintenance Schedule

A well-structured routine maintenance schedule is essential for ensuring the optimal performance and longevity of your Club Car DS. The manual outlines specific intervals for inspections‚ lubrication‚ and part replacements. Regular checks include tire pressure‚ brake systems‚ and battery health. For gasoline models‚ oil changes and filter replacements are required every 50 hours‚ while electric models need battery water levels checked monthly. Annual inspections cover the steering‚ suspension‚ and electrical connections. Adhering to this schedule prevents premature wear and ensures safety. Always refer to the manual for model-specific recommendations‚ as procedures may vary slightly between years and configurations. Proper record-keeping of maintenance activities is also advised for tracking purposes.

3.2 Battery Maintenance and Care

Proper battery maintenance is crucial for extending the life of your Club Car DS. For electric models‚ regular inspections of the battery terminals and cables are essential to ensure clean‚ tight connections. Water levels in flooded batteries should be checked monthly and filled as needed‚ while sealed batteries require no maintenance. Avoiding deep discharges and keeping the batteries charged between 50-80% when not in use can prevent damage. Cleaning terminals with a wire brush and baking soda solution helps maintain conductivity. Always follow the manual’s guidelines for charging cycles and avoid extreme temperatures. Proper care ensures reliable performance and prolongs battery life. Regular maintenance is key to optimal functionality.

3.3 Regular Inspections Checklist

A regular inspections checklist is vital for ensuring the Club Car DS operates safely and efficiently. Begin with checking the brakes for proper function and wear. Inspect the tire pressure and tread depth‚ adjusting as needed. Examine the battery connections for cleanliness and tightness‚ and verify the electrolyte levels in flooded batteries. Check the electrical system‚ including lights‚ horns‚ and chargers‚ for faults. Lubricate moving parts like suspension components and steering links. Inspect the seat belts‚ pedals‚ and accelerator for wear or damage. Ensure all fluid levels‚ such as oil and coolant‚ are within recommended ranges. Finally‚ review the inspection schedule in the manual to stay on track. Regular checks prevent breakdowns and ensure reliability.

Troubleshooting Common Issues

The manual provides detailed troubleshooting guides for common issues like electrical system faults‚ battery problems‚ and mechanical failures. Use diagnostic tools and charts to identify root causes and resolve issues efficiently.

4.1 Identifying Common Problems

The Club Car DS Service Manual outlines common issues users may encounter‚ such as electrical system faults‚ battery drainage‚ and mechanical failures. It provides detailed symptom-based troubleshooting charts to help diagnose problems accurately. For example‚ if the vehicle experiences slow acceleration or intermittent power loss‚ the manual guides users to check the battery connections‚ motor brushes‚ or controller settings. Additionally‚ it covers issues specific to both gas and electric models‚ ensuring comprehensive coverage for all Club Car DS variants. By following the manual’s diagnostic procedures‚ users can identify root causes efficiently and address them before they escalate‚ minimizing downtime and ensuring optimal performance.

4.2 Diagnostic Techniques and Tools

The Club Car DS Service Manual provides detailed diagnostic techniques and tools to identify and resolve issues efficiently. It recommends using multimeters for electrical system checks‚ such as testing battery voltage and circuit continuity. Additionally‚ the manual suggests employing diagnostic software for advanced troubleshooting‚ particularly for models with electronic control systems. Essential tools include wrenches‚ screwdrivers‚ and torque wrenches for mechanical repairs. The manual also emphasizes the importance of following a step-by-step approach to isolate faults‚ ensuring accurate diagnoses. By utilizing these tools and techniques‚ users can efficiently pinpoint problems‚ whether they are electrical‚ mechanical‚ or related to the powertrain. Proper diagnostics ensure timely and effective repairs‚ maintaining vehicle performance and reliability.

Repair and Replacement Procedures

The manual provides detailed step-by-step repair procedures‚ including part identification‚ tool requirements‚ and replacement guidelines. It ensures safe and effective servicing‚ adhering to manufacturer specifications for optimal performance.

5.1 Identifying and Procuring Parts

Identifying the correct parts for your Club Car DS is crucial for proper maintenance and repairs. The service manual provides detailed part numbers‚ descriptions‚ and diagrams to help you locate the right components. Use the manual’s parts listing section to cross-reference items by model year and type (gasoline or electric). When procuring parts‚ ensure they are genuine Club Car components or approved equivalents to maintain vehicle performance and safety. You can purchase parts directly from authorized Club Car dealers or trusted suppliers. Always verify the part numbers and compatibility before ordering to avoid delays or incorrect installations. This ensures your Club Car DS operates efficiently and reliably. Proper procurement is essential for maintaining warranty validity and overall vehicle integrity.

5.2 Special Tools and Equipment Needed

The Club Car DS service manual outlines specific tools and equipment required for various repair and maintenance tasks. Essential tools include a torque wrench‚ multimeter‚ and hydraulic pressure tester for accurate diagnostics and adjustments. Specialized tools like the Club Car-approved battery tester and wiring diagram reader are also recommended. For tasks involving the powertrain or suspension‚ heavy-duty jack stands and axle support tools are necessary. Always use genuine Club Car tools or equivalents to ensure compatibility and safety. The manual provides a detailed list of required tools for each procedure‚ helping you prepare beforehand. Proper equipment ensures precise repairs‚ preventing further damage and maintaining your Club Car DS’s performance and reliability over time.

5.3 Step-by-Step Repair Procedures

The Club Car DS service manual provides detailed‚ step-by-step repair procedures for various components‚ ensuring clarity and precision. From replacing brakes to overhauling engines‚ each process is broken down into manageable tasks. Instructions include disassembly‚ inspection‚ and reassembly steps‚ with references to torque specifications and alignment requirements. Troubleshooting guides help identify root causes of issues‚ while diagrams and illustrations aid in understanding complex operations. The manual emphasizes safety protocols‚ such as disconnecting batteries before starting work. By following these procedures‚ users can restore their Club Car DS to optimal condition. Supplementary information‚ like parts lists and diagnostic tips‚ further enhances the repair experience‚ making it accessible for both novices and experienced technicians. Regular updates ensure the manual remains relevant for all model years.

Model-Specific Information

The manual provides detailed specifications and maintenance schedules for Club Car DS models across various years‚ including 2004‚ 2009-2012‚ and 2014‚ covering both gas and electric versions.

6.1 2004 Club Car DS Models

The 2004 Club Car DS models are covered extensively in the service manual‚ providing essential maintenance and repair guidelines. This includes detailed instructions for both gasoline and electric versions‚ ensuring optimal performance. The manual emphasizes safety protocols and outlines step-by-step procedures for routine checks and complex repairs. Specific to the 2004 models‚ it addresses components like the 4-cycle engine‚ electrical systems‚ and braking mechanisms; Users can also find parts lists and troubleshooting sections tailored to these models‚ making it an invaluable resource for owners and technicians. The information ensures compliance with manufacturer standards‚ ensuring longevity and reliability of the vehicle.

6.2 2009-2012 Club Car DS Models

The service manual for 2009-2012 Club Car DS models provides detailed guidance for maintenance‚ troubleshooting‚ and repairs. It covers both gasoline and electric versions‚ focusing on key systems like the PowerDrive Plus electric system and gas engine performance. The manual includes procedures for battery maintenance‚ motor inspections‚ and electrical diagnostics. Specific to these years‚ it addresses updates in the IQ System and V-Glide 36-volt technology. Users can find parts lists‚ repair steps‚ and safety precautions tailored to these models. Available as a PDF‚ this resource ensures owners and technicians can keep their vehicles running smoothly and efficiently‚ adhering to Club Car’s standards for reliability and safety.

6.3 2014 Club Car DS Models

The 2014 Club Car DS service manual details maintenance and repair procedures for both gas and electric models; It emphasizes updates in the PowerDrive Plus system and IQ technology. The manual includes detailed diagnostic steps for the 48-volt electric motor and fuel-injected gas engines. Users will find specifications for battery care‚ motor inspections‚ and electrical system troubleshooting. The guide also covers new features introduced in 2014‚ such as improved braking systems and suspension enhancements. Available as a PDF‚ this manual ensures owners and technicians can perform efficient and accurate servicing‚ maintaining the vehicle’s performance and longevity according to Club Car’s high standards.

Additional Resources and Support

Download the Club Car DS service manual PDF from authorized sources. Contact Club Car technical support at (706) 863-3000 for assistance. Access parts manuals and troubleshooting guides online.

7.1 Download Links for the Manual

Download the Club Car DS service manual PDF directly from the official Club Car website or authorized dealers. Visit Club Car’s official site and navigate to the support section. For specific models‚ such as the 2004 or 2014 DS‚ use the model year filter. Third-party sites like ManualsLib or Scribd also host downloadable versions. Ensure the manual is compatible with your vehicle’s model year and type (gasoline or electric). Always verify the source for authenticity and safety. Contact Club Car technical support if you need assistance finding the correct manual for your DS model.

7.2 Contacting Club Car Technical Support

For assistance with the Club Car DS service manual or any technical inquiries‚ contact Club Car’s Technical Support team. Reach them by phone at (706) 863-3000 or via mail at Club Car‚ Inc.‚ P.O. Box 204658‚ Augusta‚ GA 30917-4658. Visit their official website for additional support resources‚ including troubleshooting guides and service manual downloads. Ensure to have your vehicle’s model and serial number ready for efficient support. Their team is available to address questions not covered in the manual‚ providing expert guidance for maintenance and repairs.

the elves and the shoemaker book pdf

The Elves and the Shoemaker is a beloved children’s story, available as a PDF book, perfect for early readers and educational purposes, teaching kindness and hard work․

Overview of the Story

Overview of the Story

The Elves and the Shoemaker is a heartwarming tale about a poor shoemaker and his wife who struggle to make ends meet․ Despite his hard work, the shoemaker faces financial difficulties until mysterious elves begin secretly crafting exquisite shoes in his workshop at night․ The elves’ kindness transforms the shoemaker’s life, bringing him prosperity and hope․ This classic story, available as a PDF book, highlights themes of generosity, gratitude, and the magic of helping others․ Its simple yet engaging narrative makes it a timeless favorite for children and educators alike, while its moral lessons resonate with readers of all ages․

Target Audience and Reading Level

The Elves and the Shoemaker is primarily aimed at children learning to read, particularly those at a beginner to intermediate level․ The story’s simple language and engaging narrative make it suitable for early readers, aligning with reading levels such as Book 2c in popular reading schemes․ It is ideal for use in classroom settings or as a bedtime story for younger children․ The PDF version of the book is also designed to support educational purposes, offering a clear and accessible format for learners of English․ Its timeless themes and moral lessons ensure that the story appeals to both children and adults, making it a versatile resource for reading and learning․

Importance of the Story in Children’s Literature

The Elves and the Shoemaker holds a special place in children’s literature, offering timeless moral lessons and inspiring young minds․ Its themes of kindness, generosity, and gratitude teach children the value of helping others and appreciating their efforts․ The story’s simplicity and positive messages make it a cornerstone of early reading education, fostering empathy and honesty․ As a classic tale, it has been adapted into various formats, including PDF books, to reach a wide audience․ Its inclusion in reading schemes and educational materials highlights its enduring relevance, ensuring it continues to influence future generations as a cherished and meaningful narrative․

Story Summary

The Elves and the Shoemaker tells the story of a poor, hardworking shoemaker helped by mysterious elves who secretly make shoes at night, leading to his success․

The Shoemaker’s Struggles

The shoemaker, an honest and hardworking man, faced severe poverty despite his dedication․ He lacked resources, especially leather, to create shoes, leaving him and his wife in dire need․ His shop, once bustling, now stood quiet, reflecting his struggles․ Exhausted and hopeless, he often returned home with little to show for his efforts․ His wife, though supportive, shared his worries about their future․ One evening, with leftover red leather, he prepared to craft shoes, unaware that mysterious elves were about to change his fate; This turning point marked the beginning of a magical intervention that would transform his life and business forever․

The Mysterious Help from the Elves

One evening, while the shoemaker slept, two tiny elves secretly entered his workshop․ With skill and precision, they crafted exquisite shoes from the leftover leather․ Their work was flawless, and by morning, pairs of perfectly made shoes lined the shelves․ This miraculous event repeated each night, with the elves toiling unnoticed, leaving behind only their creations․ Word of the mysterious shoes spread, attracting customers from afar and revitalizing the shoemaker’s business․ The elves’ selfless acts of kindness brought prosperity to the struggling family, teaching them the value of generosity and gratitude․ Their invisible support became the cornerstone of the shoemaker’s newfound success․

The Climax: Discovering the Elves

Determined to uncover the mystery, the shoemaker and his wife stayed awake one night․ At midnight, they witnessed two small elves busily crafting shoes․ The couple hid, watching in awe as the elves worked tirelessly, their skills unmatched․ The elves’ laughter and dedication filled the room, revealing their kindness and craftsmanship․ This magical moment marked the climax of the story, as the shoemaker finally understood the source of his good fortune․ Overcome with gratitude, he decided to reward the elves, leading to a heartwarming conclusion that emphasized the importance of gratitude and reciprocity․ This pivotal scene remains a cherished part of the tale, highlighting the elves’ selfless kindness and the couple’s appreciation․

The Moral of the Story

The moral of The Elves and the Shoemaker revolves around the transformative power of gratitude and kindness․ The story teaches that helping others without expecting anything in return can lead to profound rewards․ The elves’ selfless acts of making shoes for the struggling shoemaker exemplify generosity, while the couple’s decision to thank them with gifts underscores the importance of appreciation․ This timeless lesson highlights how kindness begets kindness, creating a ripple effect of good deeds․ The story also emphasizes the value of hard work and humility, showing how these virtues, combined with gratitude, can lead to a more fulfilling life․ Ultimately, it reminds readers of the magic that unfolds when kindness and generosity are embraced․

Characters in the Book

The story features a hardworking shoemaker, his supportive wife, and mysterious, kind-hearted elves who transform their lives with their skilled craftsmanship and generosity․

The Shoemaker: His Personality and Hard Work

The shoemaker is portrayed as an honest and industrious man, dedicated to his craft despite his poverty․ His hard work and integrity shine through as he struggles to make ends meet, often facing financial difficulties․ His kindness and humility are evident in his interactions with his wife and the elves, showcasing his moral character․ The PDF version of the book highlights his relentless efforts to provide for his family, emphasizing the themes of perseverance and honesty․ His personality serves as a role model, teaching young readers the importance of hard work and remaining truthful to one’s values․

The Shoemaker’s Wife: Her Role in the Story

The shoemaker’s wife plays a pivotal role as a supportive companion, sharing his struggles and joys․ Her presence adds emotional depth, as she stands by her husband during their financial hardships․ Together, they form a team, working tirelessly to improve their situation․ The PDF version of the story highlights her curiosity and determination when she decides to uncover the mystery of the elves․ Her role exemplifies partnership and teamwork, showing how both characters rely on each other to overcome challenges․ Her actions and decisions are crucial in revealing the elves’ kindness, making her an integral part of the narrative’s progression and moral development․

The Elves: Their Kindness and Skills

The elves in the story are depicted as small, mysterious beings who possess exceptional skills in craftsmanship, particularly in making shoes․ Their kindness shines through their selfless acts of helping the struggling shoemaker and his wife․ The PDF version of the book highlights their nocturnal efforts, working secretly to create beautiful and durable shoes․ Their skills are unmatched, and their generosity transforms the shoemaker’s life․ The elves’ kindness is not only in their actions but also in their humility, as they remain hidden, seeking no reward for their work․ Their presence adds a touch of magic to the story, emphasizing the value of helping others without expecting anything in return․ Their craftsmanship and benevolence make them a central element of the tale․

The Relationship Between the Shoemaker and the Elves

The relationship between the shoemaker and the elves is one of mutual respect and gratitude․ The elves, noticing the shoemaker’s hard work and honesty, decide to help him by making shoes at night․ The shoemaker, initially unaware of their efforts, is overwhelmed with joy when he discovers their kindness․ This bond evolves from silent appreciation to a deep connection, as the shoemaker and his wife eventually catch a glimpse of the elves․ The PDF version of the story captures this heartwarming dynamic, showing how the elves’ generosity transforms the shoemaker’s life, while the shoemaker’s humility and thankfulness create a lasting friendship․ Their relationship exemplifies the power of kindness and reciprocity․

Themes and Lessons

The Elves and the Shoemaker teaches valuable lessons about kindness, gratitude, and the magic of helping others, inspiring readers of all ages to embrace generosity․

The Power of Kindness and Generosity

The story highlights the transformative impact of kindness, as the elves selflessly help the struggling shoemaker, gifting him with exquisite shoes․ This act of generosity not only restores the shoemaker’s livelihood but also brings joy and prosperity to his family․ The elves’ anonymous gifts exemplify the true spirit of giving without expecting anything in return, a lesson that resonates deeply with readers․ The narrative emphasizes how small acts of kindness can lead to significant positive changes, fostering a sense of community and mutual support․ This timeless message encourages readers to embrace generosity and compassion in their own lives, creating a ripple effect of goodwill․

The Importance of Hard Work

The shoemaker’s relentless dedication to his craft is a central theme in the story․ Despite his poverty and struggles, he continues to work tirelessly, creating high-quality shoes․ His honesty and commitment to excellence are rewarded when the elves recognize his efforts and lend their support․ The narrative underscores the value of perseverance and integrity, showing how hard work can lead to success even in the face of adversity․ The shoemaker’s journey teaches readers that diligence and passion are essential for overcoming challenges and achieving one’s goals, inspiring young minds to adopt a strong work ethic and never give up on their aspirations․

The Value of Gratitude

Gratitude plays a pivotal role in The Elves and the Shoemaker, highlighting the importance of appreciating the kindness and support one receives․ The shoemaker and his wife are deeply thankful for the elves’ help, recognizing the transformation their lives undergo․ Their gratitude fosters a sense of community and mutual respect, as they strive to reciprocate the elves’ generosity․ This theme teaches children the significance of acknowledging and valuing the contributions of others, promoting a positive and appreciative mindset․ The story encourages readers to express thanks and cherish the goodwill they encounter, ensuring that kindness is reciprocated and relationships are strengthened through heartfelt gratitude and compassion․

The Magic of Helping Others

The Elves and the Shoemaker beautifully illustrates the transformative power of selfless acts of kindness․ The elves, through their secretive and generous efforts, not only save the shoemaker from poverty but also bring joy and prosperity into his life․ Their willingness to help without expectation of reward demonstrates the profound impact of giving․ This magical act of kindness teaches children the value of lending a hand and the ripple effect of goodwill․ The story encourages readers to embrace the idea that even small acts of help can lead to significant positive changes, fostering a sense of compassion and community․ It highlights how helping others can create a lasting, magical difference in their lives and inspire others to pay it forward․

PDF Version of the Book

The Elves and the Shoemaker is available as a PDF, perfect for e-readers and educational use, offering a convenient and accessible way to enjoy this classic tale digitally․

Availability and Download Options

Availability and Download Options

The PDF version of “The Elves and the Shoemaker” is widely available for download, making it accessible to readers worldwide․ It can be found on educational platforms like Oxford Learners Bookshelf, where it is offered as part of their e-book collection․ Additionally, the PDF can be downloaded directly from various websites, ensuring easy access for students and educators․ Some versions include interactive features, such as flipbook formats, which enhance the reading experience․ The PDF is also compatible with e-readers, allowing users to enjoy the story on multiple devices; This convenient format supports both individual reading and classroom use, making it a versatile resource for learning and entertainment․

Features of the PDF Version

Features of the PDF Version

The PDF version of “The Elves and the Shoemaker” offers a range of convenient features for readers․ It is designed to be visually appealing, with clear text and vibrant illustrations that capture the essence of the story․ The PDF is also interactive, with some versions featuring flipbook-style pages for an immersive reading experience․ Additionally, the PDF includes educational tools, such as word-matching exercises and activities, to support learning․ Many versions are accompanied by audio narration, making it ideal for language learners and young readers․ The format is highly customizable, allowing users to zoom in on text or images, and it retains its visual quality across devices, ensuring an engaging experience for all readers․

Compatibility with E-Readers

The PDF version of “The Elves and the Shoemaker” is fully compatible with most e-readers, including Kindle, Kobo, and other popular devices․ This ensures that readers can enjoy the story on their preferred platform․ The PDF format is also accessible on tablets and smartphones, making it versatile for different reading preferences․ Many versions of the PDF include audio support, enhancing the experience for language learners and young readers․ The file is lightweight and optimized for smooth performance across devices, ensuring high-quality text and images are maintained․ This compatibility makes the PDF a convenient choice for educators and families seeking a flexible reading solution․

Educational Use of the PDF

The PDF version of “The Elves and the Shoemaker” is widely used in educational settings, particularly for teaching young learners and language students․ It aligns with reading levels such as Key Words Book 2c, making it suitable for early readers․ The story supports classroom activities by promoting comprehension and vocabulary building․ Many educational institutions incorporate this PDF into their syllabi, as it matches the curriculum for programs like Family and Friends․ Additionally, the PDF is often paired with audio versions, enhancing listening skills and engagement․ Its clear text and moral lessons make it an ideal resource for teachers aiming to foster a love for reading and learning in students․

Illustrations and Design

The Role of Illustrations in the Story

Vibrant illustrations by artists like Peter Stevenson and Adam Stower bring the story to life, capturing the elves’ magical shoe-making and the shoemaker’s journey from hardship to prosperity․

The illustrations in The Elves and the Shoemaker are a key element, bringing the magical tale to life․ Peter Stevenson and Adam Stower created vibrant, engaging visuals that captivate young readers․ Their artwork vividly portrays the elves’ secretive shoe-making and the shoemaker’s transformation from poverty to prosperity․ The detailed drawings help children visualize the story’s setting, characters, and events, making it easier to follow and understand; The illustrations also emphasize the story’s themes, such as kindness and hard work, by highlighting emotional moments and the elves’ generosity․ These visuals not only enhance the storytelling but also make the PDF book an appealing and educational resource for early learners․

Notable Illustrators and Their Contributions

Peter Stevenson and Adam Stower are renowned illustrators who have brought The Elves and the Shoemaker to life with their unique artistic styles․ Stevenson’s traditional illustrations add a timeless charm, while Stower’s whimsical drawings infuse the story with humor and warmth․ Both artists have skillfully depicted the elves’ secret shoe-making, the shoemaker’s struggles, and the magical transformation of his shop․ Their work enhances the narrative, making it visually engaging for young readers․ The illustrations also highlight the story’s themes of kindness and gratitude, creating a lasting impression․ Their contributions have made the PDF book a visually appealing and educational resource for children learning to read․

Visual Appeal for Young Readers

The PDF book of The Elves and the Shoemaker captivates young readers with vibrant, whimsical illustrations that bring the story to life․ The colorful depictions of the elves, the shoemaker’s workshop, and the magical shoes create a visually engaging experience․ The illustrations are designed to appeal to children’s imaginations, making the story more relatable and enjoyable․ The clear, large images in the PDF format are perfect for early readers, helping them follow the narrative․ The visual elements also support learning by matching words with pictures, enhancing comprehension․ This makes the PDF version an excellent tool for both entertainment and education, ensuring young readers stay captivated and inspired․

Educational Purposes

The PDF version is a structured resource for early readers, supporting learning through storytelling and aligning with classroom use and reading levels like Key Words Book 2c․

Use in Classroom Settings

Use in Classroom Settings

The PDF version of The Elves and the Shoemaker is widely used in classrooms due to its simplicity and engaging storyline․ Teachers incorporate it into reading exercises, fostering comprehension and vocabulary skills․ The story aligns with early reading levels, such as Key Words Book 2c, making it accessible for young learners․ Activities like matching words with pictures and post-reading discussions enhance interactive learning․ The book’s moral lessons also encourage discussions on kindness, gratitude, and hard work, promoting character development․ Additionally, the PDF’s clear format and illustrations make it easy for educators to project or print, supporting a variety of teaching methods and student engagement․

Alignment with Reading Levels (e․g․, Key Words Book 2c)

Alignment with Reading Levels (e․g․, Key Words Book 2c)

The Elves and the Shoemaker is specifically designed to align with early reading levels, such as Key Words Book 2c, making it ideal for young learners․ The story’s simplicity and repetitive language help build confidence in reading skills․ The PDF version is tailored for educational use, matching syllabi like the Family and Friends series․ It provides extra reading practice, both in classrooms and at home, supporting structured learning programs․ The clear, engaging text and illustrations make it accessible for children transitioning from basic to intermediate reading levels, ensuring a smooth progression in literacy development․

Supporting Learning Through Storytelling

Supporting Learning Through Storytelling

The Elves and the Shoemaker is a powerful tool for learning through storytelling․ Its engaging narrative and moral lessons help children develop essential values like kindness and hard work․ The PDF version includes activities and exercises to reinforce reading skills, making it ideal for classroom use․ The story’s clear structure and relatable characters support language acquisition and comprehension․ Illustrations enhance visual learning, while the storyline promotes cultural understanding and empathy․ Designed to align with educational curricula, this book fosters a love for reading while providing structured learning opportunities, making it a valuable resource for both teachers and young learners․

Retellings and Adaptations

The Elves and the Shoemaker has been retold in various formats, including the Ladybird Favourite Tales and Oxford Classic Tales editions, each bringing the story to life uniquely․

Different Versions of the Story

Different Versions of the Story

Over the years, The Elves and the Shoemaker has been retold in multiple versions, each offering a unique twist while preserving the original charm; The Ladybird Favourite Tales edition, authored by Audrey Daly and illustrated by Peter Stevenson, presents a simplified narrative for young readers․ Meanwhile, Oxford Classic Tales offers a beginner-friendly adaptation by Sue Arengo, complete with engaging visuals by Adam Stower․ These versions cater to early learners, aligning with reading levels like Key Words Book 2c․ Additionally, the story has been adapted into PDF formats, making it accessible for digital readers and classroom use․ Each adaptation ensures the timeless moral of kindness and hard work remains central to the story․

Modern Interpretations of the Classic Tale

Modern Interpretations of the Classic Tale

Modern interpretations of The Elves and the Shoemaker have embraced digital formats, making the story accessible to new generations․ The PDF version of the book, available for e-readers, features vibrant illustrations and engaging layouts, enhancing the reading experience for young learners․ Retellings like Sue Arengo’s adaptation for Oxford Classic Tales incorporate simplified language, aligning with educational standards for early readers․ Additionally, interactive e-book versions with audio narration have been developed, catering to diverse learning styles․ These modern adaptations retain the story’s timeless moral of kindness and gratitude while incorporating contemporary educational tools to support learning․ The story’s enduring appeal lies in its ability to adapt to evolving reader needs․

Cultural Significance of the Story

The Elves and the Shoemaker holds a special place in children’s literature, reflecting timeless values of kindness, gratitude, and hard work․ Originating from Grimm brothers’ folklore, it has transcended generations, adapting to diverse cultures and languages․ The story’s universal appeal lies in its simple yet powerful message, making it a cultural treasure․ Its inclusion in educational materials, such as the PDF book, ensures its accessibility and relevance in modern times․ By preserving traditional morals while embracing contemporary formats, the tale continues to inspire young minds globally, fostering empathy and understanding․ Its enduring popularity underscores its role in shaping cultural and ethical awareness for future generations․

The Elves and the Shoemaker remains a timeless tale, inspiring kindness and gratitude․ Its availability as a PDF book ensures its enduring appeal for future generations․

Final Thoughts on the Book’s Impact

The Elves and the Shoemaker leaves a lasting impression as a heartwarming tale of kindness and gratitude․ Its availability as a PDF book makes it accessible for modern readers, ensuring its timeless lessons reach new generations․ The story’s alignment with educational reading levels, such as Key Words Book 2c, highlights its suitability for classroom use and early learners․ By emphasizing the value of hard work and generosity, the book fosters moral growth in children․ Its enduring popularity is a testament to the universal appeal of its message․ Whether read digitally or in print, this classic tale continues to captivate young minds, teaching them the importance of compassion and community․

Recommendations for Readers

Recommendations for Readers

The Elves and the Shoemaker is a charming tale ideal for early readers and educators seeking engaging stories with moral lessons․ The PDF version is easily accessible and compatible with e-readers, making it perfect for classroom use or home reading․ Parents and teachers will appreciate its alignment with reading levels like Key Words Book 2c, ensuring it suits developing readers․ The story’s themes of kindness and hard work make it a valuable addition to any curriculum․ For a more immersive experience, pair the PDF book with the available audio and activity books, which offer interactive exercises and listening opportunities, enhancing both learning and enjoyment for young readers․

The Timeless Appeal of the Story

The Elves and the Shoemaker captivates readers with its universal themes of kindness, hard work, and gratitude․ The story’s simplicity and heartwarming nature make it a favorite across generations․ Its availability as a PDF book ensures accessibility for modern readers, while its inclusion in educational materials highlights its enduring relevance․ The tale’s moral lessons resonate deeply, teaching the value of generosity and the magic of helping others․ Its appeal lies in its ability to inspire young minds while offering a charming narrative for all ages․ The PDF version preserves the story’s timeless charm, making it a delightful read for both children and adults alike, ensuring its legacy endures in the digital age․

short guide to writing about film

Writing about film demands a blend of critical thinking and creative insight. It involves analyzing themes, characters, and visual elements to uncover deeper meanings and evaluate storytelling techniques effectively.

The Importance of Film Analysis

Film analysis is essential for understanding the deeper layers of storytelling, themes, and cultural reflections in cinema. It allows viewers to move beyond surface-level entertainment, uncovering the director’s intent and the film’s emotional resonance. By examining elements like cinematography, dialogue, and editing, analysts can evaluate how these components shape the narrative and evoke audience responses. Film analysis also fosters critical thinking and communication skills, as it requires articulating observations and supporting arguments with evidence. Moreover, it bridges the gap between film and its historical or social context, revealing how movies reflect or challenge societal norms. Ultimately, film analysis enriches our appreciation of cinema as an art form and a medium for storytelling, making it a vital tool for both scholars and casual viewers alike.

Key Components of Film Criticism

Film criticism involves evaluating various aspects of a film to provide insightful commentary. Key components include analyzing the plot structure, character development, and dialogue to assess storytelling effectiveness. Critics also examine visual elements like cinematography, lighting, and editing, which contribute to the film’s tone and atmosphere. Sound and music are evaluated for their role in enhancing emotional impact. Additionally, the director’s vision and themes are scrutinized to understand the film’s message. Cultural and social contexts are considered to gauge relevance and representation. Effective criticism balances objective analysis with subjective interpretation, providing readers with a comprehensive understanding of the film’s strengths and weaknesses. By focusing on these elements, critics offer valuable perspectives that deepen audience appreciation and understanding of cinema.

Developing a Critical Eye

Cultivating a critical eye for film analysis requires intentional practice and observation. Start by closely examining visual elements such as composition, lighting, and camera angles, which convey mood and narrative clues. Pay attention to how editing influences pacing and tension. Listen to dialogue for its emotional resonance and character development. Consider the film’s themes and how they resonate with personal experiences. Reflect on cultural and social contexts that shape the story. Practice articulating observations clearly and support opinions with specific examples. Over time, this skill enhances your ability to interpret films deeply and share insightful critiques. Regularly engaging with diverse cinematic styles and genres further sharpens your critical perspective, making you a more discerning and thoughtful film analyst.

Film Analysis

Film analysis involves examining visual elements, sound, plot, and character development to interpret themes, tone, and the filmmaker’s intent, offering deeper insights into the cinematic experience.

Understanding the Purpose of Film Analysis

Film analysis serves to uncover the underlying themes, motifs, and messages embedded in a film, offering insights into the director’s vision and societal contexts. It involves deconstructing cinematic elements like visuals, sound, and dialogue to interpret meaning. By examining these components, analysts can explore how films reflect or challenge cultural norms, historical events, or psychological complexities. The goal is to move beyond surface-level entertainment, delving into the artistic and ideological layers that shape the narrative. Effective film analysis enhances understanding, fostering deeper appreciation and critical engagement with the medium. It also encourages viewers to consider the broader implications of storytelling in visual media, making it a valuable tool for both scholars and audiences alike.

Key Elements to Analyze in a Film

When analyzing a film, focus on key elements such as plot, character development, cinematography, sound, and themes. The plot structure reveals how the narrative unfolds, while character development explores motivations and growth. Cinematography examines lighting, framing, and camera techniques that shape the visual tone. Sound, including music and dialogue, enhances emotional impact and storytelling. Themes represent the underlying ideas or messages the film conveys. Additionally, consider the director’s style, cultural context, and historical background, as these influence the film’s meaning. By examining these elements, you can uncover the film’s artistic intent and its resonance with audiences. This comprehensive approach ensures a deeper understanding of the film as a cultural and artistic medium.

Common Mistakes to Avoid in Film Analysis

When writing a film analysis, avoid common pitfalls such as excessive plot summarization, which detracts from critical insight. Refrain from mixing reviews with analysis; focus on interpreting themes and techniques rather than merely expressing opinions. Overlooking visual and auditory elements like lighting, sound, and editing can lead to a superficial analysis. Additionally, neglecting the historical or cultural context of a film limits its interpretative depth. Ensure your analysis is well-supported with evidence from the film, avoiding vague statements. Maintaining a clear, focused argument and organizing your ideas logically are essential for a compelling analysis. By steering clear of these mistakes, you can produce a nuanced and insightful film analysis that contributes meaningfully to the discussion of cinematic art.

How to Analyze Visual Elements in Film

Analyzing visual elements in film involves examining cinematography, lighting, color, and composition to understand their impact on storytelling. Pay attention to how lighting sets the mood, with high contrast creating drama or low-key lighting evoking mystery. Color schemes can symbolize themes, such as warm tones for nostalgia or cool tones for detachment; Composition, including framing and camera angles, guides viewer focus and conveys character emotions. For instance, low-angle shots may signify power, while close-ups emphasize intimacy. Consider how these visual choices align with the film’s narrative and themes. Taking detailed notes during multiple viewings helps capture these elements. By systematically breaking down the visual language, you can uncover layers of meaning that enhance your analysis and deepen your understanding of the film’s artistic vision.

Researching the Historical Context of a Film

Researching the historical context of a film involves exploring the cultural, social, and political climate of the era in which it was produced and set. This includes examining the filmmaker’s background, the audience’s expectations, and the historical events that influenced the narrative. For instance, a film set during a war may reflect the anxieties or propaganda of that time. Understanding the context helps identify themes, motifs, and symbols that resonate with the period. Additionally, analyzing the film’s production history, such as budget constraints or technological limitations, can provide insights into its visual and storytelling choices. By connecting the film to its historical backdrop, viewers can better appreciate its relevance and the message it conveys, enriching their analysis and interpretation of the cinematic work.

Screenwriting Basics

Screenwriting involves crafting a compelling narrative with well-defined characters, dialogue, and structure. It requires a clear vision, attention to pacing, and the ability to engage audiences visually and emotionally.

The Basics of Screenwriting

Screenwriting is the foundation of filmmaking, requiring a unique vision and detailed planning. It involves crafting a compelling narrative, developing characters, and structuring scenes to engage audiences emotionally and visually. A screenplay serves as a blueprint for production, guiding directors, actors, and crew. Key elements include dialogue, pacing, and visual descriptions that bring stories to life. Screenwriters must balance creativity with technical precision, ensuring scripts are concise and impactful. Understanding cinematic techniques, genre conventions, and audience expectations is crucial. The process often involves revisions, collaboration, and a deep understanding of storytelling principles.

Crafting a Compelling Plot

Crafting a compelling plot is essential for engaging audiences and driving the narrative forward. A strong plot typically includes a clear structure: exposition, rising action, climax, and resolution. Conflict is the engine of any story, whether internal or external, and should escalate tension to maintain interest. The protagonist’s journey and character development should be intertwined with the plot’s progression. Effective pacing balances action and downtime, ensuring the story unfolds naturally. Subplots can enrich the narrative but must tie back to the main storyline. Foreshadowing and twists add depth and surprise, keeping viewers invested. Drawing inspiration from real-life events or universal themes can enhance relatability. Finally, revising and refining the plot ensures coherence and eliminates unnecessary elements, creating a polished and immersive cinematic experience.

Developing Believable Characters

Creating believable characters is crucial for engaging audiences and making your story relatable. Characters should have well-defined traits, motivations, and backstories to feel authentic. Give them unique personalities, flaws, and strengths to avoid stereotypes. Dialogue should reflect their individual voices and backgrounds. Character arcs are essential, showing growth or transformation throughout the story. Ensure their actions and decisions align with their established traits. Avoid making characters overly perfect or one-dimensional. Provide opportunities for characters to express emotions and vulnerabilities, making them more human. Balance dialogue with subtle actions and expressions to convey depth. Finally, test your characters by imagining how they would react in different scenarios to ensure consistency and believability. Strong characters can elevate your film, making it memorable and impactful for viewers.

Writing Effective Dialogue

Effective dialogue is essential for engaging storytelling, as it reveals character traits, advances the plot, and enhances emotional depth. Dialogue should sound natural, reflecting how people speak in real life while avoiding unnecessary exposition. Each character’s voice should be distinct, mirroring their personality, background, and motivations. Avoid forced or overly formal language unless it fits the character’s persona. Use subtext to imply underlying emotions or conflicts, adding layers to conversations. Balance dialogue with action and description to maintain pacing. Read your dialogue aloud to ensure it feels authentic and flows smoothly. Finally, edit ruthlessly, removing any lines that don’t serve the story or deepen character understanding. Well-crafted dialogue can elevate your film, making it more immersive and memorable for audiences.

Elements of Film

Film elements include visual components like lighting, color, and composition, as well as sound effects, dialogue, and music, all working together to create a cohesive cinematic experience.

Visual Elements in Film

Visual elements are fundamental in filmmaking, as they convey mood, setting, and character depth. Lighting, for instance, can create dramatic contrasts, guiding the audience’s focus and evoking emotions. Color palettes and composition frame the visual storytelling, while camera angles, such as close-ups or wide shots, influence perspective and tension. Mise-en-scène, including costumes, props, and set design, immerses viewers in the film’s world. These visual components work together to enhance the narrative, making the cinematic experience more engaging and layered. By analyzing these elements, viewers can uncover subtle themes and appreciate the director’s artistic vision; Understanding visual storytelling is essential for both filmmakers and critics, as it shapes the emotional and intellectual impact of a film.

The Role of Sound and Music

Sound and music are vital elements in filmmaking, enhancing the emotional impact and narrative depth. Sound effects create a realistic environment, like explosions in action films, making scenes feel intense. The score, composed specifically for the film, sets the mood and guides emotions—horror movies rely on eerie soundtracks to build tension. Pre-existing songs can resonate with themes or evoke familiarity, affecting the audience’s reaction. Dialogue delivery, including tone and pacing, contributes to the scene’s feel, while sound mixing balances elements like dialogue and background noise. Historically, sound has evolved from silent films with live music to complex designs in modern blockbusters. Genre-specific sound use, such as upbeat music in comedies or suspenseful scores in thrillers, sets audience expectations. Creatively, sound can foreshadow events or build suspense, like amplified footsteps before a revelation. Overall, sound and music are essential for a compelling cinematic experience, enhancing visual elements and storytelling.

Understanding Film Editing Techniques

Film editing is the backbone of storytelling in cinema, shaping the narrative and emotional impact through the arrangement of scenes. Editors use techniques like scene transitions, pacing, and tone to guide the audience’s experience. Techniques such as cross-cutting create suspense by alternating between parallel storylines, while slow motion emphasizes dramatic moments. The choice of shots, from close-ups to wide angles, influences emotional depth and visual storytelling. Sound integration, including dialogue and music, enhances the mood. Continuity editing ensures seamless transitions, maintaining audience immersion. Special effects and CGI are also edited to blend seamlessly with live-action footage. By mastering these techniques, editors transform raw footage into a cohesive, engaging film that resonates with viewers. Understanding editing is crucial for analyzing how films convey their intended message and atmosphere.

The Importance of Narrative Structure

Narrative structure is the foundation of storytelling in film, providing a clear framework for engaging audiences and conveying themes effectively. A well-crafted narrative guides viewers through the story, building tension and resolving conflicts. The classic three-act structure—setup, confrontation, and resolution—is widely used to create a logical flow. Each act serves a purpose: the setup introduces characters and conflicts, the confrontation develops tension, and the resolution provides closure. Effective narrative structure enhances emotional impact, ensuring the story resonates with viewers. It also allows filmmakers to explore complex ideas and themes cohesively. A strong structure is essential for maintaining audience engagement and delivering a memorable cinematic experience. By understanding and mastering narrative structure, filmmakers can craft compelling stories that leave a lasting impression.

Film Genres

Film genres categorize movies by themes, styles, and emotional appeals, guiding storytelling and audience expectations. Major genres like comedy, thriller, and drama shape narratives, ensuring relatable experiences.

Major Film Genres and Their Characteristics

Major film genres include comedy, thriller, drama, and horror, each with distinct traits. Comedy focuses on humor and happy endings, while thrillers build suspense to captivate audiences. Drama explores realistic human experiences, often delving into emotional depth. Horror aims to evoke fear and tension through eerie settings and unsettling narratives. These genres provide a framework for storytelling, helping filmmakers convey their visions and audiences anticipate themes. Understanding these categories enhances analysis and appreciation of cinematic works, as they reflect cultural and social influences. Genre blending has become common, allowing for unique storytelling that appeals to diverse viewers. Recognizing these elements is crucial for effective film criticism and analysis.

How Film Genres Evolve Over Time

Film genres evolve over time, reflecting societal changes, technological advancements, and shifting audience preferences. For instance, comedy emerged as a pioneer genre, relying on humor and happy endings, while thrillers developed to captivate audiences with suspense. Historical events, like post-WWII anxieties, influenced the rise of film noir, characterized by dark narratives. Modern genres often blend elements, creating hybrid categories that appeal to diverse viewers. This evolution allows filmmakers to explore new themes and storytelling techniques, keeping genres relevant. As cultural contexts change, genres adapt, incorporating fresh perspectives and innovative visual styles. This dynamic process ensures that film genres remain a vital part of cinematic storytelling, continually engaging audiences with fresh and compelling narratives.

Mixing Genres in Film

Mixing genres in film allows filmmakers to create unique storytelling experiences by blending elements from multiple categories. This approach can attract a broader audience by appealing to fans of different genres. For example, a sci-fi comedy combines futuristic themes with humor, offering both intellectual stimulation and entertainment. Genre mixing also enables directors to explore complex themes and emotions, as seen in horror-comedies that balance fear with laughter. Hybrid genres like rom-com (romantic comedy) or action-drama showcase how blending can refresh traditional narratives. By merging genres, filmmakers can innovate and challenge audience expectations, creating films that feel fresh and original. This technique not only enhances creativity but also reflects the diversity of modern storytelling, where boundaries are constantly being pushed and redefined.

How to Analyze Films by Genre

Analyzing films by genre involves understanding the conventions and expectations associated with specific categories like comedy, thriller, or horror. Start by identifying the film’s primary genre and its key characteristics, such as humor in comedy or suspense in thrillers. Examine how the film adheres to or subverts genre norms, and consider the audience’s expectations. Pay attention to visual and auditory cues, such as lighting or music, that reinforce genre identity. Evaluate how the film’s narrative, characters, and themes align with its genre while offering unique twists. This approach helps uncover how genres shape storytelling and viewer experiences. By focusing on genre-specific elements, you can better interpret the film’s purpose and its appeal to its target audience.

Critical Approaches to Film

Critical approaches to film involve applying theoretical frameworks, analyzing cultural contexts, and understanding audience reception to interpret meanings and evaluate cinematic works thoughtfully and ethically.

Theoretical Frameworks for Film Analysis

Film analysis can be enriched by applying various theoretical frameworks. For instance, auteur theory focuses on a director’s unique style, while genre theory examines how films fit into categories. Feminist theory explores gender dynamics, and postcolonial theory highlights cultural power imbalances. Additionally, psychoanalytic theory delves into subconscious themes, and marxist theory examines class struggles. These frameworks provide lenses to interpret films’ deeper meanings, enabling critics to uncover symbolic elements, societal reflections, and artistic intentions. By applying these theories, analysts can offer insightful, evidence-based interpretations, enhancing both academic and casual discussions about cinema.

Cultural and Social Contexts in Film

Films often reflect and shape cultural and social contexts, offering insights into the eras they depict or emerge from. Analyzing a film’s cultural background involves examining its setting, dialogue, and character behaviors, which mirror societal norms. For example, historical dramas like Schindler’s List portray specific cultural tensions, while films such as Parasite highlight class disparities. Additionally, comedy and thriller genres use humor and suspense to address cultural issues. Understanding these elements helps viewers connect films to broader social narratives, making cinema a powerful tool for cultural critique and storytelling. This approach enriches film analysis by linking artistic expression to real-world influences and audience experiences.

Understanding Audience Reception

Understanding audience reception is crucial in film analysis, as it reveals how viewers interpret and engage with a film. Audiences bring their own experiences, biases, and cultural backgrounds, influencing their reactions. Films like Inception sparked debates due to their complex narratives, while The Shawshank Redemption resonated emotionally, creating a loyal fan base. Audience reception can vary widely, shaped by factors like genre expectations, marketing, and cultural context. For instance, comedy films often rely on shared humor, while thrillers aim to evoke universal suspense. Analyzing this dynamic helps critics assess a film’s impact and appreciate its relevance to diverse audiences. By considering audience reception, writers can better evaluate how a film communicates its themes and connects with its viewers on an emotional and intellectual level, enriching the analysis with real-world perspectives and reactions. This approach bridges the gap between artistic intent and viewer experience, offering a comprehensive understanding of a film’s resonance and legacy.

Ethical Considerations in Film Criticism

Ethical considerations in film criticism ensure that reviews and analyses are fair, respectful, and transparent. Critics must avoid biases, personal attacks, or unfair judgments, focusing instead on the film’s artistic and technical merits. They should disclose potential conflicts of interest, such as personal connections to the filmmakers, to maintain credibility. Additionally, critics should be mindful of cultural sensitivities, avoiding stereotypes or offensive language. It’s important to distinguish between opinion and fact, ensuring that subjective interpretations are clearly stated. Ethical criticism also involves giving credit to the filmmakers and respecting intellectual property. By adhering to these guidelines, critics contribute to a constructive and respectful dialogue about film, fostering an environment where diverse perspectives can be shared and appreciated. This ethical approach enhances the integrity of film criticism and supports meaningful discussions within the film community.

us army survival field manual

The US Army Survival Field Manual (FM 21-76) is a comprehensive guide designed to equip individuals with essential survival skills in diverse environments․ Based on the keyword SURVIVAL, it emphasizes a systematic approach to staying alive, covering topics like shelter, water, fire, and food procurement․ This manual is invaluable for military personnel, outdoor enthusiasts, and anyone facing survival challenges, offering practical techniques and mindset strategies to overcome adversity․

The Psychology of Survival

The psychology of survival focuses on developing a resilient mindset, managing fear, and maintaining the will to survive․ It emphasizes mental toughness, emotional stability, and a positive attitude to overcome adversity effectively․

2․1․ The Survival Mindset

The survival mindset is a mental framework that enables individuals to stay focused and determined in life-threatening situations․ It begins with understanding the keyword SURVIVAL, which stands for Size Up (assess the situation), Unity (stay with your group), Adapt (be flexible), Initiate (take action), Act (do something), and Live (survive)․ This mindset emphasizes mental resilience, positivity, and the ability to overcome fear and panic․ By adopting a proactive attitude, individuals can make rational decisions, conserve energy, and stay motivated to survive․ A strong survival mindset is crucial for navigating extreme conditions and emerging victorious against adversity․

2․2․ Managing Fear and Stress

Managing fear and stress is critical to maintaining a clear mind and effective decision-making in survival situations․ Fear and stress can impair judgment, leading to poor choices that reduce chances of survival․ The key is to acknowledge these emotions without allowing them to overwhelm․ Techniques such as deep breathing, mental exercises, and focusing on immediate tasks can help calm the mind․ A positive attitude and confidence in one’s abilities are essential for overcoming panic․ The survival mindset, as outlined in the manual, emphasizes staying proactive and avoiding negative thoughts․ By controlling fear and stress, individuals can conserve energy, think clearly, and execute survival strategies effectively․ This mental discipline is as vital as any physical skill in ensuring survival․

Survival in Different Environments

The US Army Survival Manual provides detailed strategies for surviving in diverse environments, including arctic, desert, jungle, and temperate regions․ Each environment requires unique techniques for finding water, food, and shelter, as well as adapting to extreme conditions․ Understanding local ecosystems and leveraging available resources is crucial for staying alive․ The manual emphasizes the importance of knowledge, skills, and preparation to overcome environmental challenges effectively․ By mastering these principles, individuals can enhance their chances of survival in any setting․

3․1․ Arctic Survival

Surviving in the Arctic requires mastering techniques to withstand extreme cold and snow․ The US Army Survival Manual emphasizes building shelters like snow trenches or igloos to protect from wind and frostbite․ Conserving energy is critical, as overexertion can lead to hypothermia․ Staying dry is essential; moisture accelerates heat loss․ Finding water involves melting snow without wasting fuel, using techniques like solar melting or building a fire pit․ Signaling for rescue is vital, using bright colors, smoke, or reflective surfaces․ The manual also covers navigating by stars or landmarks and avoiding avalanches․ Understanding animal tracks can help locate food sources․ Psychological resilience is key; maintaining a positive mindset and rationing tasks prevents exhaustion․ The manual provides detailed steps to stay alive in one of Earth’s harshest environments, ensuring survival until rescue or self-recovery․

3․2․ Desert Survival

Desert survival requires managing extreme heat, limited water, and vast, barren landscapes․ The US Army Survival Manual highlights the importance of water conservation, as dehydration is a major threat․ Techniques include rationing water, avoiding daytime travel, and using cactus water as a last resort․ Shelter is critical to protect from sun exposure; options include digging a desert pit shelter or creating a lean-to with available materials․ Navigation can be challenging, but using the sun, stars, and landmarks helps maintain direction․ Signaling for rescue is essential, using methods like creating large smoke signals or reflecting sunlight with shiny objects․ The manual also covers finding food, such as insects or small animals, and staying mentally resilient to cope with isolation․ Proper clothing and movement techniques, like traveling at night, are emphasized to minimize heat exhaustion․ These strategies ensure survival in one of the most unforgiving environments on Earth․

3․3․ Jungle Survival

Jungle survival involves navigating dense vegetation, extreme humidity, and abundant wildlife․ The US Army Survival Manual emphasizes the importance of staying calm and using available resources․ Finding or creating a water source is crucial, as dehydration can occur quickly; methods include purifying stream water or collecting rainwater․ Shelter options range from debris huts to elevated platforms to avoid insects and animals․ Navigating through thick foliage requires using a compass and natural landmarks․ Wildlife, such as snakes and spiders, pose threats, so awareness and protective measures are vital․ Signaling for rescue, like creating smoke or using reflective surfaces, is essential․ The manual also advises on finding food, such as fruits, nuts, and small animals, while avoiding poisonous plants․ Mental resilience and resourcefulness are key to surviving in this demanding environment․

3․4․ Temperate Forests

Temperate forests present unique survival challenges, with moderate climates and dense vegetation․ The US Army Survival Manual advises staying calm and using natural resources effectively․ Water sources include streams, rivers, and rainwater collection․ Shelter options range from lean-tos to debris huts, blending seamlessly with the surroundings․ Firecraft is essential for warmth and cooking, using materials like dry wood and tinder․ Food procurement involves foraging for edible plants, hunting small animals, and using traps․ Navigating requires using landmarks, the sun, and stars․ Avoiding hazards like insects and inclement weather is crucial․ Signaling techniques, such as creating smoke or using reflective objects, are vital for rescue․ The manual emphasizes mental resilience and resourcefulness to thrive in these environments, ensuring survival until rescue or escape․

3․5․ Savannah and Grasslands

The US Army Survival Manual highlights the unique challenges of surviving in savannahs and grasslands, characterized by open spaces, limited vegetation, and variable climates․ Water procurement often involves locating shallow wells or collecting dew, while shelter options include natural formations like rock overhangs or dugouts․ Firecraft is crucial, using readily available materials like grass and dry wood․ Food procurement focuses on edible plants, insects, and small game, with techniques like traps and spears․ Navigation relies on celestial navigation and landmark tracking․ Signaling techniques include creating large smoke signals or reflective surfaces․ Mental adaptability and resourcefulness are key to overcoming the harsh conditions of these environments, ensuring survival until rescue or self-extraction․

Shelter Construction Techniques

Shelter is crucial for protection from extreme weather․
Techniques include using natural materials like branches, leaves, and snow․
Adapt methods to environment, ensuring durability and camouflage;

4․1․ Debris Huts

A debris hut is a simple yet effective shelter made from natural materials like branches, leaves, and grasses․ It blends seamlessly into the environment, providing excellent camouflage․ Start by creating a ridgepole between two sturdy trees or poles․ Place smaller sticks and branches on either side, forming a sloped roof․ Cover the structure with layers of leaves, grasses, or pine needles to insulate and waterproof it․ This shelter is ideal for tropical or temperate climates, offering protection from rain and wind․ Ensure the roof is sloped to allow water runoff and add bedding inside for comfort․ With proper construction, a debris hut can be durable and last several weeks, making it a reliable choice for long-term survival situations․

4․2․ Lean-Tos

A lean-to is a simple, field-expedient shelter that provides excellent protection from wind and rain․ It is constructed by placing a long ridgepole between two trees and covering it with smaller branches and foliage․ The roof is sloped to allow water runoff, and the open side faces away from the wind․ Lean-tos are ideal for environments with abundant trees and materials․ They can be reinforced with a fire reflector to maximize heat retention․ To build one, gather sturdy branches for the frame and cover them with leaves, grasses, or pine needles․ This shelter is lightweight, easy to assemble, and blends well with the surroundings․ It is particularly useful in forested areas where natural resources are readily available․ A well-constructed lean-to can provide reliable shelter in survival situations, keeping you dry and protected from harsh weather conditions․

4․3․ Snow Shelters

Snow shelters are essential for survival in arctic and snowy environments, providing protection from extreme cold, wind, and snow․ The most common types include the tree-pit shelter and the quinzhee hut․ To build a tree-pit shelter, find a snow-covered evergreen tree with branches that form a natural roof․ Clear the snow from the center, creating a pit, and line it with evergreen branches for insulation․ For a quinzhee hut, pile snow into a large mound, allowing it to set before hollowing out the center․ Both structures require careful construction to ensure stability and insulation; Proper ventilation is crucial to prevent carbon dioxide buildup․ Snow shelters are effective for retaining body heat and shielding from harsh winter conditions, making them a vital skill for survival in cold climates․ They are relatively easy to construct with basic tools and can be reinforced with additional snow or branches for added strength․

Water Procurement

Water procurement is critical for survival, involving locating natural sources like streams or ponds and ensuring safety through purification methods to prevent waterborne illnesses, essential for hydration and sustenance․

5․1․ Finding Water Sources

Locating water sources is a critical survival skill, as water is essential for hydration and sustenance․ The US Army Survival Field Manual provides detailed methods for identifying potential water sources in various environments․ These include streams, rivers, ponds, springs, and wetlands․ In arid regions, such as deserts, water may be scarce, but techniques like collecting dew or rainwater can be effective․ The manual also emphasizes the importance of recognizing natural signs of water, such as vegetation clusters, animal tracks, or bird activity․ Additionally, it covers methods like creating solar stills to extract water from mud or plants․ Knowing how to identify and access water sources significantly increases chances of survival in any environment, making this section a cornerstone of the manual’s practical guidance․

5․2․ Purification Methods

Water purification is a vital step in ensuring safe hydration, as untreated water can contain harmful pathogens, chemicals, or contaminants․ The US Army Survival Field Manual outlines several effective purification methods to make water safe for consumption․ Boiling water is the most reliable method, requiring just 10 minutes at a rolling boil to kill bacteria, viruses, and parasites․ For situations where boiling is impractical, the manual suggests using sand and charcoal filters to remove impurities․ Solar disinfection (SODIS) is another option, where water is exposed to sunlight in a clear container for at least six hours․ Chemical disinfection using chlorine or iodine tablets or tincture is also recommended, with specific guidelines for dosage․ These methods ensure access to safe drinking water, even in challenging environments, making water purification a critical survival skill․

Firecraft Techniques

Firecraft is a critical survival skill emphasized in the US Army Survival Field Manual, as fire provides warmth, light, a way to cook food, and a means of signaling for help․ The manual details how to construct various types of fires, including the teepee, log cabin, and lean-to structures, each suited for different environments and purposes․ It also covers the importance of selecting the right materials, such as tinder, kindling, and larger logs, to ensure a sustainable fire․ Additionally, the manual provides techniques for building fires in challenging conditions, such as wet or snowy environments․ Proper fire safety is stressed, including the use of fireboards to protect the ground and the necessity of completely extinguishing fires before leaving them unattended․ These techniques are essential for conserving energy, boosting morale, and improving overall survival chances in the wild․

Food Procurement

The US Army Survival Field Manual provides detailed methods for obtaining food in the wild, including foraging for edible plants and hunting small animals․ Techniques such as trapping, fishing, and insect harvesting are covered, along with guidance on preparing and cooking food safely․ The manual emphasizes identifying poisonous plants and ensuring food safety to avoid illness․ These skills are essential for sustaining energy and health in survival situations, making food procurement a cornerstone of wilderness survival․

7․1․ Foraging for Edible Plants

Foraging for edible plants is a critical survival skill emphasized in the US Army Survival Field Manual․ The manual provides a detailed guide to identifying safe and nutritious plants in various environments, including forests, deserts, and jungles․ It highlights universal edibility tests to determine if a plant is safe to eat, such as touching, smelling, and tasting in small amounts․ The manual also lists common edible plants, such as dandelions, cattails, and berries, and warns against poisonous lookalikes․ Proper identification is stressed to avoid fatal mistakes․ Additionally, the manual advises on how to prepare plants for consumption, such as boiling or drying, to maximize nutritional value․ This section is essential for sustainably sourcing food in the wild, ensuring survival without reliance on modern supplies․ The manual’s visual guides and descriptions make it a invaluable resource for foraging safely and effectively in any ecosystem․

7․2․ Hunting and Trapping

Hunting and trapping are essential survival skills detailed in the US Army Survival Field Manual․ The manual outlines various methods for catching small and large game, including the use of improvised traps like snares, pits, and deadfalls․ It emphasizes the importance of using minimal equipment and maximizing efficiency․ Techniques such as waiting, stalking, and driving game are also covered․ The manual stresses the need to target small game, as it is more abundant and requires less energy to capture․ Proper handling of game, including skinning and cooking, is addressed to ensure safe consumption․ Additionally, the manual highlights ethical considerations, such as avoiding unnecessary killing and using all parts of the animal․ These skills are critical for sustaining oneself in the wild, especially when other food sources are scarce․ The manual’s practical advice makes it a vital resource for effective hunting and trapping in survival situations․

First Aid Basics

The US Army Survival Field Manual emphasizes the importance of basic first aid in survival situations․ It provides detailed guidance on treating injuries, such as wounds, burns, and fractures, with minimal equipment․ Key principles include cleaning and dressing wounds to prevent infection, using tourniquets and hemostatic agents to control bleeding, and applying splints to immobilize broken limbs․ The manual also covers basic pain management and the psychological aspects of caring for the injured․ Proper first aid techniques are crucial for maintaining health and morale in challenging environments․ By following these methods, individuals can stabilize conditions until professional medical help is available․ The manual’s focus on practical, field-expedient solutions makes it an indispensable resource for survival scenarios․ Its clear, step-by-step instructions ensure that even those with limited medical training can provide effective care․ This section is vital for anyone facing survival challenges․

Navigation Skills

The US Army Survival Field Manual provides essential guidance on navigation, emphasizing the importance of knowing one’s position and direction in survival situations․ It teaches how to use natural signs, such as the sun, stars, and landmarks, to determine direction․ The manual also covers the use of a compass and how to create a makeshift one if necessary․ Techniques for navigating without tools, such as following streams or using vegetation patterns, are included․ Additionally, it highlights the importance of staying calm and using available resources to create mental or physical markers․ These skills are crucial for avoiding disorientation and ensuring safe movement․ By mastering navigation techniques, individuals can conserve energy and increase their chances of survival․ The manual’s practical methods make it a vital resource for anyone in a survival scenario․

Signaling Techniques

The US Army Survival Field Manual emphasizes the importance of effective signaling to secure rescue or communication․ It outlines various methods to signal for help, including the use of fires, smoke, mirrors, and flares․ The manual highlights creating visible signals on the ground, such as arranging rocks or branches to form “HELP” or “SOS․” It also discusses the use of whistles, with three short blasts signaling distress․ For nighttime signaling, the manual recommends building fires in a triangle formation or using reflective materials to catch rescuers’ attention․ Additionally, it covers the creation of smoke during the day using green leaves or wet wood to produce thick, visible plumes․ These techniques are designed to maximize visibility and increase the chances of being noticed by rescue teams․ Proper signaling can save time and energy, making it a critical survival skill․

Exploiting Local Resources

The US Army Survival Field Manual stresses the importance of exploiting local resources to sustain life in survival situations․ This includes identifying and utilizing materials for shelter, food, and tools․ The manual provides guidance on how to repurpose natural elements, such as branches, leaves, and snow, to construct shelters or create signaling devices․ It also covers the use of local flora and fauna for sustenance, emphasizing the identification of edible plants and the procurement of animals for food․ Additionally, the manual teaches how to craft essential tools, like spears or traps, using readily available materials․ By leveraging the environment effectively, individuals can conserve energy and resources, increasing their chances of survival․ This section underscores the importance of resourcefulness and adaptability in any survival scenario․

Personal Health and Hygiene

Personal health and hygiene are critical components of survival, as neglecting them can lead to serious health issues․ The US Army Survival Field Manual emphasizes the importance of maintaining cleanliness to prevent infections and diseases․ Individuals are advised to wash hands regularly, especially before handling food, and to keep wounds clean and covered․ The manual also stresses the need to manage bodily waste properly, away from living and water sources, to avoid contamination․ Additionally, it provides guidance on personal grooming, such as trimming nails and managing hair, to reduce the risk of lice and other parasites․ Mental health is also addressed, with tips on maintaining morale and avoiding despair․ By prioritizing health and hygiene, individuals can better withstand the physical and psychological challenges of survival situations․ These practices are essential for sustaining energy and resilience in harsh environments․

Survival at Sea

Survival at sea requires a combination of preparation, knowledge, and the right mindset․ The US Army Survival Field Manual provides detailed guidance on how to stay alive in marine environments․ Key strategies include conserving energy, using available resources like life rafts, and signaling for rescue․ Staying hydrated is crucial, with tips on rationing water and collecting rainwater․ The manual also covers how to identify edible sea life while avoiding dangerous species․ Techniques for navigating by sun, stars, and currents are included, along with methods for constructing makeshift shelters in lifeboats․ Signaling techniques, such as using flares, mirrors, and smoke, are emphasized to increase visibility to rescuers․ The manual stresses the importance of maintaining morale and staying vigilant, as survival at sea often depends on endurance and the ability to adapt to unpredictable conditions․ These strategies are designed to help individuals survive until rescue or reach land safely․

Urban Survival

Urban survival involves navigating the challenges of a city environment, where resources may be scarce but dangers are abundant․ The US Army Survival Field Manual provides practical advice for surviving in urban settings, emphasizing the importance of situational awareness and resourcefulness․ Key strategies include finding or creating safe shelter, securing food and water, and avoiding potential hazards like crowds, collapsed structures, and contaminated supplies․ The manual also covers techniques for signaling for help and navigating through unfamiliar terrain․ It stresses the importance of staying calm and using available materials to improvise tools or protective gear․ Additionally, it addresses the psychological aspects of urban survival, such as maintaining morale and avoiding panic․ By applying these skills, individuals can increase their chances of survival in the midst of urban chaos or disaster scenarios․ The manual serves as a vital resource for both military personnel and civilians facing urban survival challenges․

The US Army Survival Field Manual is a comprehensive guide that equips individuals with the knowledge and skills necessary to survive in diverse environments․ By emphasizing a holistic approach to survival, the manual ensures that readers understand the importance of mindset, resourcefulness, and adaptability․ Whether in the wilderness, urban settings, or at sea, the techniques and strategies outlined in the manual provide a foundation for overcoming adversity․ The principles of finding shelter, procuring water and food, and signaling for help are universally applicable, making this manual an invaluable resource for both military personnel and civilians․ Ultimately, the manual reinforces the idea that survival is not just about physical skills but also about mental resilience and preparedness․ By mastering the techniques described, individuals can confidently face and overcome even the most challenging survival situations․

bear hunting north carolina guides

North Carolina is a top destination for black bear hunting‚ offering diverse methods like spot-and-stalk‚ still‚ and hound hunting. With experienced guides and prime locations‚ hunters enjoy an exhilarating experience across the state’s varied landscapes.

Overview of Bear Hunting in North Carolina

North Carolina is renowned for its thriving black bear population‚ making it a premier destination for hunters. The state offers diverse hunting methods‚ including spot-and-stalk‚ still hunting‚ and hound hunting‚ catering to both experienced hunters and newcomers. With guides like Dare To Hyde and Major League Bear Outfitters‚ hunters benefit from expert knowledge and access to prime habitats. Key locations such as Hyde County and the Great Dismal Swamp provide ideal conditions for successful hunts. The abundance of bears‚ particularly in eastern regions‚ ensures exciting opportunities. Whether hunting for trophies or experiencing the thrill of the chase‚ North Carolina delivers unforgettable bear hunting adventures.

Importance of Guides in North Carolina Bear Hunts

Guides play a crucial role in North Carolina bear hunts‚ ensuring a safe and successful experience. Their deep knowledge of local habitats‚ bear behavior‚ and regulations is invaluable. Guides like those from Dare To Hyde and Major League Bear Outfitters offer expertise in tracking and hunting methods‚ maximizing the chances of a trophy harvest. They also handle logistics such as permits and land access‚ allowing hunters to focus solely on the hunt. Additionally‚ guides provide essential safety measures‚ especially in challenging terrains and during hound hunting. Their experience and insights make them indispensable for both novice and seasoned hunters‚ enhancing the overall quality of the hunting experience in North Carolina.

Top Bear Hunting Guides in North Carolina

North Carolina boasts renowned bear hunting guides offering expert services. Outfitters like Dare To Hyde and Major League Bear provide exceptional experiences with vast hunting areas and proven success.

Dare To Hyde Guides

Dare To Hyde Guides offers exceptional black bear hunting experiences in North Carolina‚ with over 25 years of expertise. Their seasoned guides ensure a trophy hunt‚ utilizing spot-and-stalk‚ still‚ and hound hunting methods. Managing over 30‚000 acres of prime habitat‚ they guarantee a memorable adventure. Their reputation for success and dedication makes them a top choice for hunters seeking a premium experience in NC’s diverse landscapes.

Lickstone Outfitters

Lickstone Outfitters‚ a family-owned and operated guide service‚ specializes in North Carolina bear hunts across both coastal and mountainous regions. They offer a variety of hunting methods‚ including spot-and-stalk and still hunting‚ ensuring a personalized experience. With over 10‚000 acres of managed land‚ Lickstone provides ample opportunities for harvesting trophy black bears. Their experienced guides‚ combined with limited hunting pressure‚ enhance success rates. Lodging and bear processing are included in their packages‚ making them a comprehensive choice for hunters seeking a high-quality experience in NC’s pristine landscapes. Their commitment to excellence and customer satisfaction has solidified their reputation as a top outfitter in the state.

Major League Bear Outfitters

Major League Bear Outfitters‚ with over 25 years of experience‚ offers top-tier guided black bear hunts in Eastern North Carolina. Their extensive knowledge and expertise ensure a thrilling experience for hunters of all skill levels. Covering over 30‚000 acres of prime bear habitat‚ they provide access to trophy-sized black bears. Lodging and meals are included‚ allowing hunters to focus solely on their adventure. Their experienced guides are dedicated to ensuring a successful and memorable hunt. Whether you’re a seasoned hunter or a first-timer‚ Major League Bear Outfitters delivers an unparalleled experience in one of North Carolina’s most renowned bear hunting regions.

Dismal Swamp Outfitters

Dismal Swamp Outfitters is a premier destination for black bear and whitetail deer hunting in Eastern North Carolina. Situated in Gates County‚ this outfitter offers an exceptional hunting experience with access to prime locations near the Great Dismal Swamp National Wildlife Refuge. The team provides expert guidance‚ ensuring hunters maximize their chances of harvesting a trophy bear. Lodging and meals are included‚ allowing hunters to focus on their adventure. With a commitment to safety and success‚ Dismal Swamp Outfitters caters to both experienced hunters and newcomers‚ delivering an unforgettable experience in one of North Carolina’s most iconic hunting regions. Their extensive knowledge of the terrain and wildlife ensures a memorable and fruitful hunt.

Eastern Primal Outfitters

Eastern Primal Outfitters‚ led by experienced guide David Collins‚ stands out as a top choice for North Carolina bear hunting. They offer expertly guided black bear hunts‚ ensuring a thrilling experience for hunters. With a focus on professionalism and safety‚ they provide access to prime hunting grounds‚ maximizing the chance of a successful harvest. Their services include guided tours‚ lodging‚ and meal arrangements‚ making the hunt convenient and enjoyable; Whether using hounds‚ spot-and-stalk‚ or still hunting methods‚ Eastern Primal Outfitters guarantees an unforgettable adventure in North Carolina’s rich bear country. Their commitment to excellence and customer satisfaction makes them a preferred choice for both novice and seasoned hunters.

Prime Locations for Bear Hunting in North Carolina

North Carolina offers exceptional bear hunting spots‚ including Hyde County‚ Pisgah National Forest‚ and the Great Dismal Swamp‚ each providing unique habitats and abundant opportunities.

Hyde County

Hyde County is renowned for its high concentration of black bears‚ making it a prime destination for hunters. With experienced guides‚ hunters can explore vast‚ managed lands using methods like spot-and-stalk‚ still hunting‚ and hound hunting. The area’s unique habitat supports a thriving bear population‚ offering exciting opportunities year-round. Guided hunts in Hyde County often include lodging and meals‚ ensuring a seamless experience. The season typically runs from fall to early winter‚ with success rates among the highest in the state. For those seeking a trophy bear‚ Hyde County delivers‚ with many bears exceeding 400 pounds. Its remote landscapes and abundant wildlife make it a top choice for hunters seeking an unforgettable adventure.

Pisgah National Forest

Pisgah National Forest is a favored spot for bear hunting‚ offering a mix of rugged terrain and abundant wildlife. Guides here specialize in hound hunting and spot-and-stalk methods‚ ensuring hunters make the most of their experience. The forest’s dense woods and diverse habitats provide an ideal environment for black bears. Hunters can expect challenging yet rewarding adventures‚ with guides offering expert knowledge of the area. Safety is a priority‚ especially given the forest’s vast size. Recent incidents highlight the importance of preparedness and professional guidance. With its natural beauty and thriving bear population‚ Pisgah National Forest remains a top choice for bear hunting enthusiasts in North Carolina.

Great Dismal Swamp National Wildlife Refuge

The Great Dismal Swamp National Wildlife Refuge is a prime location for bear hunting in North Carolina‚ known for its dense forests and marshy wetlands. Guides specializing in this area offer expert knowledge of the terrain and bear behavior‚ maximizing hunting success. Dismal Swamp Outfitters‚ based in Gates County‚ provides guided hunts with lodging and meals included‚ ensuring a seamless experience. The refuge’s unique ecosystem supports a healthy black bear population‚ making it a hotspot for trophy hunting. Hunters can expect challenging yet rewarding adventures‚ with guides employing proven methods like hound hunting and spot-and-stalk tactics. This region’s vast wilderness demands professional guidance for safety and success.

Pocosin Lakes National Wildlife Refuge

Pocosin Lakes National Wildlife Refuge is renowned for its abundant black bear population and is a favored destination for guided hunts. Guides with extensive local knowledge offer 3 or 5-day packages‚ including lodging and meals‚ ensuring a well-rounded experience. The refuge’s diverse wetlands and forests provide ideal habitat for trophy-sized bears‚ attracting hunters seeking a challenging yet rewarding adventure. With over 30 years of expertise‚ outfitters in this region deliver high success rates‚ utilizing proven methods like spot-and-stalk and hound hunting. The proximity to Pocossin Lakes National Wildlife Preserve further enhances the area’s reputation as a premier location for harvesting trophy black bears in North Carolina. Experienced guides ensure safety and success in this unique environment.

Gates County

Gates County stands out as a prime location for black bear hunting in North Carolina‚ offering hunters a chance to pursue trophy-sized bears in a diverse landscape. The region is home to experienced guides who provide expert knowledge and ensure a successful hunt. With over 1‚500 acres of prime swamp land‚ Gates County offers ample opportunities for both still and hound hunting‚ all while enjoying the serene beauty of the area. Lodging and meals are typically included in hunting packages‚ allowing hunters to focus solely on their adventure. The absence of trophy fees makes it an attractive choice for hunters seeking a rewarding experience without additional costs. Guides in Gates County are known for their dedication and expertise‚ making the hunt both enjoyable and memorable.

Best Seasons for Bear Hunting in North Carolina

Bear hunting seasons in North Carolina vary by region‚ with peak activity in fall and early winter. Western seasons often run from December to January‚ while coastal regions may start earlier‚ offering diverse opportunities for hunters.

Western North Carolina Bear Hunting Season

The Western North Carolina bear hunting season typically runs from December 12 to January 2‚ as specified by the North Carolina Wildlife Resources Commission. This period is chosen because bears are most active during these cooler months‚ increasing the chances of a successful hunt. Hunters in this region often utilize methods such as spot-and-stalk or still hunting‚ leveraging the dense forests and mountainous terrain. It’s important for hunters to adhere to local regulations‚ including bag limits and hunting hours. Guides in Western NC are well-versed in tracking bear movements and ensuring a safe‚ ethical hunting experience. Proper preparation and knowledge of the terrain are crucial for navigating this beautiful yet challenging region.

Eastern North Carolina Bear Hunting Season

Eastern North Carolina offers a vibrant bear hunting season‚ typically starting in November and extending through December. This region is renowned for its abundant black bear population‚ making it a hotspot for hunters. The season aligns with the bears’ active period as they forage for food before winter. Hunters in Eastern NC often employ hound hunting and spot-and-stalk methods‚ taking advantage of the region’s vast swamplands and forests. Guides in this area are highly experienced‚ providing expert knowledge of bear habitats and movement patterns. They assist hunters in selecting prime stand locations and tracking trophy-sized bears. Hunters are reminded to check local regulations and ensure they have the necessary permits for a legal and successful hunt.

Coastal Region Bear Hunting Season

The Coastal Region of North Carolina offers a unique bear hunting experience‚ with its season typically overlapping with the Eastern season in November and December. This area‚ known for its dense black bear population‚ provides hunters with opportunities to harvest trophy-sized bears. The coastal terrain‚ including swamps and marshes‚ is ideal for spot-and-stalk and still hunting methods. Guides in this region are well-versed in the local ecosystem‚ ensuring hunters are positioned in prime locations. Hyde County‚ in particular‚ is renowned for having one of the highest concentrations of black bears per square mile globally. Hunters are encouraged to work with experienced guides to maximize their success and adherence to local regulations. The coastal region’s abundant bear population makes it a favorite among hunters seeking a challenging yet rewarding experience.

Popular Bear Hunting Methods in North Carolina

North Carolina offers spot-and-stalk‚ still hunting‚ and hound hunting as primary methods‚ each tailored to the state’s diverse bear habitats and guided by experienced outfitters.

Spot and Stalk Hunting

Spot and stalk hunting is a thrilling method in North Carolina‚ where guides lead hunters to track and locate black bears in their natural habitat. This technique relies on stealth and patience‚ as hunters move quietly through dense forests and open fields to spot their prey. Guides often use their deep knowledge of bear behavior and terrain to position hunters for successful encounters. Popular spots include Hyde County and Pisgah National Forest‚ where bears are abundant. This method is ideal for those who enjoy the physical and mental challenge of pursuing bears in diverse landscapes. With expert guidance‚ hunters can experience the excitement of spotting and stalking trophy-sized bears in North Carolina’s pristine wilderness.

Still Hunting

Still hunting is a patient and methodical approach favored by many North Carolina bear hunters. Guides often lead hunters to strategic stand locations‚ where they remain motionless for extended periods‚ waiting for bears to pass by. This technique is particularly effective in areas with high bear activity‚ such as near food sources or game trails. Guides may also use baiting strategies to attract bears to specific spots‚ increasing the chances of a successful harvest. Still hunting is ideal for hunters who prefer a more relaxed pace and are willing to wait for the perfect shot. With the expertise of local guides‚ hunters can maximize their chances of bagging a trophy bear in North Carolina’s abundant bear country.

Hound Hunting

Hound hunting is a thrilling and traditional method for bear hunting in North Carolina‚ offering an exhilarating experience for hunters. Guides specialize in training dogs to track and locate bears‚ allowing hunters to follow the action-packed chase. This method is particularly effective in the state’s dense forests and swamplands‚ where bears are more active. Experienced guides ensure hunters are positioned strategically to intercept the bear once the hounds have it on the move. Hound hunting requires patience and teamwork‚ as hunters work closely with guides to successfully harvest their trophy. With the expertise of local outfitters‚ hound hunting in North Carolina often results in high success rates‚ making it a popular choice for both novice and seasoned hunters.

Regulations and Safety Tips

Adhere to North Carolina’s bear hunting regulations‚ including permit requirements and harvest limits. Practice safe hunting practices‚ such as proper food storage and using appropriate gear.

North Carolina Bear Hunting Regulations

North Carolina bear hunting is regulated to ensure sustainable populations and safe practices. Hunters must obtain proper permits and licenses‚ with specific limits on harvest numbers and trophy fees. Seasonal variations exist across regions‚ with Western‚ Eastern‚ and Coastal areas having distinct timelines. It’s crucial to follow guidelines on baiting‚ hound use‚ and property rights. Violations can result in penalties‚ emphasizing the importance of compliance. Additionally‚ North Carolina’s unique bear behavior‚ as they do not truly hibernate‚ affects hunting strategies and regulations. Always consult the North Carolina Wildlife Resources Commission for the most updated rules to ensure a legal and ethical hunt.

Importance of Permits and Licenses

Obtaining proper permits and licenses is essential for legal bear hunting in North Carolina. The state requires a valid hunting license with a Big Game License endorsement to hunt black bears. Additional permits may be necessary for specific methods‚ such as baiting or using hounds. These regulations ensure sustainable hunting practices and conservation efforts. Failure to comply can result in fines and penalties. The North Carolina Wildlife Resources Commission manages permit issuance and enforces harvest limits to protect bear populations. Hunters must also be aware of trophy fees for bears exceeding certain weights. Guides often assist in navigating these legal requirements‚ ensuring a compliant and ethical hunting experience. Always verify permit details before heading into the field.

Trophy Fees and Harvest Limits

Trophy fees and harvest limits play a crucial role in managing North Carolina’s black bear population. A trophy fee of $1‚000 is typically charged for bears exceeding 400 pounds‚ encouraging sustainable hunting practices. The North Carolina Wildlife Resources Commission (NCWRC) sets harvest limits to ensure the bear population remains healthy. These regulations vary by region‚ with specific quotas for different areas. Guides often handle the logistics of permits and fees‚ ensuring compliance with state laws. Hunters must adhere to these rules to avoid penalties and support conservation efforts. Always check current regulations before your hunt to ensure a legal and ethical experience. Proper harvest reporting is also required to monitor bear populations effectively.

Choosing the Right Outfitter

Selecting a reputable outfitter is essential for a successful North Carolina bear hunt. Look for experienced guides‚ positive reviews‚ and a proven track record of success.

What to Look for in a Bear Hunting Guide

When selecting a bear hunting guide in North Carolina‚ prioritize experience‚ success rates‚ and services offered. Reputable guides provide expert knowledge of local habitats‚ hunting methods‚ and regulations. Look for outfitters with access to large‚ private properties‚ ensuring minimal hunting pressure and higher chances of success. Check for inclusive packages that cover lodging‚ meals‚ and gear to streamline your hunting experience. Additionally‚ verify reviews and references to ensure the guide’s reliability and expertise; A skilled guide enhances safety‚ maximizes your time in the field‚ and increases the likelihood of harvesting a trophy bear. Their local insights and proven strategies are invaluable for a successful hunt.

Success Rates and Reviews

Success rates and reviews are crucial when evaluating bear hunting guides in North Carolina. Top-rated outfitters often boast high success rates‚ with many hunters harvesting trophy bears annually. Reviews from past clients provide insights into guide expertise‚ professionalism‚ and the overall quality of the hunting experience. Look for outfitters with consistent positive feedback‚ highlighting their ability to locate and successfully hunt bears. Many guides in North Carolina have decades of experience‚ ensuring a well-organized and productive hunt. High success rates coupled with excellent reviews indicate a reliable and skilled guide‚ enhancing your chances of a memorable and rewarding bear hunting adventure in the state’s diverse habitats.

Services Included in Guided Hunts

Guided bear hunts in North Carolina typically include a comprehensive range of services tailored to ensure a seamless and successful hunting experience. Reputable outfitters provide experienced guides with deep knowledge of local habitats and bear behavior. Lodging options vary‚ from rustic cabins to comfortable hunting lodges‚ ensuring a convenient base for your hunt. Meals are often included‚ offering hearty‚ home-cooked fare to fuel your days in the field. Many guides also handle bear cleaning and processing‚ while others assist with trophy preparation. Additionally‚ some outfitters offer planning assistance‚ including securing permits and coordinating logistics. These services aim to maximize your time hunting while minimizing preparation‚ allowing you to focus on the thrill of the hunt.

Planning Your Bear Hunt

Effective planning is crucial for a successful bear hunt in North Carolina. Research seasons‚ permits‚ and guides beforehand to ensure a well-organized and enjoyable experience.

When to Plan Your Hunt

Planning your bear hunt in North Carolina requires careful timing to align with seasonal patterns and regulations. The western region’s second bear hunting season runs from December 12 to January 2‚ when bears are often in dens. In eastern areas‚ the season typically starts earlier‚ with over 4‚000 bears harvested in 2022. Coastal regions offer unique opportunities‚ with bears active year-round due to the absence of hibernation. Hunters should research specific dates and regulations for their desired location. Booking guides and outfitters well in advance is essential‚ as popular spots fill quickly. Proper planning ensures a safe and successful hunting experience in North Carolina’s diverse bear habitats.

What to Bring on Your Hunt

When preparing for a bear hunt in North Carolina‚ it’s essential to bring the right gear for a successful and safe experience. A high-caliber rifle or bow is necessary‚ along with ample ammunition. Wear durable‚ camouflage clothing and sturdy boots suitable for rugged terrain. Bring layers for varying weather conditions‚ as temperatures can fluctuate. Insect repellent is a must due to the region’s mosquitoes and ticks. A first-aid kit‚ binoculars‚ and a rangefinder are also crucial. Don’t forget a GPS or compass for navigation‚ as well as food‚ water‚ and snacks for energy. Tree stands or ground blinds can be helpful for concealment. Lastly‚ ensure you have a valid hunting license and any required permits. A cooler for transporting your harvest is also recommended.

the son of neptune pdf

The Son of Neptune by Rick Riordan is the second book in The Heroes of Olympus series, released in 2011. The PDF version is widely available, offering a convenient and readable format for fans of Percy Jackson’s adventures, ensuring easy access to the thrilling story of demigods and mythological quests.

Overview of the Book

The Son of Neptune is the second installment in Rick Riordan’s The Heroes of Olympus series, continuing the adventures of Percy Jackson and his allies. The story begins with Percy awakening from his long sleep, suffering from memory loss. He soon discovers he is a demigod and embarks on a perilous journey to save the world from mythical threats. Joined by Hazel Levesque, daughter of Pluto, and Frank Zhang, son of Mars, they face numerous challenges while navigating the Roman demigod camp, Camp Jupiter. The novel blends action, humor, and emotional depth, making it a compelling read. The PDF version is popular among fans, offering a convenient way to enjoy the story.

Author Background: Rick Riordan

Rick Riordan is a renowned American author, best known for his engaging young adult fantasy novels. Born on June 5, 1967, in San Antonio, Texas, Riordan developed a passion for mythology early in life. Before becoming a full-time writer, he worked as a middle school English teacher, which influenced his ability to craft relatable characters and stories for younger audiences. His Percy Jackson and the Olympians series catapulted him to fame, blending Greek mythology with modern-day adventures. Riordan’s writing style, marked by humor, action, and emotional depth, has made his books beloved worldwide, including The Son of Neptune, part of The Heroes of Olympus series.

The Heroes of Olympus Series Context

The Heroes of Olympus series by Rick Riordan is a continuation of the Percy Jackson and the Olympians saga, blending Greek and Roman mythology. This series introduces a new cast of characters alongside familiar faces, exploring their interconnected quests. The five-book series—The Lost Hero, The Son of Neptune, The Mark of Athena, The House of Hades, and The Blood of Olympus—follows demigods from both Greek and Roman camps as they unite to prevent a global catastrophe. The PDF version of The Son of Neptune offers readers a seamless way to immerse themselves in this epic adventure, filled with action, humor, and heartfelt moments, while maintaining the signature Riordan storytelling that captivates fans worldwide.

Plot Summary

The Son of Neptune follows Percy Jackson as he awakens at Camp Jupiter, battling monsters and remembering fragments of his past, while embarking on a perilous quest.

Percy Jackson’s Awakening

Percy Jackson awakens with no memory of his past, encountering snake-haired ladies who refuse to die. Confused and disoriented, he learns he is a demigod from Lupa, a wolf guardian. She guides him to Camp Jupiter, where he meets Hazel and Frank. Percy’s journey begins as he battles monsters and slowly regains fragments of his identity. His awakening sets the stage for a perilous quest, blending action, humor, and mythological elements. The PDF version captures his transformation, showcasing Riordan’s mastery of storytelling. Percy’s awakening is a pivotal moment, driving the plot forward and deepening his character in the Heroes of Olympus series.

The Quest Begins: Camp Jupiter

Percy Jackson arrives at Camp Jupiter, a sanctuary for Roman demigods, where he encounters a new world of military discipline and unfamiliar traditions. The camp’s strict rules and warrior ethos contrast sharply with the Greek camp, Camp Half-Blood, adding to Percy’s confusion. Here, he meets Hazel Levesque and Frank Zhang, who join him on a perilous quest to prevent a catastrophic prophecy from unfolding. The group faces challenges as they prepare to leave the safety of the camp, venturing into uncharted territories beyond the gods’ realms. The PDF highlights the camaraderie and tensions as they embark on their mission, setting the stage for their epic journey.

Hazel and Frank’s Roles

Hazel Levesque, daughter of Pluto, and Frank Zhang, son of Mars, play pivotal roles in The Son of Neptune. Hazel’s ability to control precious metals and her cursed past make her a crucial asset, while Frank’s leadership skills and the magical spear that can summon fire add strength to the group. Their unique talents complement Percy’s, forming a formidable team. Hazel’s experience with the magical boat and Frank’s strategic thinking are essential as they face challenges. Their growth throughout the quest showcases their resilience and loyalty, making them indispensable to the mission’s success and the story’s progression in the PDF version of the novel.

Challenges and Obstacles

In The Son of Neptune, Percy, Hazel, and Frank face numerous challenges as they navigate their perilous quest. Percy’s memory loss and confusion hinder his ability to lead, while the group battles formidable monsters, including the relentless snake-haired ladies. Their journey through dangerous landscapes and treacherous terrains tests their courage and teamwork. Additionally, they must confront Gaea’s powerful forces and the awakening of mythological evils. The trio also grapples with internal conflicts, such as Frank’s fear of his fate and Hazel’s guilt over her past. These obstacles push their resolve to the limit, making their mission to save the world even more daunting in the PDF version of the novel.

Climax and Resolution

The climax of The Son of Neptune unfolds as Percy, Hazel, and Frank confront the monstrous forces of Gaea at the Doors of Death. A fierce battle ensues, with the trio facing overwhelming odds. Frank’s life-altering decision to prevent the monsters’ resurgence becomes a pivotal moment, showcasing his bravery and sacrifice. The resolution brings a mix of triumph and sorrow, as the quest concludes but at a great cost. The PDF version captures the emotional depth and action, leaving readers eager for the next installment in the series while reflecting on the characters’ growth and the escalating stakes in the Heroes of Olympus saga.

Key Characters

In The Son of Neptune, Percy Jackson, Hazel Levesque, and Frank Zhang lead the quest, each bringing unique abilities and backgrounds to the story.

Percy Jackson: The Son of Neptune

Percy Jackson, the son of Neptune (Roman god of the sea), awakens with amnesia, recalling only his name. His journey in The Son of Neptune explores his identity and bravery as he navigates a world of demigods and monsters. The PDF version of the book captures his compelling story, offering readers a seamless and accessible way to experience his adventures. Percy’s central role in the quest highlights his resilience and leadership, making him a beloved character in Rick Riordan’s Heroes of Olympus series. The digital format ensures his story reaches a wider audience, maintaining the book’s original charm and excitement.

Hazel Levesque: Daughter of Pluto

Hazel Levesque, daughter of Pluto, brings a unique perspective to The Son of Neptune. Born in the 1940s, her past is marked by tragedy, yet she wields immense power over precious metals. Her connection to the Roman demigod world enriches the story, as she joins Percy and Frank on their perilous quest. The PDF version of the book vividly portrays her growth from a timid girl to a courageous hero, showcasing her loyalty and strength. Hazel’s journey is a testament to resilience, adding depth to the narrative and highlighting themes of identity and belonging in Riordan’s compelling tale.

Frank Zhang: Son of Mars

Frank Zhang, the son of Mars, is a loyal and brave demigod who plays a crucial role in The Son of Neptune. As a descendant of the Chinese zodiac, Frank’s unique heritage adds cultural depth to the story. The PDF version highlights his journey, where he confronts challenges and discovers his true potential. Frank’s leadership skills and unwavering dedication make him a key ally to Percy and Hazel. His character development emphasizes themes of identity and courage, making him a fan favorite. The digital format of the book ensures that Frank’s story is accessible and engaging for readers worldwide, enhancing the overall experience of Riordan’s epic adventure.

Supporting Characters and Allies

In The Son of Neptune, a diverse cast of supporting characters and allies enriches the narrative. Reyna Avila Ramírez-Arellano, the strong and capable leader of Camp Jupiter, and Octavian, her ambitious cohort leader, play pivotal roles. The Fifth Cohort, a group of dedicated Roman demigods, stands as loyal allies. Additionally, Terminus, the Roman god of boundaries, adds depth to the story. These characters, along with others, contribute to the dynamic interactions and friendships that drive the plot. The PDF version of the book provides easy access to these characters’ stories, making their journeys and contributions more engaging for readers.

Antagonists and Monsters

In The Son of Neptune, the antagonists and monsters play a crucial role in escalating the story’s tension. Gaea, the Earth goddess, is the primary antagonist, awakening from her slumber to challenge the demigods. Polybotes, a fearsome giant, serves as her formidable warrior, leading the forces of monsters against Percy and his allies. Additionally, the snake-haired Gorgons and other mythological creatures pose relentless threats. These antagonists not only test the heroes’ courage but also highlight the themes of heroism and sacrifice. The PDF version vividly captures these encounters, immersing readers in the epic battles and high-stakes challenges faced by Percy, Hazel, and Frank.

Themes and Symbolism

The Son of Neptune explores themes of heroism, sacrifice, and identity, with monsters symbolizing internal and external challenges. The PDF highlights these elements vividly, enriching the narrative depth.

Heroism and Sacrifice

In The Son of Neptune, heroism and sacrifice are central themes. Percy, Hazel, and Frank embody bravery, risking their lives to protect others. Percy faces his memory loss and dangerous quests, showcasing resilience. Hazel’s control over precious metals and gems highlights her courage despite a tragic past. Frank’s fiery abilities and loyalty, even in the face of personal vulnerability, define sacrifice. The PDF version underscores these themes, emphasizing how each character’s actions contribute to the greater good. Their willingness to confront challenges demonstrates the true essence of heroism, making their journey inspiring and memorable for readers.

Loyalty and Friendship

Loyalty and friendship are pivotal in The Son of Neptune. Percy, Hazel, and Frank form an unbreakable bond, trusting each other through perilous challenges. Their camaraderie grows as they rely on one another’s strengths, overcoming monsters and obstacles. The PDF highlights how their friendships deepen, with each character proving their loyalty. Percy’s amnesia tests their trust, yet they remain steadfast, proving true friendship’s power. Their journey exemplifies unity, showing that together, they can achieve the impossible. The novel, available in PDF, beautifully portrays how loyalty and friendship are essential in their quest.

Identity and Belonging

In The Son of Neptune, themes of identity and belonging are central to the characters’ journeys. Percy, Hazel, and Frank grapple with self-discovery, unsure of their places in the demigod world. Percy’s amnesia amplifies his confusion, while Hazel and Frank confront insecurities tied to their pasts and destinies. The PDF version highlights how their quest helps them find acceptance and purpose, proving that belonging is not just about origins but about the bonds they forge. Riordan masterfully explores how identity shapes their actions and growth, making the novel a powerful reflection on finding one’s true self and where they belong.

Mythological References

The Son of Neptune is deeply rooted in Roman mythology, offering fresh perspectives on classical myths. Riordan skillfully weaves in figures like Neptune, Pluto, and Mars, while introducing monsters and gods from Roman lore. The PDF version highlights how the story blends mythological elements with modern twists, creating a unique narrative. Characters like Hazel, with her connection to the Underworld, and Frank, tied to martial fate, embody mythological legacies; The book’s use of mythological references enriches the plot, making it a compelling read for fans of both Roman and Greek mythologies, while the digital format ensures these stories are easily accessible to a wider audience.

Reception and Reviews

The Son of Neptune received widespread critical acclaim for its engaging story and character development. Fans praised the PDF version for its accessibility and readability, enhancing the overall experience of Rick Riordan’s captivating narrative.

Critical Acclaim

The Son of Neptune received widespread critical acclaim for its engaging narrative and character development. Reviewers praised Rick Riordan’s ability to weave Greek and Roman mythology into a modern, thrilling adventure. The book’s PDF version was particularly commended for its readability and accessibility, allowing fans to immerse themselves in Percy’s journey seamlessly. Critics highlighted the novel’s balance of humor, action, and emotional depth, making it a standout in the young adult fantasy genre. With a score of 94%, it remains a fan favorite, showcasing Riordan’s mastery of storytelling and world-building. The PDF format further enhanced the reading experience, ensuring the story’s magic reached a broader audience.

Reader Feedback and Ratings

Readers enthusiastically praised The Son of Neptune, with many highlighting its captivating plot and memorable characters. The PDF version received positive feedback for its crisp formatting and ease of access, making it a favorite among fans. Reviewers often noted the seamless continuation of Percy Jackson’s story, with a 94% approval rating. The novel’s ability to blend humor, action, and heartfelt moments resonated deeply with readers. Fans appreciated how the PDF format allowed them to enjoy the story on various devices, enhancing their reading experience. The book’s engaging narrative and relatable characters solidified its place as a beloved installment in The Heroes of Olympus series.

Awards and Recognition

The Son of Neptune received widespread critical acclaim and numerous awards. The PDF version’s popularity contributed to its recognition in young adult literature. It was a New York Times bestseller and won the Goodreads Choice Award for Best Fantasy in 2011. The novel’s success led to its inclusion in several “Best Books of the Year” lists. Its engaging storytelling and character development earned praise from both critics and readers. The book’s impact on the genre further solidified Rick Riordan’s reputation as a master of mythological fiction. The PDF format’s accessibility played a role in its widespread recognition and continued popularity among fans of the series.

Impact on Young Adult Literature

The Son of Neptune significantly influenced young adult literature by blending mythology with modern storytelling. The PDF version’s accessibility helped reach a broader audience, inspiring a new wave of mythological fiction. Rick Riordan’s ability to craft relatable characters and engaging plots set a high standard for the genre. The book’s success encouraged other authors to explore mythological themes, enriching YA literature. The PDF format’s popularity also highlighted the growing demand for digital reading options, making it easier for readers to access and share the story. This book remains a cornerstone in the genre, continuing to captivate readers worldwide with its timeless appeal.

The “Son of Neptune” PDF

The Son of Neptune PDF is widely available for download on major platforms like Amazon and official websites in formats like PDF and EPUB, ensuring easy reader access.

Availability and Download Options

The Son of Neptune PDF is readily available online through platforms like Amazon, Barnes & Noble, and Google Books. It can be downloaded in various formats, including PDF and EPUB, making it accessible to a wide range of readers. Additionally, many websites offer free PDF downloads, though users should ensure they are using legal and secure sources to avoid copyright issues. The digital version is also available through libraries and eBook subscription services, providing readers with multiple convenient options to access the book. This accessibility has contributed to its popularity among fans of Rick Riordan’s work worldwide.

Features of the PDF Version

The PDF version of The Son of Neptune offers a well-formatted digital reading experience, maintaining the original book’s structure and layout. It includes clear typography, proper chapter divisions, and easy navigation via bookmarks. The file is compatible with various e-readers, tablets, and smartphones, ensuring readability across devices. Some versions may include additional features like a table of contents, search functionality, and zoom options for enhanced accessibility. The PDF also preserves any illustrations or maps from the original text, enriching the reading experience. Overall, it provides a convenient and visually appealing way to enjoy Rick Riordan’s engaging storytelling.

Advantages of the Digital Format

The digital format of The Son of Neptune offers unparalleled convenience and accessibility. Readers can easily carry the book on multiple devices, such as e-readers, tablets, or smartphones, without occupying physical space. The PDF version ensures crisp text and clear formatting, with options to adjust font size and brightness for a personalized reading experience. Additionally, digital copies are often more affordable than physical books and can be downloaded instantly, eliminating the need for shipping. This format also supports environmentally friendly reading habits by reducing paper usage. Overall, the digital version enhances the reading experience while providing flexibility and ease of access.

Security and Legal Considerations

Accessing The Son of Neptune in PDF format requires adherence to copyright laws and security measures. Downloading the book from unauthorized sources may violate intellectual property rights and expose users to legal risks. Official digital versions are encrypted to prevent unauthorized distribution and ensure content security. Purchasing through reputable platforms like Amazon or Barnes & Noble supports the author and publisher while providing a secure, virus-free download. Users should avoid pirated copies to protect their devices from malware and respect the creative work of Rick Riordan. Legal acquisition guarantees a safe and high-quality reading experience, upholding both security and ethical standards.

Guides and Resources

For The Son of Neptune PDF, readers can access reading guides, study materials, and fan discussions online, enhancing their understanding and engagement with the story.

Reading Guides and Summaries

Reading guides and summaries for The Son of Neptune PDF are widely available online, offering detailed analyses of the plot, characters, and themes. These resources provide chapter-by-chapter breakdowns, helping readers understand the complexities of Percy’s journey and the mythological references. Summaries highlight key events, such as Percy’s awakening, the quest to rescue Death, and the challenges faced by Hazel and Frank. Additionally, study guides include discussion questions and insights into Rick Riordan’s writing style, making them invaluable for both casual readers and educators. The PDF format ensures easy access to these materials, enhancing the reading experience and fostering deeper engagement with the story.

Study Materials and Lesson Plans

Study materials and lesson plans for The Son of Neptune PDF are designed to enhance understanding and engagement with the text. Educators can access comprehensive teaching guides, including vocabulary lists, essay prompts, and reading strategies. These resources often align with educational standards, making the novel a valuable addition to classroom curriculums. Lesson plans focus on themes like heroism, identity, and loyalty, encouraging critical thinking and discussion. Activities such as character analysis, plot mapping, and creative writing projects help students connect with Percy’s journey. The availability of these materials in PDF format ensures easy integration into digital and traditional learning environments, supporting both teachers and students effectively.

Fan Art and Community Discussions

Fans of The Son of Neptune have created vibrant communities to share their love for the book. Fan art inspired by Percy, Hazel, and Frank is widely shared on platforms like DeviantArt and Tumblr. Discussions often revolve around character development, plot twists, and mythological references. The PDF format has made it easier for fans to access and share fan-made content, fostering a sense of camaraderie. Online forums and social media groups dedicated to Rick Riordan’s works are hubs for creative exchanges, with fans interpreting scenes and characters in unique ways. These communities celebrate the book’s themes and inspire new artistic interpretations, keeping the story alive beyond its pages.

Sequels and Related Books

The Son of Neptune is part of The Heroes of Olympus series, which includes five books. The sequels are The Mark of Athena, The House of Hades, and The Blood of Olympus. These books continue the adventures of Percy Jackson and his allies. Fans can also explore other series by Rick Riordan, such as Percy Jackson and the Olympians and The Kane Chronicles, which expand the demigod universe. The PDF versions of these books are popular among readers, offering a seamless reading experience. Together, they create a rich, interconnected world of mythology and adventure, captivating readers worldwide with their thrilling stories and memorable characters.

The Son of Neptune is a captivating installment in The Heroes of Olympus series, offering a thrilling adventure. The PDF format ensures easy access to Percy’s journey, making it a must-read for fans of mythological tales and demigod quests.

Final Thoughts on the Book

The Son of Neptune stands out as a compelling continuation of The Heroes of Olympus series, seamlessly blending humor, adventure, and emotional depth. Rick Riordan’s masterful storytelling captivates readers, especially in the PDF format, which enhances accessibility. The narrative delves into themes of identity and loyalty, with Percy, Hazel, and Frank facing formidable challenges. The book’s ability to balance action with character development solidifies its place in young adult literature. Fans of mythology and adventure will find themselves engrossed, making The Son of Neptune a memorable read that leaves a lasting impression.

Recommendations for Further Reading

After reading The Son of Neptune, fans of Rick Riordan can explore more of The Heroes of Olympus series with The Mark of Athena and The House of Hades. For those who enjoy mythology-infused adventures, The Trials of Apollo and The Kane Chronicles offer similar thrills. Additionally, readers might appreciate Percy Jackson and the Olympians for its foundational storytelling. The PDF format of these books, like The Son of Neptune, ensures easy access to these captivating tales. Exploring these works will deepen your understanding of Riordan’s imaginative world and its memorable characters.

weslo cadence g 5.9 treadmill owners manual

Welcome to the Weslo Cadence G 5.9 Treadmill Owners Manual. This guide provides essential information for safe assembly, operation, and maintenance of your treadmill. Read carefully to ensure optimal performance and longevity of your equipment.

Overview of the Treadmill Features

The Weslo Cadence G 5.9 treadmill is designed for effective home workouts, featuring 6 Personal Trainer Workouts and 8 preset programs for varied exercise routines. It includes a 2-position manual incline for adjusting intensity and Comfort Cell Cushioning to reduce impact on joints. The built-in pulse sensor allows heart rate monitoring, while the console provides clear workout data. These features make it a versatile and user-friendly option for fitness enthusiasts seeking convenience and efficiency in their training sessions.

Importance of Reading the Manual

Reading the Weslo Cadence G 5.9 treadmill manual is crucial for safe and effective use. It provides detailed instructions for assembly, operation, and maintenance, ensuring proper functionality. The manual highlights safety precautions, such as emergency stop procedures and weight restrictions, to prevent injuries and damage. Additionally, it outlines troubleshooting tips and maintenance guidelines to extend the treadmill’s lifespan. Understanding the manual helps users maximize their workout experience while adhering to warranty conditions and accessing customer support when needed.

Key Features of the Weslo Cadence G 5.9 Treadmill

The Weslo Cadence G 5.9 Treadmill features 6 Personal Trainer Workouts, 2-Position Manual Incline, Comfort Cell Cushioning, Built-In Pulse Sensor, and 8 Preset Workouts for versatile training.

6 Personal Trainer Workouts

The Weslo Cadence G 5.9 Treadmill comes with 6 pre-set Personal Trainer Workouts, offering diverse training options tailored to different fitness goals. These programs incorporate varied inclines and speeds to keep your workouts engaging and effective. Whether you’re aiming for weight loss, endurance, or strength, these workouts provide structure and motivation. Each program adjusts automatically, ensuring a dynamic and challenging exercise experience. This feature makes it easy to stay on track with your fitness journey and achieve desired results efficiently.

2-Position Manual Incline

The Weslo Cadence G 5.9 Treadmill features a 2-position manual incline, offering versatility for your workouts. This incline function allows you to adjust the deck to two different levels, providing varied intensity for walking, jogging, or running. The manual adjustment is simple and convenient, enabling you to customize your workout to target different muscle groups. By incorporating incline training, you can enhance calorie burn, boost endurance, and add variety to your exercise routine, keeping your workouts engaging and effective.

Comfort Cell Cushioning

The Weslo Cadence G 5.9 Treadmill is equipped with Comfort Cell Cushioning, a unique feature designed to reduce the impact on your joints during workouts. This cushioning system absorbs shock and provides a smoother walking or running surface, making your exercise experience more comfortable. By minimizing stress on your joints, it allows for longer and more enjoyable workouts. Additionally, the cushioning helps maintain a consistent belt motion, ensuring a stable and quiet operation. This feature is particularly beneficial for users who prioritize joint health and overall workout comfort.

Built-In Pulse Sensor

The Weslo Cadence G 5.9 Treadmill features a built-in pulse sensor, allowing you to monitor your heart rate during workouts. Located on the handgrips, this sensor provides real-time feedback, helping you stay within your target heart rate zone. This feature is essential for optimizing your exercise routine and ensuring you achieve your fitness goals safely. The pulse sensor is easy to use and offers accurate readings, making it a valuable tool for tracking your cardiovascular progress throughout your training sessions. Regular use can enhance your workout efficiency and overall health.

8 Preset Workouts

The Weslo Cadence G 5.9 Treadmill comes with 8 preset workouts designed to cater to various fitness goals. These programs automatically adjust the treadmill’s speed and incline to provide a diverse and challenging exercise experience. Whether you’re focusing on cardio improvement, weight loss, or endurance building, these workouts offer structured routines to keep your sessions engaging and effective. The preset options eliminate the need for manual adjustments, allowing you to concentrate on your performance and achieve consistent results with every use.

Assembly and Installation

Assembly and installation of the Weslo Cadence G 5.9 Treadmill are straightforward processes that require careful attention to the provided instructions. Ensure all parts are properly aligned and securely tightened using the included tools. Choose a flat, stable surface in a well-ventilated area for optimal performance. Follow the step-by-step guide to avoid errors and ensure safety. Proper installation is crucial for the treadmill’s longevity and your safety during workouts.

Step-by-Step Assembly Instructions

Begin by unpacking all components and verifying the integrity of each part. Locate the frame, deck, and console. Attach the legs to the frame using the provided bolts. Next, align the deck with the frame and secure it tightly. Mount the console on the uprights, ensuring proper connection of all wires. Attach the side rails and handlebars. Tighten all screws and bolts firmly. Double-check all connections for stability and safety. Finally, plug in the power cord and test the treadmill to ensure everything functions correctly before use.

Tools and Equipment Needed

For assembling the Weslo Cadence G 5.9 treadmill, you will need a Phillips screwdriver, a 3/16″ Allen wrench, and a 5mm Allen wrench. Additionally, a rubber mallet may be useful for gently tapping parts into place. Ensure you have a measuring tape to verify proper alignment and a torque wrench for securing bolts. Optional items include gloves for grip and a socket set for added convenience. Always refer to the manual for specific tool requirements to ensure a safe and accurate assembly process.

Installation Location Recommendations

Place the Weslo Cadence G 5.9 treadmill on a firm, level surface in a well-ventilated area. Avoid direct sunlight to prevent overheating. Ensure the area is clear of obstacles for safe access. Position it near a power outlet and consider using a surge protector; The floor should be sturdy enough to support the treadmill’s weight. If installed upstairs, verify the floor’s weight capacity. Keep the treadmill away from water sources to avoid electrical hazards. Proper placement enhances safety, stability, and performance.

Safety Precautions

Always read the manual before use. Ensure the treadmill is placed on a level surface and follow weight and age restrictions. Keep children away and use the emergency stop feature when needed. Regularly inspect the equipment for damage and avoid overexertion. Proper precautions ensure safe and effective workouts. Adhere to all guidelines to minimize risks and maintain optimal performance.

General Safety Guidelines

Before using the Weslo Cadence G 5.9 treadmill, ensure the area is clear of obstacles and the surface is level. Always inspect the equipment for damage or wear. Supervise children and pets during operation. Wear proper workout attire and avoid loose clothing that may catch. Use the emergency stop feature if needed. Follow weight and age restrictions. Keep the treadmill unplugged when not in use. Familiarize yourself with controls before starting. Avoid overexertion and consult a doctor if you have health concerns. Proper precautions ensure a safe and effective workout experience.

Emergency Stop Procedures

In case of an emergency, immediately press the red emergency stop button or pull the safety key. This will halt the treadmill belt instantly. Ensure the machine is cool before restarting. Never attempt to stop the belt manually. If the emergency stop is activated, unplug the treadmill and wait 30 seconds before restarting. Always stay calm and follow these steps to ensure your safety. Familiarize yourself with the emergency stop feature before use to prevent accidents. Proper use of these procedures is crucial for safe operation.

Weight and Age Restrictions

The Weslo Cadence G 5.9 treadmill has a maximum weight capacity of 250 lbs (113 kg). Users must be at least 12 years old to operate the treadmill safely. Children under 12 should not use the treadmill, even with supervision. Exceeding the weight limit may cause damage or void the warranty. Always ensure users meet these requirements to maintain safety and optimal performance. Adhere to these guidelines to prevent accidents and prolong the lifespan of your treadmill.

Operating the Treadmill

Plug in the treadmill, press the start button, and select your desired mode or preset workout. Adjust speed and incline as needed for a comfortable exercise experience.

How to Turn On the Power

To power on the Weslo Cadence G 5.9 treadmill, locate the power switch, usually found near the console or under the hood. Ensure the treadmill is properly plugged into a grounded electrical outlet. Flip the switch to the “on” position and press the start button on the console. The display will light up, and the treadmill is ready for use. Always ensure the area is clear and follow safety guidelines before beginning your workout.

Using Manual Mode

Manual mode allows you to control the treadmill settings directly. Press the “Manual” button on the console to activate this mode. Use the speed and incline buttons to adjust the treadmill’s settings during your workout. The console will display your current speed, incline, and other metrics. You can increase or decrease the intensity at any time by pressing the corresponding buttons. This mode provides flexibility and customization, letting you tailor your workout to your preferences. Always start at a low intensity and gradually increase as needed.

Selecting Preset Workouts

The Weslo Cadence G 5.9 treadmill offers 8 preset workouts designed to provide variety and challenge. To select a preset workout, navigate to the workout section on the console and choose your desired program using the arrow buttons. Each preset workout automatically adjusts the treadmill’s speed and incline to guide you through a structured routine. Once selected, press the “Start” button to begin. You can monitor your progress on the display and adjust settings as needed during the workout for optimal results. This feature helps keep your workouts engaging and effective.

Adjusting the Incline

To adjust the incline on the Weslo Cadence G 5.9 treadmill, use the manual incline feature. The treadmill offers two preset incline positions, allowing you to simulate walking or running uphill. To change the incline, ensure the treadmill is stopped and locate the incline adjustment mechanism. Move the lever or button to your desired position. Always adjust the incline before starting your workout or when the belt is stationary to ensure safety. This feature enhances workout intensity and targets different muscle groups effectively.

Maintenance and Troubleshooting

Regular maintenance ensures your Weslo Cadence G 5.9 treadmill runs smoothly. Clean the belt, check for wear, and lubricate as needed to prevent friction issues. Troubleshooting common problems like belt misalignment or sensor malfunctions can be addressed by referring to the manual or contacting customer support for assistance.

Belt Lubrication Recommendations

Regular belt lubrication is crucial for smooth operation. The Weslo Cadence G 5.9 treadmill typically doesn’t require frequent lubrication, but if you notice friction or noise, apply a silicone-based lubricant. Avoid household oils, as they may damage the belt or deck. Lubricate every 3 months or as needed. Ensure the treadmill is turned off and unplugged before applying lubricant. Wipe off excess with a clean cloth to prevent residue buildup. Proper lubrication extends the lifespan of the belt and motor, ensuring optimal performance during workouts.

Cleaning and Upkeep Tips

Regular cleaning is essential for maintaining the Weslo Cadence G 5.9 treadmill. Use a soft cloth and mild detergent to wipe down the console, belt, and surrounding areas after each use. Avoid harsh chemicals, as they may damage the surfaces. Vacuum dust from the motor vents to ensure proper airflow. Dampen a cloth with water to clean the belt, but avoid excessive moisture to prevent rust. Regularly inspect and tighten loose bolts or screws. Proper upkeep ensures optimal performance, safety, and longevity of your treadmill.

Common Issues and Solutions

If the belt stalls or skips, check for debris and ensure proper lubrication. For error messages, unplug the treadmill, wait 30 seconds, and restart. If the power fails, verify the outlet connection and circuit breaker. Heart rate sensors may malfunction if not placed correctly on the handlebars. Address these issues promptly to maintain functionality and safety. Always refer to the manual for troubleshooting steps before contacting support. Regular maintenance can prevent many common problems, ensuring smooth operation and extending the treadmill’s lifespan.

Warranty and Support

The Weslo Cadence G 5.9 treadmill comes with a warranty covering parts and labor. For details, refer to the manual. Contact customer support for assistance or inquiries.

Warranty Details

The Weslo Cadence G 5.9 treadmill is backed by a comprehensive warranty program. The frame is typically covered for 10 years, while the motor and parts are covered for 1 year. Labor costs are usually covered for 1 year as well. To activate the warranty, ensure proper registration of your product. Refer to the manual for specific terms and conditions. Regular maintenance, as outlined in the manual, is essential to maintain warranty validity. Contact customer support for any warranty-related inquiries or claims.

Customer Support Contact Information

For any inquiries or assistance with your Weslo Cadence G 5.9 treadmill, contact customer support directly. Support is available via phone, email, or through the official website. Visit the manufacturer’s website for the most up-to-date contact information. Live chat support is also available on their official site. Refer to the manual for additional details on how to reach customer service. Ensure to have your product serial number ready for faster assistance. Visit www.officialwebsite.com for more information.

Downloading the Manual

Visit the official Weslo website to download the Cadence G 5.9 treadmill manual in PDF format. Access the manual instantly for free at www.officialwebsite.com.

Official Sources for the Manual

The official Weslo Cadence G 5.9 treadmill manual can be downloaded directly from Weslo’s authorized website or trusted retailer sites. Visit www.officialwebsite.com to access the PDF version free of charge. Ensure you verify the source to avoid unauthorized downloads. The manual is also available through select online marketplaces like Amazon, where it can be downloaded instantly after purchase. Always choose reputable platforms to ensure authenticity and safety.

How to Access the PDF Version

To access the Weslo Cadence G 5.9 treadmill manual in PDF format, visit the official Weslo website or authorized retailers like Amazon. Use the model number (Cadence G 5.9) to search for the manual. Some sites may require creating an account or verifying ownership. Once found, click the download link to save the PDF. Ensure the source is reputable to avoid unauthorized versions. The manual is also available through select online marketplaces, where it can be downloaded instantly after purchase. Always verify the source for authenticity.

Final Tips for Effective Use

For optimal performance, always start with a proper warm-up and cool-down. Use the built-in pulse sensor to monitor your heart rate during workouts. Take advantage of the 6 Personal Trainer Workouts and 8 preset programs to diversify your routines. Adjust the 2-position manual incline to challenge yourself gradually. Keep the treadmill clean and lubricate the belt as needed. Store it in a dry, cool place when not in use. Refer to the manual for specific guidance tailored to your fitness goals.

Benefits of Regular Maintenance

Regular maintenance ensures optimal performance and extends the lifespan of your Weslo Cadence G 5.9 treadmill. Proper lubrication prevents belt friction, reducing wear and tear. Cleaning the treadmill regularly keeps it hygienic and functioning smoothly. By following maintenance guidelines, you avoid unexpected breakdowns and ensure safety during workouts. A well-maintained treadmill provides consistent performance, supporting your fitness journey effectively. Regular upkeep also maintains warranty validity, protecting your investment. Consistent care ensures your treadmill remains a reliable tool for achieving your health and fitness goals.