Aqua Systems Water Softener Manual: A Comprehensive Guide
Navigating Aqua Systems water softeners involves understanding installation, operation, maintenance, and troubleshooting—this guide details these aspects for optimal performance and longevity.
Understanding Water Hardness and Softening

Water hardness stems from dissolved minerals—primarily calcium and magnesium—affecting cleaning efficiency and appliance lifespan. Hard water creates scale buildup in pipes and reduces soap’s lathering ability, leading to higher detergent usage and potential damage to water heaters, dishwashers, and washing machines. Aqua Systems water softeners address this by employing ion exchange, a process where hardness minerals are exchanged for sodium or potassium ions.
This softening process utilizes resin beads coated with these ions. As hard water flows through the softener, calcium and magnesium adhere to the resin, releasing sodium. Eventually, the resin becomes saturated, necessitating regeneration—a process involving a concentrated salt brine solution to flush out the accumulated hardness minerals and recharge the resin with sodium ions. Understanding this cycle is crucial for efficient operation.
What is an Aqua Systems Water Softener?
Aqua Systems water softeners are designed to remove hardness minerals from your water supply, providing numerous benefits for your home and family. They utilize a sophisticated ion exchange process, employing resin beads to swap calcium and magnesium ions for sodium or potassium. This results in noticeably softer water, improving cleaning effectiveness and extending the life of water-using appliances.
Aqua Systems offers a range of models tailored to different household sizes and water hardness levels. Their systems often include features like demand-initiated regeneration, which optimizes salt and water usage. Consulting with an Aqua Systems representative, or reviewing their online resources, helps determine the ideal softener for your specific needs and water conditions.
Aqua Systems Models: An Overview
Aqua Systems provides a diverse selection of water softener models, catering to varying household demands and water quality challenges. Their offerings range from compact units suitable for smaller homes to high-capacity systems designed for larger families and increased water consumption. Key considerations when choosing a model include grain capacity, flow rate, and regeneration cycle efficiency.
Aqua Systems consultants can assess your water hardness and usage to recommend the most appropriate system. Online resources, like their website, also provide detailed specifications and comparisons. Understanding the differences between series allows for informed decision-making, ensuring optimal performance and long-term cost savings.
Popular Aqua Systems Water Softener Series
Aqua Systems features several popular series, each designed with specific features to address diverse water conditions. The Aspire series is known for its high efficiency and smart technology, offering customizable regeneration cycles and remote monitoring capabilities. The Horizon series provides a balance of performance and affordability, suitable for standard household needs.
Additionally, the Legacy series offers robust, reliable softening for those seeking a dependable, long-lasting solution. Consulting with an Aqua Systems representative is crucial to determine which series best aligns with your water hardness, household size, and budget. Each series boasts unique benefits, ensuring tailored water softening.
Comparing Aqua Systems to Competitors (AO Smith, etc.)
When evaluating water softeners, Aqua Systems often competes with brands like AO Smith. While AO Smith offers readily available units at retailers like Lowe’s, often at a lower initial price point (around $500-$700), Aqua Systems emphasizes a more consultative approach and potentially superior warranty support.
Plumbing shops often favor Aqua Systems, citing higher part quality. However, this comes at a higher upfront cost, including installation (potentially exceeding $1700). Consider long-term costs, including salt (approximately $20-$30 per bag) and potential repair expenses. Aqua Systems’ local presence may simplify warranty claims, a key differentiator.
Installation Process: A Step-by-Step Guide
Proper installation is crucial for optimal softener performance. Begin with Pre-Installation Considerations, ensuring suitable plumbing hookups are available. Aqua Systems consultants assess existing connections, providing installation estimates if needed. You can opt for Professional Installation through Aqua Systems or choose DIY Installation with a purchased unit (like from Lowe’s or Amazon).
DIY installation typically requires a plumber for final connections, adding roughly $500 to the total cost. Regardless of the method, carefully follow the manufacturer’s instructions. Incorrect installation can void warranties and lead to operational issues.
Pre-Installation Considerations (Plumbing Hookups)
Before installation, assess your plumbing. A dedicated water supply line is essential, along with a drain for regeneration discharge. Aqua Systems consultants evaluate existing hookups, determining if modifications are necessary. Consider proximity to electrical outlets for the control valve.
Ensure adequate space around the unit for maintenance and salt additions – a softener holding four bags of salt requires sufficient room. Verify water pressure meets the softener’s specifications. Improper plumbing can lead to leaks, reduced efficiency, and potential damage. Professional assessment is recommended for complex setups.

Professional Installation vs. DIY Installation
Choosing between professional installation and a DIY approach depends on plumbing expertise. While purchasing a softener from stores like Home Depot or Lowe’s can save on the unit cost (around $500-$800), plumbing installation can add another $500.
Professional installation, though pricier (potentially $1700+), ensures correct connections, adherence to local codes, and valid warranty coverage. DIY risks improper installation, voiding warranties and potentially causing water damage. Aqua Systems offers installation services, while independent plumbers can install purchased units. Consider your skill level and potential costs before deciding.
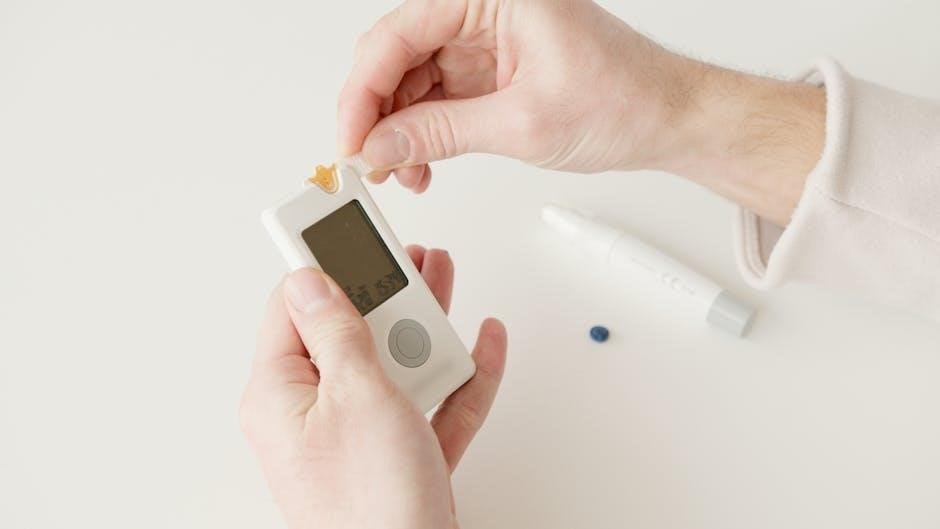
Manual Operation and Settings
Understanding the control valve is crucial for Aqua Systems softener operation. This valve manages the softening and regeneration cycles. Settings allow customization based on water hardness and household usage. The regeneration cycle, essential for replenishing salt and cleaning the resin bed, can be adjusted for optimal efficiency.
Consult your specific model’s manual for detailed instructions on navigating the control valve. Proper settings ensure consistently soft water and prevent unnecessary salt consumption. Regular monitoring and adjustments are key to maximizing the softener’s performance and lifespan.
Understanding the Control Valve
The Aqua Systems control valve is the brain of the unit, orchestrating softening and regeneration. It cycles through service, backwash, brine draw, rinse, and refill phases. Familiarize yourself with the valve’s buttons or digital display – models vary. Understanding each setting allows for tailored operation based on water hardness and consumption.

Typically, you’ll find controls for regeneration initiation, cycle status, and potentially, salt level monitoring. A malfunctioning control valve often signals operational issues. Refer to your model’s specific manual for detailed diagrams and troubleshooting steps related to the control valve’s functions.
Setting the Regeneration Cycle
Proper regeneration is crucial for maintaining softening efficiency. The regeneration cycle replenishes the resin bed with brine, removing accumulated hardness minerals. Aqua Systems control valves allow customization of this cycle, often based on time or water usage.

Time-based regeneration occurs at a pre-set interval (e.g., every 3 days), while demand-initiated regeneration triggers based on water volume processed. Adjusting the cycle frequency impacts salt consumption; more frequent cycles use more salt. Monitor your water hardness and adjust accordingly. Consult your manual for specific programming instructions for your Aqua Systems model’s control valve.
Maintenance and Troubleshooting
Regular maintenance ensures optimal performance and extends the lifespan of your Aqua Systems water softener. Key tasks include periodically adding water softener salt – typically when the salt level reaches ¼ full – and selecting the appropriate salt type (pellets, crystals, or blocks).
Monitor regeneration frequency; adjust based on water usage and hardness. Common issues include low water pressure (check for clogged injectors), hard water (verify salt levels and regeneration settings), and unusual noises (may indicate valve problems). Refer to your manual for detailed troubleshooting steps or contact Aqua Systems customer support.
Adding Water Softener Salt
Maintaining sufficient salt levels is crucial for effective softening. Regularly check the brine tank, ideally monthly, and replenish when the salt level reaches approximately one-quarter full. Most tanks hold around four bags worth of salt, depending on the model.
Carefully pour the salt directly into the brine tank, avoiding the central riser tube. Do not allow salt to bridge or form a solid mass; break up any clumps. Ensure the tank lid is securely in place to prevent contamination and maintain humidity. Consistent salt levels guarantee optimal water softening performance.
Salt Types: Choosing the Right Option
Several salt options are available for your Aqua Systems water softener, each with unique characteristics. Rock salt is the most economical but contains impurities that can lead to sludge buildup. Solar salt is purer, offering better performance and reduced residue. Evaporated salt is the highest purity option, minimizing sludge and maximizing softener efficiency.

Consider your water hardness and softener model when selecting salt. Pellets are generally preferred for consistent dissolution, while crystals may be suitable for some systems. Avoid using iodized salt or salts with anti-caking agents, as these can damage the softener.
Regeneration Frequency: How Often to Replenish Salt
Determining regeneration frequency depends on your household’s water usage and water hardness levels. A typical softener holding four bags of salt, as mentioned, may require replenishment every few weeks to months. Monitor the salt level regularly, aiming to maintain at least a few inches of salt above the water level.
Aqua Systems control valves often allow for customized regeneration settings. Adjusting the cycle based on water consumption prevents salt waste and ensures optimal softening. Harder water necessitates more frequent regeneration. Observe your water quality and adjust accordingly for peak performance.
Common Issues and Their Solutions
Several issues can arise with Aqua Systems water softeners, but many are easily resolved. Low water pressure can indicate a clogged injector or resin bed – cleaning these components often restores flow. If water tastes salty, the regeneration cycle might be malfunctioning; check valve settings and salt levels.
Hard water breakthrough suggests insufficient salt or an improperly set regeneration frequency. Unusual noises could signal air in the system or a failing valve. If problems persist, contacting Aqua Systems customer support or a qualified plumber is recommended for diagnosis and repair.
Aqua Systems Warranty Information

Aqua Systems typically offers warranties on their water softeners, varying by model and component. The control valve usually has a longer warranty period, often five years, covering defects in materials and workmanship. The tank itself frequently carries a lifetime warranty, protecting against leaks or structural failures.
However, warranties generally don’t cover issues resulting from improper installation, lack of maintenance (like salt replenishment), or damage from freezing. Always register your softener promptly to activate the warranty and retain proof of purchase for any claims. Review the specific warranty details included with your unit.
Cost Analysis: Aqua Systems vs. DIY Options
Comparing costs reveals significant differences. Aqua Systems, including installation, can range from $1700 upwards, offering convenience and potentially superior service. A DIY approach—purchasing a softener (around $500-$800) and hiring a plumber ($500)—totals $1000-$1300, representing potential savings.
However, factor in ongoing expenses. Water softener salt adds recurring costs, with usage dependent on household size and water hardness. Consider warranty implications; local Aqua Systems support simplifies repairs, while DIY repairs may incur additional plumber fees. Evaluate long-term value, balancing initial savings against potential service accessibility.
Initial Investment (Unit Price & Installation)

The upfront cost is a key consideration. Aqua Systems consultations, like those offered in Houston, provide tailored pricing, factoring in existing plumbing hookups. Expect to pay upwards of $1700 for a complete system, encompassing the unit itself and professional installation. Alternatively, purchasing a softener from retailers like Lowe’s or Home Depot (AO Smith models around $500-$700) presents a lower initial outlay.

However, this doesn’t include installation. Hiring a plumber separately can add approximately $500 to the total cost. Carefully assess quotes, considering what’s included—installation specifics and any necessary plumbing modifications—to accurately compare investment levels.
Long-Term Costs (Salt, Maintenance, Repairs)
Beyond the initial purchase, ongoing expenses are crucial. Water softener salt is a recurring cost, with consumption dependent on water usage; a typical unit may hold around four bags. Salt prices vary, but budgeting for regular replenishment is essential. Maintenance is generally minimal, primarily involving salt refills and occasional system checks.
However, repairs can arise. Choosing a local company like Aqua Systems offers potential advantages for warranty service, avoiding the complexities of shipping or self-repair. DIY installations, while cheaper upfront, may complicate warranty claims. Factor in potential repair costs when evaluating long-term affordability.
Finding Aqua Systems Manuals Online
Accessing Aqua Systems water softener manuals is readily achievable through several online avenues. The official Aqua Systems website is the primary resource, often providing downloadable PDFs for various models. Searching directly on their site using your specific model number is recommended for accuracy.
Additionally, general online search engines (Google, Bing) can yield results, though verifying the source’s legitimacy is crucial. Beware of unofficial websites offering potentially outdated or inaccurate information. Online forums and communities dedicated to water softeners may also host shared manuals or links. Always prioritize official documentation for reliable guidance.
Aqua Systems Customer Support and Contact Information
For direct assistance with your Aqua Systems water softener, several support channels are available. The primary point of contact is through their official website, Aqua Systems, which typically features a “Contact Us” section; This often includes a phone number and email address for customer service inquiries.
Depending on your location, Aqua Systems may have regional offices or authorized dealers offering local support. Checking their website for a dealer locator is advisable. Online chat support might also be available during business hours. When contacting support, have your model number and purchase date readily available for efficient assistance.
Benefits of Using an Aqua Systems Water Softener
Employing an Aqua Systems water softener yields numerous advantages for your home and well-being. Primarily, softened water dramatically improves water quality, extending the lifespan of appliances like dishwashers and washing machines by preventing scale buildup. This translates to reduced repair costs and increased energy efficiency.
Furthermore, softened water offers noticeable skin and hair health benefits, leaving skin feeling softer and hair more manageable. Reduced soap scum simplifies cleaning routines, and brighter, longer-lasting clothes are another perk. Ultimately, an Aqua Systems softener contributes to a more comfortable and cost-effective household experience.
Improved Water Quality & Appliance Lifespan
Aqua Systems water softeners significantly enhance water quality by removing hardness minerals like calcium and magnesium. This prevents the formation of scale, a common culprit in reduced appliance efficiency and premature failure. Dishwashers, washing machines, and water heaters all benefit from this protection, experiencing fewer repairs and a longer operational life.
Scale buildup also impacts plumbing, restricting water flow and potentially leading to costly issues. Softened water ensures consistent water pressure and minimizes the need for descaling treatments. Investing in an Aqua Systems softener is a proactive step towards protecting your home’s valuable appliances and plumbing infrastructure.
Skin and Hair Health Benefits
Softened water from an Aqua Systems unit offers notable benefits for skin and hair health. Hard water minerals can leave a residue on skin, leading to dryness, irritation, and exacerbated conditions like eczema. Soft water allows soaps and shampoos to lather more effectively, requiring less product for a thorough cleanse.
This results in softer, smoother skin and hair that feels cleaner and more manageable. Reduced mineral buildup also minimizes dryness and itchiness. Many users report a noticeable improvement in skin hydration and a healthier, shinier appearance to their hair after switching to softened water. It’s a simple change with significant wellness advantages.
Potential Drawbacks and Considerations
While Aqua Systems softeners offer benefits, potential drawbacks exist. Softened water contains increased sodium levels, a concern for individuals on sodium-restricted diets; potassium chloride salt alternatives are available, though less efficient. Environmental impact is another consideration, as the salt discharge from regeneration cycles can affect local ecosystems.

Regular salt replenishment is essential, adding ongoing costs. Some may dislike the slightly slippery feel of softened water initially. Proper maintenance is crucial to prevent issues like bacterial growth within the system. Weighing these factors against the advantages is vital for informed decision-making.
Sodium Content in Softened Water
Aqua Systems water softeners utilize ion exchange, replacing calcium and magnesium with sodium ions. This process increases the sodium concentration in treated water, potentially posing health concerns for individuals following low-sodium diets. The amount of sodium added varies based on water hardness and softener settings.
For those sensitive to sodium, alternative softening methods or potassium chloride salt can be considered, though potassium chloride is often more expensive and less effective. Regular water testing is recommended to monitor sodium levels, especially if health conditions necessitate it. Understanding this trade-off is crucial for informed usage.
Environmental Impact of Salt Discharge
Aqua Systems water softeners, like most ion-exchange systems, release brine—highly concentrated saltwater—during regeneration. This discharge can negatively impact local ecosystems, increasing salinity in waterways and potentially harming aquatic life and vegetation. The environmental consequences depend on the volume of discharge and the receiving water body’s capacity to dilute it.
Consideration should be given to responsible salt disposal practices and exploring alternative softening technologies with reduced salt consumption. Some regions have regulations regarding brine discharge, so awareness of local guidelines is essential. Minimizing water usage and optimizing regeneration cycles can also lessen the environmental footprint.